Injection Molding Thermoplastics: A Guide for NPI Teams
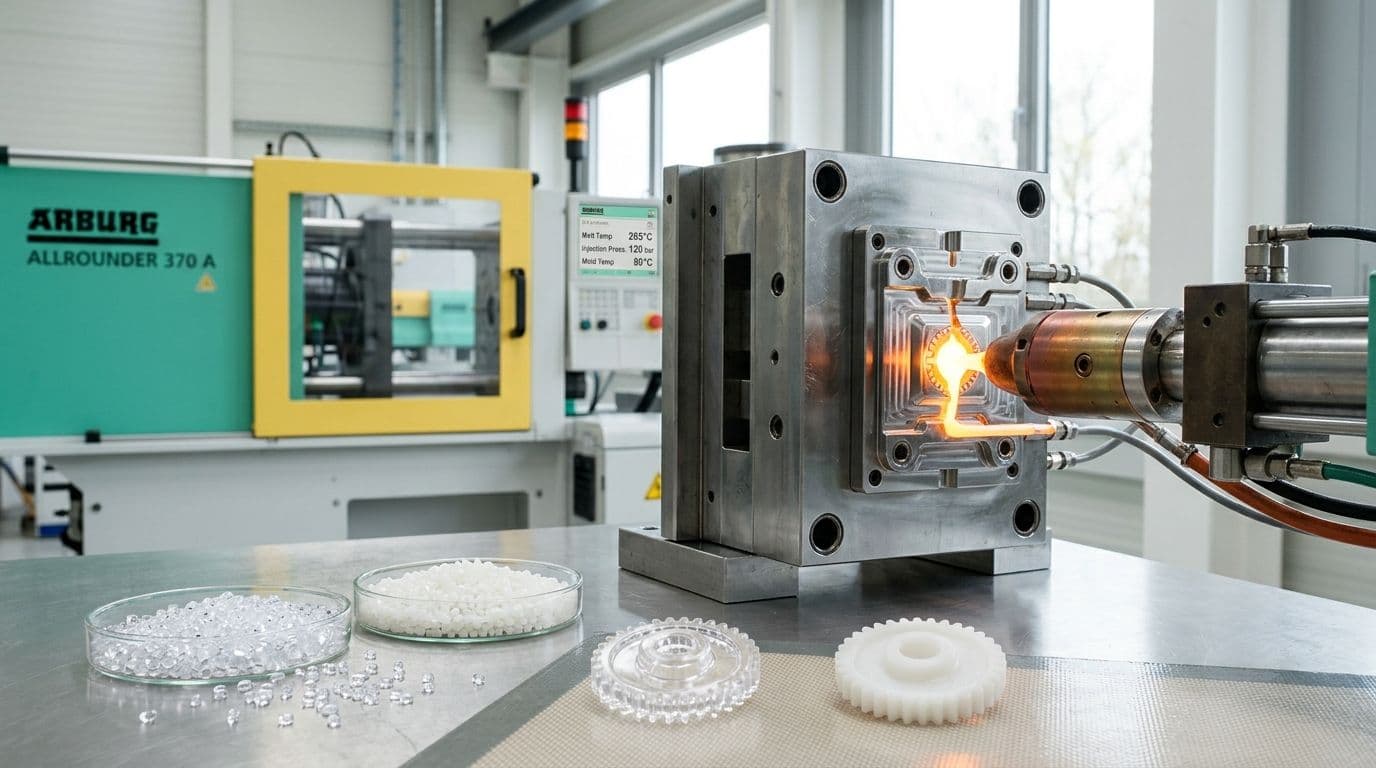
You're probably in one of two situations right now. Either your team has a CAD model that looks finished, and someone just asked, “What resin are we using?” Or you've already gotten early DFM feedback from a molder and realized the material choice, gate location, tolerance stack, and tooling plan are all tied together.
That's where most first injection molding programs get into trouble. Teams treat resin selection like a catalog exercise, tooling like a purchasing event, and defects like something the supplier will “dial in later.” In practice, injection molding thermoplastics is a chain of trade-offs. A resin that flows easily may move too much after molding. A cheap tool may save money upfront and cost weeks in rework. A strong polymer on paper may be the wrong choice if it can't hold the dimensions your assembly needs.
Table of Contents
Amorphous vs Semi-Crystalline Thermoplastics Explained- Why structure changes behavior
Matching Material Properties to Part Requirements- Read the datasheet like a designer, not a shopper
Controlling the Injection Molding Process Window- What each process setting really does
Design for Manufacturability That Prevents Defects- The design rules that save the most pain
Rapid Tooling vs Production Tooling for NPI- Where rapid tooling makes sense
A Thermoplastic Selection Checklist for Your Next Project- Functional requirements
Choosing Your Plastic in a High-Stakes Market
A lot of teams start with a shortlist like PP, ABS, PC, or nylon and assume the rest is fine-tuning. That's backwards. The plastic choice sets the tone for shrinkage behavior, cosmetic finish, chemical exposure limits, tooling demands, and how much process variation your supplier can absorb before parts drift.
That matters because thermoplastics aren't a niche manufacturing material. Thermoplastics make up 90% by weight of all plastic used globally, and polypropylene alone accounts for 34% of total plastic consumption worldwide, according to BMP Medical's market overview of common thermoplastics in injection molding. The same source says the global injection molded plastics market was valued at USD 337.50 billion in 2025 and is projected to reach USD 647.90 billion by 2034. Those numbers tell you something practical. This process is everywhere because it works, but it only works well when the design, material, and tooling decisions agree with each other.
Why NPI teams get stuck
The pressure point in NPI isn't usually whether a part can be molded. Most parts can be molded somehow. The question is whether you can mold them repeatably, with acceptable scrap, on the timeline your launch can tolerate.
A team buying on piece-price alone often misses the larger costs:
- Material drift risk: A resin that seems easy to source may be less forgiving on tolerance retention.
- Tooling mismatch: A fast tool may be right for concept validation and wrong for a regulated launch.
- Late geometry changes: Small wall or rib changes can force venting, gating, or packing changes.
Practical rule: In NPI, the cheapest quoted path is often the one with the most hidden assumptions.
When a program goes off track, it's rarely because one decision was terrible. It's usually because several “reasonable” decisions didn't line up. That's why the right way to approach injection molding thermoplastics is to treat resin selection, process window, and tooling strategy as one system.
Amorphous vs Semi-Crystalline Thermoplastics Explained
The first split that matters is molecular structure. If your team understands this early, a lot of later confusion disappears.
An amorphous plastic behaves like a bowl of cooked spaghetti. The polymer chains are arranged randomly. A semi-crystalline plastic is closer to neatly stacked logs mixed with tangled regions. Parts of the structure are ordered, parts aren't. That difference changes how the resin flows, cools, shrinks, and survives in service.

Why structure changes behavior
Amorphous materials such as PC, ABS, and PS usually soften over a temperature range instead of showing a sharp melt point. Designers often like them for housings, covers, and parts where appearance matters because they can offer good clarity or a predictable cosmetic surface.
Semi-crystalline materials such as nylon, PP, and PEEK form more ordered regions as they cool. That usually gives them stronger chemical resistance and better wear behavior, but it also means shrinkage behavior can be more aggressive and less forgiving if the part geometry is uneven.
Think about cooling like traffic leaving a stadium. Random traffic disperses more gradually. Ordered traffic packs into lanes and exits differently. In molded parts, that shows up as differences in crystallinity, local contraction, and warp sensitivity.
How the trade-offs show up in real parts
Here's the comparison that matters during design review.
| Property | Amorphous (e.g., PC, ABS, PS) | Semi-Crystalline (e.g., Nylon, PP, PEEK) |
|---|---|---|
| Molecular structure | Random, spaghetti-like arrangement | Ordered regions mixed with amorphous regions |
| Optical behavior | Often transparent or easy to make visually clear | Often opaque or translucent |
| Thermal response | Softens over a range | More distinct melting behavior |
| Shrinkage behavior | Often more predictable for tight cosmetic parts | Often more sensitive to cooling and geometry |
| Chemical resistance | Can be more limited depending on the fluid environment | Often stronger in chemical exposure |
| Wear and bearing use | Usually not the first choice for sliding contact | Often better for wear surfaces and bearing features |
| Tolerance strategy | Often easier for appearance-driven housings | Better when function outweighs cosmetics, if shrinkage is controlled |
| Typical design caution | Stress cracking and heat limits | Warp, moisture response, and differential shrink |
Semi-crystalline resins can solve a field performance problem and create a dimensional control problem at the same time.
That's why blanket material advice isn't useful. If you need a transparent instrument cover, semi-crystalline chemistry is usually fighting your goal. If you're molding a snap, a bearing surface, or a part that sees aggressive cleaners, an amorphous resin may look easier in CAD and fail in service.
Use the structure question early. It narrows the field fast, and it pushes the team toward the right arguments. Not “Which plastic is strongest?” but “Which family gives us the right balance of stability, flow, chemistry, and appearance?”
Matching Material Properties to Part Requirements
In material selection, professionals often read a datasheet like a shopping sheet. They compare headline properties and pick the resin with the best-looking numbers. That's how you end up with a technically impressive material that's awkward to mold, expensive to qualify, or unstable in the field.
The buying question is sharper than that. Which thermoplastic is best for this part under actual production constraints like pressure, flow rate, and dimensional stability? As UL Prospector's discussion of injection molding problems and material choice makes clear, many material FAQs skip that decision. For precision parts, predictable shrinkage and long-term stability often matter more than choosing the easiest resin to mold.
Read the datasheet like a designer, not a shopper
A datasheet doesn't tell you whether the resin is “good.” It tells you what trade you're making.
If a housing sits near heat, heat deflection behavior matters because the part must keep its shape under load, not just survive a lab test. If a latch arm sees repeated stress, creep resistance matters because the part can relax over time even if it passed initial pull testing. If your part mates to a seal or metal insert, dimensional stability often matters more than raw tensile strength.
A common mistake is paying for strength when the part really needs stiffness retention, chemical compatibility, or stable molding behavior.
Properties that matter most in production
Use this filter during material down-selection:
- Dimensional stability: If the part aligns with optics, bearings, seals, or PCB features, ask how the resin behaves after molding and after environmental exposure. Tight tolerance parts usually punish unpredictable shrinkage.
- Heat performance: Don't just ask whether the polymer can tolerate heat. Ask whether the feature that matters stays within tolerance at temperature.
- Chemical exposure: Cleaning agents, skin oils, lubricants, fuels, adhesives, and sterilization media all change the answer.
- Long-term loading: Clips, hinges, bosses, and cantilevered tabs fail by fatigue or creep more often than by simple overload.
- Moisture sensitivity: Some engineering resins are strong and useful, but they demand more discipline in storage, drying, and process control.
For example, ABS is often attractive for appearance and general-purpose housings. Polycarbonate can be a better fit when impact performance and clarity matter, but it brings its own molding and design considerations. If your team is evaluating that trade, this practical guide to injection molding polycarbonate is a useful companion read.
Pick the resin for the failure mode you can't afford, not for the property that looks best in the first row of the datasheet.
A part that warps out of assembly spec is a material failure, even if the polymer is mechanically strong. A component that survives testing but crazes after cleaner exposure is also a material failure. The right selection process starts with the product's critical functions, then screens resins by what can go wrong in production and in use.
Controlling the Injection Molding Process Window
A good resin won't rescue a bad process window. In injection molding thermoplastics, the machine settings control how the material flows, how the cavity packs, and how the polymer freezes. Small changes can shift a part from crisp and repeatable to warped, flashed, short, or cosmetically unstable.
The core variables are grounded in real operating ranges. In thermoplastic molding, melt temperature typically runs from 200°C to 300°C depending on the polymer grade, while mold temperature is usually set between 20°C and 120°C. Injection pressure commonly operates between 500 and 1500 bar, and clamping force has to counter that pressure well enough to keep the mold shut and avoid flash, as summarized by IQS Directory's explanation of thermoplastic molding process conditions.

What each process setting really does
Melt temperature controls viscosity. Hotter melt flows more easily, like warming syrup so it pours into fine corners. Push it too low and the resin can hesitate, freeze early, or leave weak knit areas. Push it too high and you invite degradation, burn marks, or unstable surface finish.
Mold temperature controls how the skin forms and how the core cools. That affects surface replication, crystallinity in semi-crystalline materials, and final warpage. A cold mold can shorten cycles and create internal stress. A warmer mold can improve surface quality and dimensional consistency, but it may also demand longer cooling and tighter control.
Injection pressure fills the cavity. It's the force that gets molten resin through gates, around ribs, and into end-of-fill details. If pressure is too low for the geometry, you get incomplete fill or poor replication. If it's too high without the right venting and clamp support, you can force flash or trap gas.
How narrow process windows create scrap
Holding pressure is where many first programs underestimate the physics. After the cavity looks full, the polymer still shrinks as it cools. Holding pressure packs additional material into the part to compensate. The verified process guidance from 3ERP's thermoplastic injection molding process overview notes that holding pressure is generally maintained at about half the maximum injection pressure to offset shrinkage and maintain density.
That's why sink marks often show up in thick sections or behind ribs. The skin froze. The interior kept shrinking. The process didn't keep the part packed long enough, or the design made packing difficult.
Use this troubleshooting sequence when parts go unstable:
- Check fill first: Short shots, hesitation, and poor detail usually point to flow, melt, or gate issues.
- Check pack next: Sink, voids, and density variation often come from holding pressure and freeze-off timing.
- Check clamp and venting: Flash at the parting line or trapped gas marks usually indicate the mold isn't managing pressure or air correctly.
A stable process window is one the supplier can hold every day, not one that only works on the setup technician's best run.
If your team understands those levers, supplier conversations improve immediately. Instead of asking for “better quality,” you can ask whether the part is fill-limited, pack-limited, cooling-limited, or clamp-limited.
Design for Manufacturability That Prevents Defects
Most molding defects start long before the first shot. They start in wall transitions, rib proportions, draft strategy, and gate placement. If you want fewer surprises in tooling trials, design the part so the resin can flow, pack, cool, and eject without fighting the geometry.

The design rules that save the most pain
Start with uniform wall thickness. This is the rule that prevents the most problems for the least effort. Thick-to-thin transitions cool at different rates. That drives differential shrinkage, sink, internal voiding, and warp. If a part needs local stiffness, use ribs or gussets instead of making the entire area heavier.
Then add draft early, not after styling is frozen. Vertical faces without enough draft don't just make ejection harder. They scuff cosmetic surfaces, stress corners during release, and force the toolmaker into compromises on texture or shutoff design.
Use radii and fillets generously. Sharp internal corners interrupt flow and concentrate stress. Rounded transitions help the resin move and reduce the chance that a crack starts exactly where the geometry changes.
What works better than late-stage troubleshooting
Here are the DFM moves that consistently reduce cost and rework:
- Use ribs for stiffness: A ribbed wall can outperform a thick wall because it adds section efficiency without creating a heat sink.
- Place gates where flow helps you: Gate location determines flow path, weld line position, pressure drop, and cosmetic witness. This is why injection molding gate design and optimization deserves review before tooling kickoff, not after T1.
- Think about ejection while modeling the part: Deep textures, undercuts, and tall unsupported walls can turn a moldable part into an ejection problem.
- Respect core-cavity alignment: Thin shutoffs and long unsupported steel features can create flash and wear issues that no process tweak will fully solve.
A simple way to think about DFM is this. Molten resin wants smooth paths, even section changes, and enough draft to let the part leave cleanly. The mold wants strong steel, manageable venting, and geometry that doesn't trap heat.
If you can point to a wall transition and say, “the molder will figure that out,” you probably haven't finished the design.
Teams often wait until T1 samples to address sink, warp, drag marks, or unbalanced fill. By then, every fix costs more because the steel already exists. Good DFM doesn't remove all tuning. It removes the avoidable tuning that burns schedule.
Rapid Tooling vs Production Tooling for NPI
Tooling strategy changes the economics of the whole launch. This isn't just about aluminum versus steel. It's about what kind of uncertainty you still have in the product, and whether the tool should absorb that uncertainty or resist it.

Where rapid tooling makes sense
Rapid tooling is usually the better fit when geometry is still moving, demand is uncertain, or you need molded parts fast for pilot builds, functional validation, or limited market release. It lowers the commitment while giving the team real molded parts instead of relying only on CNC or printed proxies.
That matters when the open questions are still basic. Will the snap engage correctly? Does the assembly stack work? Will the cosmetic surface survive shipping? In those cases, speed and learning often matter more than maximum tool life.
If your volume is still ambiguous and you're deciding between processes for early runs, this comparison of urethane casting vs injection molding for project planning can help frame the handoff point.
When steel is the lower-risk choice
Production tooling makes sense when the part is stable, the demand outlook is clearer, and the launch can't tolerate process drift or repeated tool changes. A hardened steel mold usually gives you a better foundation for long-term repeatability, more durable shutoffs, and less anxiety about tool wear on demanding programs.
The critical point is that the “cheap” tool isn't always the low-cost decision. As Saint-Gobain's medical molding guidance on avoiding failure risk argues, buyers often focus on unit cost when they should evaluate full lifecycle risk. The lowest-cost tooling option can become the highest total-cost option if it triggers extra validation cycles, scrap, or late design changes.
Use this side-by-side lens during NPI:
| Decision factor | Rapid tooling | Production tooling |
|---|---|---|
| Best use | Early NPI, pilot runs, design learning | Stable design, scale-up, repeat production |
| Main strength | Faster learning with lower upfront commitment | Better long-term repeatability and durability |
| Main risk | Tool life and design-change churn can stack up | Higher upfront commitment before design is fully proven |
| Good fit | Evolving geometry, uncertain demand, test builds | Locked geometry, regulated programs, sustained output |
| Wrong fit | Programs that need long-term dimensional discipline from day one | Programs still making frequent design changes |
A tooling decision should answer one question: Which option reduces program risk at this stage? If you still expect geometry changes, don't buy permanence too early. If the part is heading into a demanding release, don't buy speed and call it savings.
A Thermoplastic Selection Checklist for Your Next Project
Most bad material decisions don't fail in the quote stage. They fail later, when a molded part reaches assembly, validation, or field use and the team realizes they optimized the wrong variable.
Use this checklist before you lock the resin and kickoff the tool.
Functional requirements
Ask the product questions first.
- What loads does the part experience? Static compression, repeated snap deflection, bearing wear, and impact all favor different materials.
- What temperatures matter in real use? Don't stop at storage temperature. Include operating heat, nearby electronics, sterilization, or sunlight exposure if relevant.
- What chemicals touch the part? Cleaners, oils, fuels, adhesives, skin contact, and packaging environments can all narrow the resin field fast.
- Which dimensions are critical? If the part interfaces with optics, seals, electronics, or precision inserts, prioritize stable shrinkage and tolerance retention over easy moldability.
- Does the part need cosmetic clarity or just functional performance? Transparency, gloss, texture replication, and visible weld lines change the material conversation immediately.
Manufacturing and business questions
Then ask the questions that save schedules.
- Can the geometry be molded without fighting the resin? Review wall transitions, draft, ribs, and likely gate positions.
- Is the process window forgiving enough for repeat production? A part that only works at one narrow machine setting is risky.
- What happens if the design changes after T1? Choose a tooling path that matches that risk.
- Are you selecting on piece-price or on total program cost? Cheap resin, cheap tooling, and fast quotes don't help if they create scrap or revalidation.
- What does scale look like? The right material and tool for pilot launch may not be right for steady production.
A practical internal review often ends with a short statement like this: the part needs chemical resistance, moderate heat capability, stable dimensions at the seal interface, acceptable cosmetics on the user-facing side, and a tooling plan that allows one design loop before production release. That's a much better basis for supplier alignment than saying you want “a durable plastic.”
Good NPI teams don't ask for the best thermoplastic in the abstract. They ask for the resin, process window, and tooling path that give the product the best chance of launching without expensive surprises.
If you need a manufacturing partner to move from prototype uncertainty to low-volume molded production, FIRMFG can support that handoff with rapid prototyping, DFM feedback, tooling options, and production-ready manufacturing services across plastic and metal parts. For teams working through first-shot risk, tolerance concerns, or process selection during NPI, that kind of end-to-end support can shorten the path from CAD to reliable parts.