Master injection molding gates with our guide. Learn types, design rules, and DFM tips to prevent defects & optimize part quality for prototypes.
You've probably seen this happen. The CAD looks clean, the tool launches, the first molded parts arrive, and the very feature nobody talked about in the design review becomes the first thing everyone notices: a gate mark on the show surface, a blush halo near a logo, or a weld line running right across the face of the product.
That's common in prototypes and low-volume runs because gate decisions often get treated as something the mold designer will “figure out later.” In practice, that late decision drives much more than where the plastic enters the part. It affects how the cavity fills, how long the part can be packed, how easy it is to trim, what the surface looks like after de-gating, and whether the team burns another round of time fixing avoidable defects.
For product designers, injection molding gates sit right at the intersection of DFM and process control. If you choose the wrong gate, you can create a part that is technically moldable but expensive to finish, difficult to tune, and inconsistent from shot to shot. If you choose the right one early, you shorten the path from sample parts to usable production parts.
Table of Contents
- Think of the gate as a controlled restriction
- What the gate has to do during one cycle
- How to compare gate types in real work
- Where each gate type tends to work best
- Placement rules that solve problems early
- Sizing rules that keep the process stable
- Sink marks warpage and weld lines
- Design review questions before quoting the mold
- Production questions before approving the gate
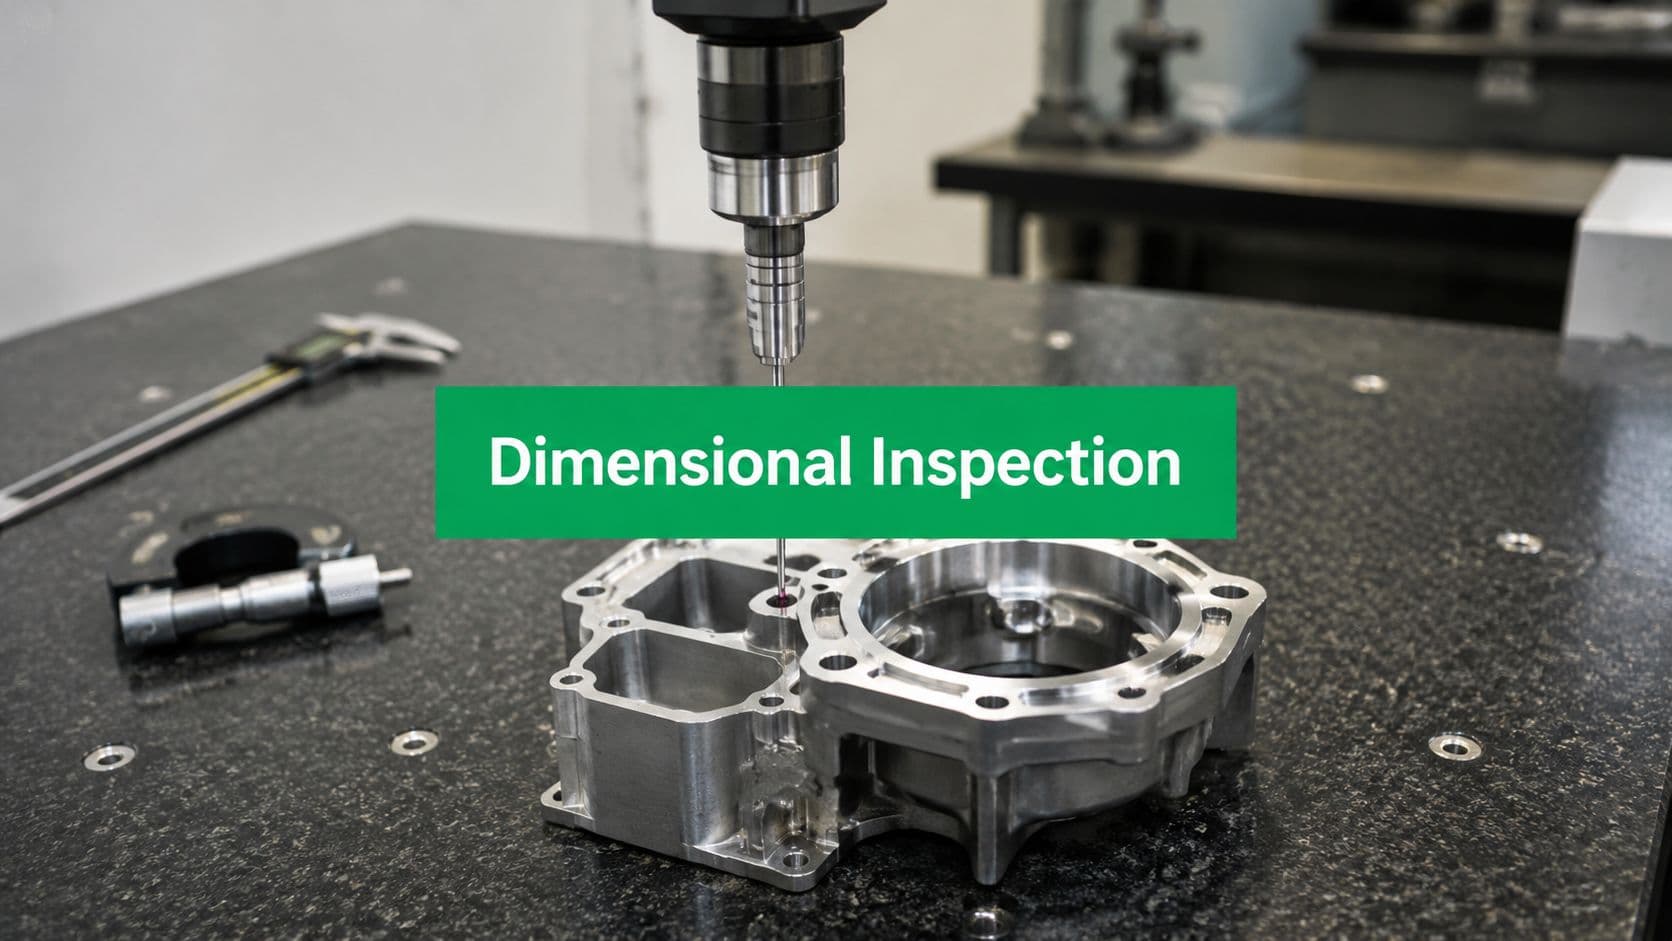
Why Your Injection Molding Gate Design Matters
A gate is easy to underestimate because it's small. On the molded part, it often looks like a tiny leftover witness mark. On the tool, it may be one of the smallest machined features in the entire cavity.
But the gate is where manufacturing intent becomes physical behavior. It decides how molten resin starts moving through the cavity, where the first visible defect tends to show up, and how much cleanup the part needs after molding. That's why a gate choice that looks acceptable in CAD can still create ugly samples, unstable packing, or unnecessary bench work after ejection.
For prototype and bridge tools, this matters even more. You usually don't have the luxury of several expensive mold revisions, and you may be balancing cosmetic requirements against a very real need to keep tooling simple. A designer might ask for an invisible gate on a visible medical housing, while the process team knows that hiding the vestige may require a more complex mold concept or a gate style that's harder to tune in early sampling.
A part can be moldable and still be wrong for production if the gate creates too much hand trimming, too much cosmetic risk, or too narrow a process window.
I've seen teams focus hard on wall thickness, ribs, and draft, then lose time over a gate placed on the one surface that marketing won't accept. That's not a minor tooling issue. It's a design decision with consequences for cost, lead time, and approval speed.
The practical mindset is simple. Treat the gate like a primary design feature, not a leftover detail.
Understanding the Gate's Function in Material Flow

If you need a refresher on the full molding sequence, this overview of the injection molding process helps place the gate in context. Inside that full system, the gate is the final restriction between the runner and the cavity.
Think of the gate as a controlled restriction
The easiest way to think about a gate is as a nozzle or valve. The sprue and runner deliver material toward the cavity. The gate does the fine control work.
It is not just an opening. It's the feature that meters entry into the part. Because it is the smallest and shortest section in the gating system, it has an outsized effect on how the melt behaves once it leaves the runner and enters the cavity.
That one restriction has to balance competing needs. It must allow the cavity to fill fast enough, maintain enough pressure for packing, and still freeze off at the right time so the process can move into cooling without backflow problems.
What the gate has to do during one cycle
There are three jobs every gate has to perform well:
- Control the initial flow front
The gate shape and cross-section influence how the resin enters the cavity. A concentrated entry can shoot the melt straight ahead and create surface issues. A broader entry can spread flow more gently across a wider area.
- Transmit packing pressure
After the cavity looks full, the machine is still doing important work. Holding pressure pushes material through the gate to compensate for shrinkage as the part cools. If the gate can't support that phase, the part may look full but still develop sinks, void tendencies, or dimensional drift.
- Freeze off predictably
The gate should solidify at the right point in the cycle. If it freezes too early, the cavity gets cut off before enough packing happens. If it stays open too long, the process may run slower than necessary or leave a larger witness area.
**Practical rule:** When a molded part shows both cosmetic defects near the gate and unstable dimensions away from the gate, don't assume those are separate problems. The same gate decision often caused both.
That's why gate discussions can't stay purely geometric. Material flow, packing, cooling, and de-gating are connected. Designers who understand that usually make better trade-offs earlier.
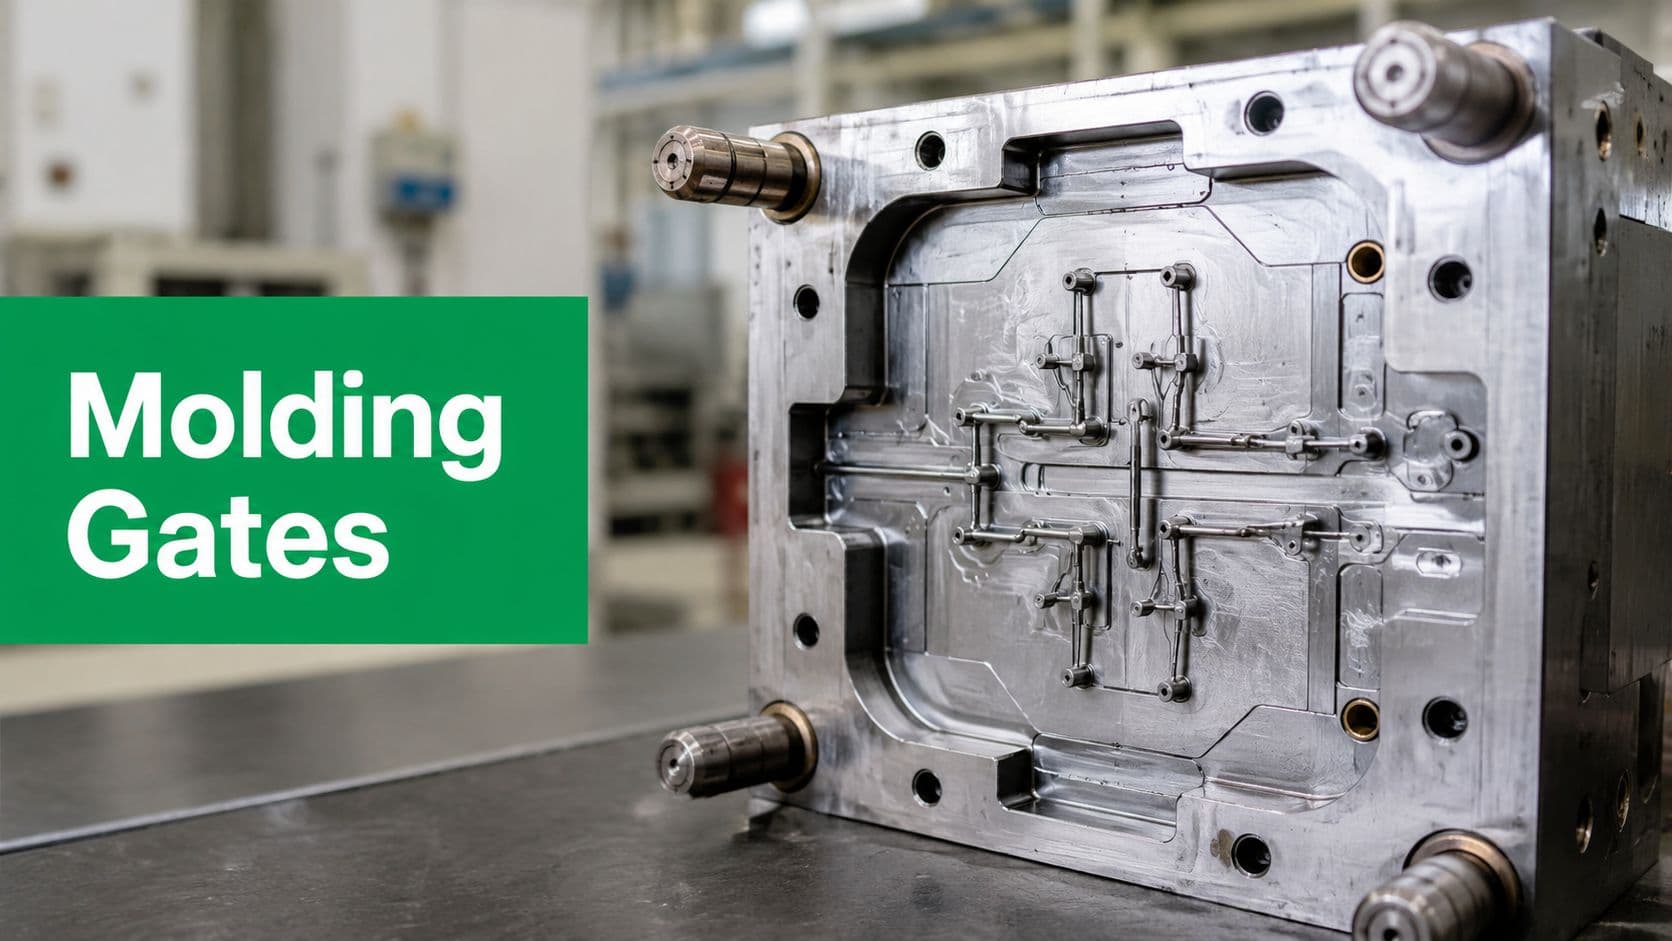
A Guide to Common Gate Types and Their Applications
Different injection molding gates solve different problems. No single gate is “best.” The right choice depends on what you care about most: cosmetic finish, easy trimming, simple tooling, balanced flow, or process forgiveness during startup.

How to compare gate types in real work
The most useful comparison isn't academic. It comes down to a few shop-floor questions:
- Can the operator remove it cleanly?
- Will the vestige land on a surface that matters?
- Does the gate help or hurt fill balance?
- Will this choice make a prototype tool easier to revise?
- Are you paying for hidden cosmetic quality with visible tooling complexity?
That last question gets ignored too often. Guidance on hiding gates without adding secondary finishing cost remains underserved, especially for cosmetic and medical parts. In practice, high-volume work often benefits from self-shearing gates or automated gate removal because they reduce secondary operations, but many discussions stop short of comparing the full trade-off between appearance, mold complexity, and de-gating effort.
Here's a practical comparison table.
| Gate Type | Description | Pros | Cons | Best For |
|---|---|---|---|---|
| Edge gate | Gate enters from the part edge at the parting line | Simple tool design, easy to modify, good general-purpose flow | Visible vestige, often needs manual trimming | Prototypes, housings, non-cosmetic edges |
| Tab gate | Edge-style gate feeding through a sacrificial tab | Helps calm entry into the part, useful when surface quality near the gate matters | Extra trimming, extra material in the tab | Shear-sensitive parts, clearer cosmetic control near entry |
| Fan gate | Wider gate that spreads flow across a larger entry area | Better flow distribution into broad sections, useful on large flat parts | Larger vestige, more manual cleanup | Flat parts, covers, panels |
| Tunnel or submarine gate | Angled gate below the parting line that shears during ejection | Automatic de-gating, vestige can be hidden on less visible surfaces | More complex tooling, less tolerant of some geometries | Cosmetic parts, multi-cavity parts, reduced bench work |
| Pinpoint gate | Small round gate, commonly used with three-plate concepts | Small vestige, automatic separation | Higher shear, easier freeze-off if undersized, more complex tooling concept | Small parts, cosmetic parts, automated de-gating |
| Diaphragm gate | Ring-like gate around a core area | Uniform feed into circular or hollow parts | Gate removal and vestige management can be intrusive | Cylindrical parts, concentric features |
| Hot runner gate | Heated feed directly to the cavity with no cold runner attached in the same way | Reduces runner handling, good process control in the right program | Higher mold cost, more maintenance complexity | Production tools, not usually the first choice for low-volume programs |
Where each gate type tends to work best
Edge gates are often the right answer when the team needs a fast, reliable, revisable starting point. If the part has a non-critical edge and the mold is for prototyping or low-volume production, simplicity has value. You can learn a lot quickly from an edge gate tool.
Tab gates earn their place when direct entry would mark or overstress the part right at the gate land. The tab absorbs some of that damage, then gets trimmed away. If a cosmetic housing shows gate blush too close to the product surface, a tab can be a practical compromise.
Fan gates are useful when you need to spread the flow front instead of driving it through one narrow entry point. They are common on flatter geometries where concentrated entry would increase stress or uneven filling.
Tunnel gates are a strong choice when labor and appearance both matter. They can hide vestige better and remove the need for a separate trimming step. That's attractive not only in high volume, but also in low-volume jobs where manual cleanup can consume more time than expected.
Pinpoint gates can leave a cleaner witness area, but they narrow your process window. If the resin is sensitive to shear, or the part needs heavy packing through the gate, they can become the source of instability unless the rest of the design supports them.
If you only compare gate types by how small the witness mark looks, you'll miss the real cost. The expensive part often isn't the mark itself. It's the tuning, trimming, and rejection work that follows.
For most development programs, I'd rather choose a gate that gives a stable first process and an acceptable witness location than chase the smallest visible mark too early.
Rules for Effective Gate Sizing and Placement
Good gate design starts with location. Sizing comes next. If the location is wrong, even a well-sized gate can still create avoidable defects, trimming problems, or difficult flow paths.

Placement rules that solve problems early
Place the gate where the part can be packed effectively and where the witness mark won't ruin the product.
That usually leads to a few practical rules:
- Feed the thicker section first
Thicker sections need sustained packing support. Feeding into a thin cosmetic lip and expecting the pressure to reach a heavier boss field downstream is a common mistake.
- Aim for balanced fill, not just easy tooling
The shortest machining path is not always the best fill path. You want the melt to reach the cavity in a way that limits hesitation, trapped air, and obvious meeting lines.
- Keep the vestige off critical surfaces
If a gate witness sits on a thumb-touch area, seal line, optical face, or adhesive land, the design team will keep paying for that decision through every build.
- Think about de-gating during CAD, not after T1
A gate that is theoretically hidden but hard to trim cleanly can create more real cosmetic damage than a slightly more visible but cleaner break point.
Sizing rules that keep the process stable
Gate geometry is not just a cosmetic detail. The gate is the smallest and shortest section of the gating system, so its cross-section strongly governs pressure drop, heat loss, packing efficiency, and the final fill pattern in the cavity. Published practical sizing ranges include rectangular gates at about 0.5 to 3 mm long, 1.5 to 5 mm wide, and 0.5 to 2 mm deep; pin gates at about 0.6 to 2.8 mm diameter and 0.7 to 1.5 mm length; and fan gates with depth typically 0.25 to 1.5 mm and width around one-quarter of the cavity width at the gate, with a minimum width of 8 mm, as described in this guidance on injection molding gate sizing and geometry.
Those ranges are starting points, not universal answers. What matters is what the size is doing to the process.
A gate that's too small tends to freeze off early. That cuts packing short, which can leave the part underpacked even when the cavity initially fills. A gate that's too large can create a different problem. The cavity may fill less uniformly, and the part may become harder to control for shrinkage and weld-line placement.
Use these checks before approving a gate size:
- Watch for premature freeze-off
If the part fills but dimensions drift and sink risk stays high, the gate may be closing before the packing phase finishes doing useful work.
- Watch for overfeeding and cleanup burden
An oversized gate can leave a larger vestige and may encourage fill patterns that aren't as controlled as they look at first glance.
- Match size to the part's real need for packing
Thick sections, long flow paths, and cosmetic surfaces all change what “right sized” means.
Don't ask whether the gate is small or large. Ask whether it stays open long enough to pack the part, then breaks or trims in a way the product can tolerate.
That question gets better results than any rule of thumb used in isolation.
Troubleshooting Defects Caused by Poor Gate Design
When a molded part fails visually or dimensionally, teams often split into two camps. One group says the gate is wrong. The other says the process is wrong.
Usually, both are partly right.
Many articles explain that gate size and placement affect jetting, blush, weld lines, cosmetics, and dimensional stability, but the practical production question is how gate size, melt temperature, mold temperature, injection speed, and venting should be adjusted together. Guidance on gate-related defects such as jetting and gate blush points out that these causes interact and that simulation can help target gate size and wall thickness, yet the troubleshooting guidance remains mostly qualitative. That matches real life. You rarely solve these defects by changing only one thing.
Jetting and gate blush
Jetting happens when resin enters the cavity as a concentrated stream instead of attaching smoothly to the mold wall and building a stable flow front. It often appears as snake-like surface marks.
A gate-related cause is usually a small or poorly directed entry that sends material shooting into open space. Sharp entry into a thick section can do it. So can process settings that drive the melt in too aggressively for the gate geometry.
Use a two-part fix:
- DFM fix
Change the gate type or location so the melt enters against a wall or spreads more gradually. A tab or fan-style entry often helps where a direct concentrated entry is too violent.
- Process fix
Rework the filling profile, especially early injection speed. Also review melt temperature, mold temperature, and venting together rather than changing one knob at a time.
Gate blush is different. The defect sits near the gate and looks like whitening, smearing, or a stressed halo. It often points to excessive local shear or an abrupt flow transition right at entry.
A useful response is to soften the entry path, reduce local stress at the gate, and then retune the process so the improvement is preserved shot to shot.
Sink marks warpage and weld lines
Sink marks near thicker sections often show that the part didn't receive enough useful packing pressure where it needed it. The gate may be too small, too far from the heavy section, or located on the wrong side of the flow problem.
Try this approach:
- DFM side
Move the gate closer to the mass that needs packing support, or enlarge the gate if early freeze-off is the limiting factor.
- Process side
Confirm that holding pressure and holding time are doing useful work before the gate freezes. If not, extending hold time alone won't help.
Warpage often points to uneven fill or uneven packing. The gate may be forcing the melt through an imbalanced path, especially on broad or asymmetric parts.
A design fix might be a broader entry, a relocated gate, or multiple gates if the geometry justifies it. The process fix is to tune the fill pattern and cooling strategy around the new flow behavior, not just force more pressure into the old setup.
Weld lines are often gate-location problems before they become process problems. If two flow fronts are destined to meet in a visible or highly loaded area, no amount of machine tuning will make that an elegant design.
When a defect sits far from the gate, don't assume the gate is innocent. The gate defines the fill pattern, and the fill pattern decides where many downstream problems show up.
That's why troubleshooting works best when the designer and process engineer review the same mold-flow logic instead of arguing over symptoms.
Your DFM Checklist for Gate Design and Production
Before you release a part for quotation or tooling, run a gate review the same way you'd run a draft or tolerance review. It prevents expensive “small changes” later.

If you already use a broader design for manufacturability checklist, add the gate questions below to that review instead of treating them as a mold-only concern.
Design review questions before quoting the mold
Start with the CAD and ask uncomfortable questions early.
- Is the gate landing on a surface the customer will see or touch?
If yes, decide whether that's acceptable now. Don't postpone the argument until sample approval.
- Does the gate feed a section that can support balanced filling?
Long unsupported flow paths, abrupt thickness transitions, and dead-end cosmetic faces should trigger a second look.
- Will the chosen gate type leave a witness the product can tolerate?
Some products can accept an edge break. Others can't accept even a faint circular mark on the wrong face.
- Does the geometry allow clean de-gating?
This matters for low-volume runs more than many teams expect. Manual trimming can become the hidden bottleneck.
Production questions before approving the gate
Once the tool concept is on the table, shift from geometry to production behavior.
- Material fit
Is the resin likely to tolerate the shear level and freeze characteristics of the selected gate type?
- Packing path
Can the gate stay open long enough to support the sections most likely to shrink unevenly?
- Process window
Does this gate give the molder room to tune injection speed, melt temperature, mold temperature, and venting without walking a razor-thin line between short shots and cosmetic defects?
- Secondary work
Will operators need trimming, sanding, or cosmetic touch-up after de-gating? If so, is that labor acceptable for the planned volume?
- Revision risk
If T1 reveals flow or cosmetic trouble, is the gate concept easy to revise, or did the team choose a gate style that commits them too early?
**Checklist mindset:** The best gate isn't the one that looks smartest in a presentation. It's the one that gives acceptable cosmetics, repeatable molding, and manageable post-processing at the volume you actually plan to run.
That's the filter worth using.
Partnering for Optimal Injection Molding Results
Good gate design reduces surprises. It helps the cavity fill the way you intended, keeps packing effective, avoids avoidable cosmetic damage, and limits secondary finishing that nobody budgeted for. For prototype and low-volume work, that matters even more because every revision costs time.
The hard part is that gate decisions sit between product design, tooling, and process tuning. No single team sees the whole problem alone. The best results usually come from reviewing the gate early, while CAD changes are still cheap and before the mold concept hardens.
If you're preparing a new part for sampling or bridge production, it's worth involving a manufacturing partner early and getting a serious DFM review of the gate strategy, de-gating method, and likely process window. That's exactly where a capable supplier can help. Explore LC Proto's injection molding services when you need prototype-to-production support with gate decisions handled as a real engineering variable, not an afterthought.