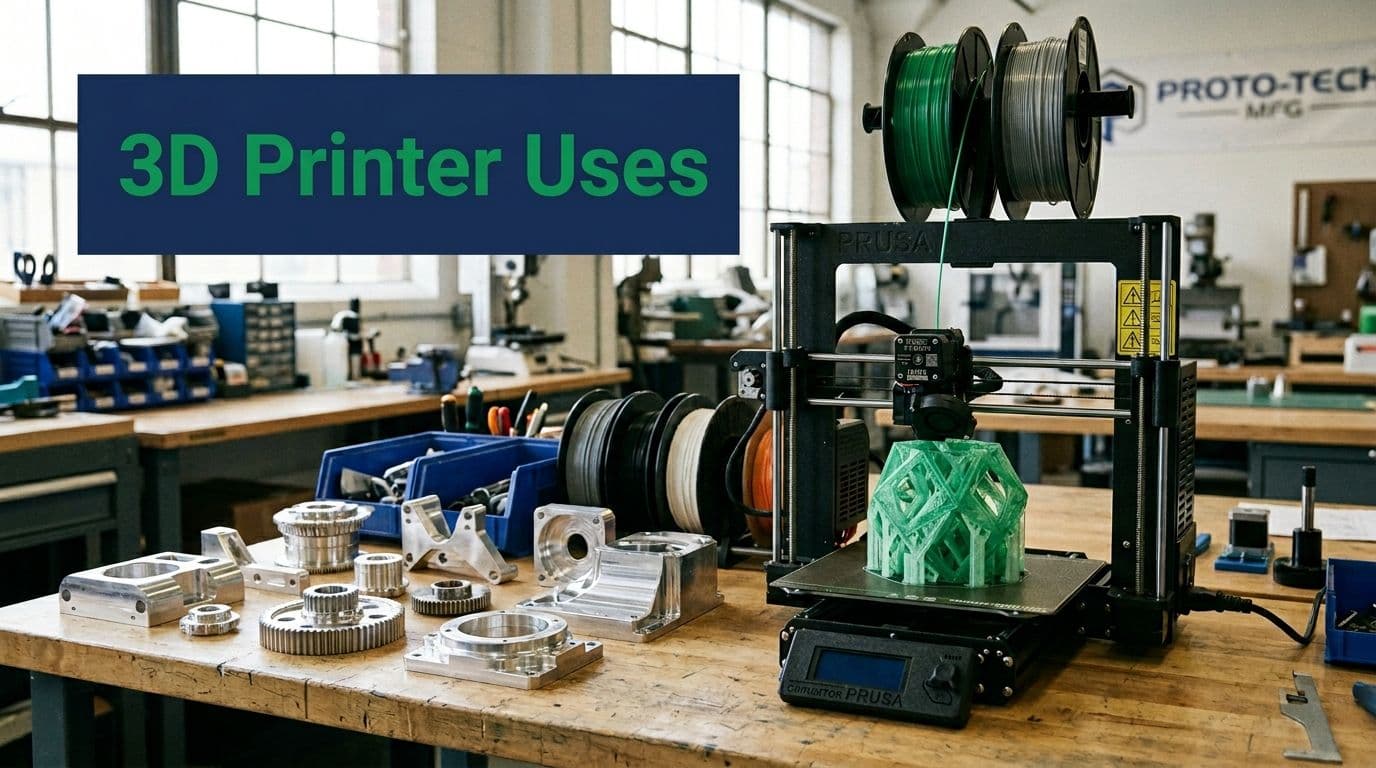
Discover top 3D printer applications transforming manufacturing, from medical implants to aerospace. See how 3D printing delivers rapid results.
One widely cited market forecast projected 3D printing to grow from USD 16.94 billion in 2022 to USD 77.83 billion by 2030. Growth at that pace usually means the process has moved from niche experimentation into daily manufacturing work.
That shift is visible on the shop floor. 3D printing now supports spare parts, assembly aids, surgical planning models, robotic brackets, short-run tooling, and bridge production. The useful question for engineers and sourcing teams is where additive manufacturing gives a time or geometry advantage, where its limits show up in tolerance, heat resistance, and surface finish, and when a machined part is still the better decision.
In practice, the best results come from using 3D printing and CNC machining together, not treating them as competing options. Printed parts are often the fastest way to validate fit, routing, ergonomics, and assembly sequence. CNC machining usually takes over when the part needs tighter tolerances, better isotropic strength, cleaner sealing surfaces, or a production-grade finish. A professional 3D printing service for prototype and low-volume parts fits well at the front of that workflow, especially when the same project may later move into machined aluminum, steel, or engineering plastics.
This article focuses on ten applications where that handoff matters. For each one, the goal is practical selection: why teams print it, which materials are common, what tolerance range is realistic, how fast parts can be turned, and where CNC machining still carries the load.
Table of Contents
- Where CNC machining still matters
- Why robotics teams rely on it
- When to switch to machined metal
- Certification and process discipline
- Why this niche uses 3D printing well
- How to control fit and repeatability
- Strong use case, with limits
- Why surgeons value these tools
- Where rapid tooling earns its keep
- Design around the insert, not just the part
- Why additive works so well in dental production
- Where 3D printing stops and CNC machining starts
- 10 3D Printer Applications Comparison
- From Prototype to Production Integrating 3D Printing Strategically
1. Medical Device Prototyping and Custom Implants

Medical is one of the clearest examples of where 3D printer applications create value fast. Patient-specific anatomy, low production volumes, and frequent design changes make additive manufacturing a natural fit for surgical guides, trial components, and custom-fit implant development. A machined part can still be the final answer, but printing is usually the fastest way to reach the right geometry first.
For device teams, the biggest advantage isn't just speed. It's design freedom during validation. You can test anatomical fit, surgeon access, handle ergonomics, and assembly logic before locking down the more expensive process route. That's why many teams use industrial 3D printing services early, then push selected dimensions and mating features into CNC secondary operations when tolerances get tight.
Why it works
SLA is useful when surface quality, small features, and visual review matter. SLS is often better when you need more durable prototype housings, drill guides, or snap-fit trials without support marks driving extra cleanup.
Typical examples include surgical cutting guides, orthopedic trial components, dental models, and instrument handles. Mayo Clinic-style anatomical models for procedure planning make sense because they help teams review access and spatial constraints before a surgeon ever enters the OR.
**Practical rule:** In medical work, don't treat post-processing as an afterthought. Sterilization, cleaning, support removal, labeling, and traceability should be part of the routing from day one.
Where CNC machining still matters
Printed geometry is excellent for iteration. It's not automatically the best choice for every final-use feature. If a component needs very tight mating surfaces, durable threaded interfaces, or long-term wear performance, CNC machining usually enters the process either as a finishing step or as the final production method.
Use 3D printing to settle the shape. Use machining to lock down the precision. That sequence prevents expensive redesign loops late in verification.
A good medical workflow usually includes:
- Early DFM review: Check wall thickness, trapped resin or powder, and orientation-sensitive surfaces before the first build.
- Material discipline: Match the print material to the use case, especially for biocompatibility, sterilization exposure, and creep risk.
- Inspection planning: Define which surfaces can remain as-printed and which need machining, polishing, or fixture-based inspection.
2. Automotive Functional Prototypes and Assembly Fixtures

Automotive teams use 3D printing in two very different ways. One is fast product development. The other is factory support. Both matter, but the second often saves more time in day-to-day operations because a bad fixture or a delayed assembly aid can slow an entire line.
A documented example comes from Ford. Working with Stratasys Direct, Ford used FDM 3D printing to redesign the Mustang quarter-glass alignment fixture, with the reported result being improved ergonomics, lower weight, and higher efficiency in the assembly process through a production-ready tool replacement in manufacturing, as shown in this Ford fixture case study from Stratasys Direct.
What actually gets printed
For product development, teams print intake paths, brackets, trim mockups, wire guides, ducting, and under-hood trial parts. For production support, they print nests, check fixtures, locator blocks, ergonomic hand tools, and line-side aids.
If you're developing a new vehicle component, a rapid prototyping workflow works best when print and machining are planned together. Print the geometry-rich version first. Then machine the datums, bores, and hard interface surfaces once the design settles.
A fixture that's lighter and easier for operators to handle often creates more practical value than a prototype that only looks good in a design review.
What to machine instead
Don't force 3D printing into high-heat, high-load, or long-cycle tooling just because the geometry is printable. Automotive buyers often need the part to survive repeated use, oil exposure, thermal cycling, and operator abuse. That's where printed nylon, resin, or FDM thermoplastics can fall short.
Machine aluminum or steel when the fixture carries repeated clamping loads, requires stable precision over time, or needs wear resistance at contact points. A hybrid tool is often the best answer: printed body, machined inserts, hardened pins, standard bushings.
Keep these trade-offs in mind:
- Use printing for geometry speed: Ducts, housings, ergonomic forms, and low-volume fixture bodies benefit most.
- Use CNC for critical interfaces: Pin holes, bushing seats, precision faces, and wear zones should rarely stay fully as-printed.
- Validate the environment: Heat, fluids, and repeated clamp cycles expose weak designs fast.
3. Custom Electronics Enclosures and Connectors
Electronics packaging is one of the most practical 3D printer applications because enclosure work changes constantly. Port locations move. Board stackups shift. Antenna clearance turns into a problem late. A printed housing lets an engineering team resolve those issues before committing to tooling.
This is especially useful for industrial controls, IoT hardware, benchtop instruments, and startup devices where production volume is still uncertain. Teams can print the shell, test assembly, revise venting, and then decide whether the next step is CNC machining, urethane casting, or injection molding.
Best uses in electronics
Printed enclosures are excellent for fit checks, user handling studies, low-volume pilot units, and internal validation builds. SLA works well when you need cleaner cosmetics and sharp edges. SLS is usually a better choice for tougher housings, clips, and functional covers.
Connector development also benefits from printing. You can test latch access, cable exit angles, strain relief geometry, and internal keep-out zones before spending money on hard tooling. That matters when one misplaced port cutout can force a redesign of the whole housing.
Useful design targets include:
- Thread strategy: Add metal inserts or redesign around self-tapping hardware rather than trusting raw printed threads.
- Thermal review: Print vent patterns and airflow channels early, then test with the PCB and heat-generating components.
- Service access: Battery doors, removable covers, and cable-routing features should be validated physically, not just in CAD.
Common failure points
Many electronics teams overestimate how “production-like” a printed enclosure is. The shape may be right while the behavior is wrong. Printed walls can flex differently, small snaps can fatigue, and material response near heat sources may not match a molded thermoplastic.
If an enclosure needs tight flatness at gasket surfaces, stable threaded bosses, EMI treatment, or high cosmetic consistency, CNC machining or molding usually takes over. Printing gets you to a confident design. It doesn't remove the need to choose the right production process.
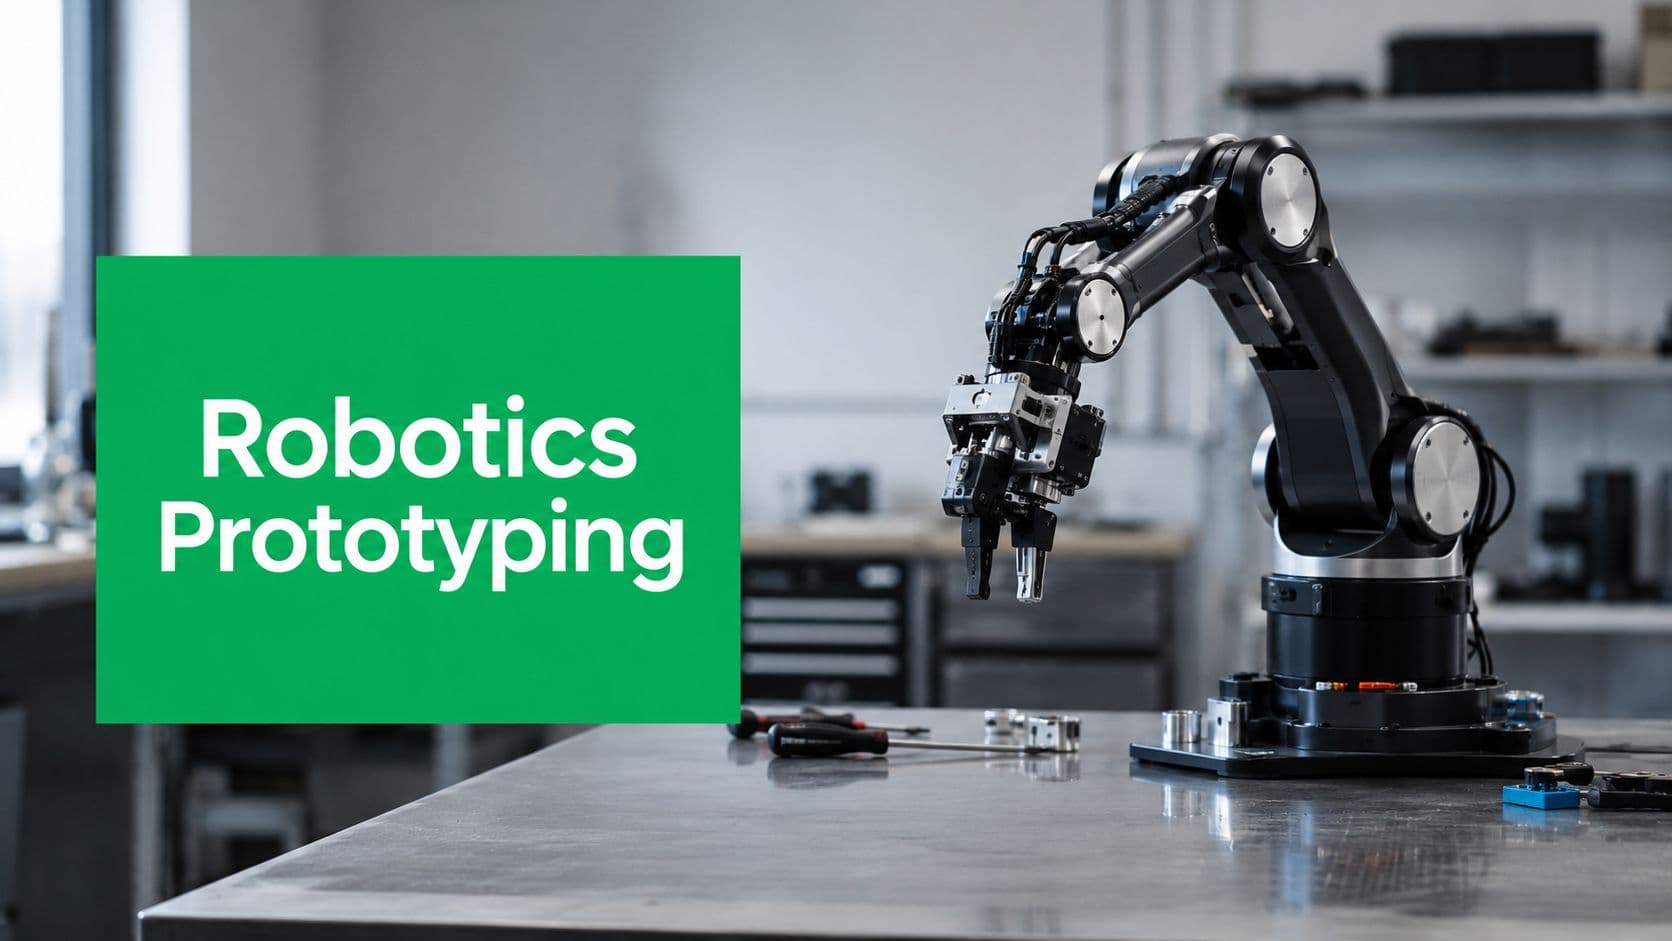
4. Robotics and Actuator Brackets, Gears, and Assemblies
Robotics development rewards fast iteration more than almost any other field. Mount a motor, test the motion path, find the interference, move the bracket, repeat. That loop is exactly why robotics teams keep printers close to the bench.
Brackets, cable guides, sensor mounts, gripper fingers, gearbox covers, and mockup linkages are strong candidates for additive manufacturing. Early-stage robots change too quickly for every revision to go through a full machined-metal cycle.
Why robotics teams rely on it
The main win is not just lead time. It's system learning. A printed part lets engineers test reach, routing, clearances, fastener access, center of gravity, and assembly order in the actual mechanism. That's much more useful than admiring a clean CAD model.
Printed gears and pulleys can also be useful in early tests, especially when the goal is to validate ratio, mesh, envelope, and integration. They're good development tools. They're rarely the final answer for sustained duty.
Print the robot to learn the robot. Machine the robot when the geometry stops moving.
When to switch to machined metal
The handoff point is usually obvious in testing. If a bracket sees sustained load, repeated impact, motor heat, bearing fits, or alignment-sensitive interfaces, 3D printing stops being the safest long-term option. MIT has noted that print-head size and weak interlayer bonding can materially affect part reliability, which is exactly why some printable geometries still perform poorly in real use under load, as discussed in MIT's report on reliability limits in complex 3D-printed parts.
For robotics, that means you should be cautious with:
- Load-bearing arms and joints: Especially where bending and cyclic stress are significant.
- Precision bearing seats: Printed bores can work for trial builds, but machined bores are the safer production path.
- Drive components under continuous torque: Use printed versions for fit and concept validation, then move to machined or molded production parts.
A solid workflow is to print the kinematics, machine the datums, and reserve production metal for the interfaces that determine robot accuracy.
5. Aerospace Component Brackets, Ducts, and Interior Fittings
Aerospace teams like additive manufacturing for the same reason race teams do. It cuts time between design and physical validation, and it handles awkward geometry well. Brackets, cabin fixtures, wire guides, ducting, and non-pressurized interior components are all common candidates during development.
The opportunity is real, but so is the discipline required. Aerospace isn't forgiving about undocumented changes, uncontrolled batches, or vague material assumptions. A part that works physically still has to fit the certification pathway.
Where additive makes sense
3D printing is strongest here when it reduces assembly count, shortens lead time for development hardware, or enables custom geometry that would be awkward to machine from solid stock. Cabin fittings and routing features often benefit because they involve complex shapes but relatively modest structural demands compared with primary flight hardware.
Replacement and service parts are also becoming more relevant in the broader additive story. During the COVID-19 period and the 2021/22 supply-chain crises, firms increasingly used 3D printing for spare parts and production continuity, making additive manufacturing a practical bridge-supply solution for maintenance-critical operations, as described in Formlabs' overview of industrial and supply-chain 3D printing use cases.
Certification and process discipline
What fails in aerospace is usually not enthusiasm. It's process control. Engineers print a part that looks right, then underestimate flammability requirements, traceability, surface finishing, environmental exposure, or the need for a stable inspection routine.
That's why CNC machining often returns in the second phase. Machine the features that control fit. Machine inserts, sealing lands, and attachment faces. Keep the printed geometry where complexity adds value and the risk is manageable.
Aerospace teams should lock down:
- Traceability: Material batch, machine, orientation, and post-processing route.
- Testing route: Physical validation should match the intended service environment, not just bench conditions.
- Secondary operations: Coatings, inserts, and machined interfaces should be planned before the first build, not after failure.
6. Fiber Optic and Photonics Component Holders and Alignment Fixtures
This is a niche that outsiders often miss, but it's a very practical one. Fiber optics and photonics labs constantly need custom holders, lens mounts, ferrule guides, and alignment fixtures for setups that may only exist in one program or one test cell. Printing those parts avoids the delay of machining every experimental jig from aluminum.
The value is strongest when geometry changes often and the fixture isn't the final precision reference. In other words, print the support hardware around the optical path while staying honest about what must remain machined and stable.
Why this niche uses 3D printing well
SLA is attractive here because fine details and compact geometry matter. Teams can quickly create custom holders for nonstandard components, cable routing clips, temporary alignment aids, and benchtop fixture bodies. For lab work, that speed changes the rhythm of development.
The mistake is assuming visual precision equals optical precision. A part can print beautifully and still shift enough under clamp load or temperature change to create alignment drift.
How to control fit and repeatability
Use printed parts to establish layout, package density, and test access. Then machine the critical datum features once the geometry is proven. That hybrid approach is usually faster than machining everything from the start and more reliable than trusting every alignment surface to a printed polymer.
Design habits that help:
- Separate structural and locating functions: Let the printed body carry the shape, but assign critical pin bores or reference faces to machined inserts.
- Control thermal behavior: If the setup sees lamp heat, enclosure heat, or environmental cycling, validate the fixture in those conditions.
- Inspect what matters: Measure true optical datums, not just outer geometry.
In photonics work, a printed fixture is often the fastest route to a usable experiment. It's rarely the best route to the final precision stage without some machined help.
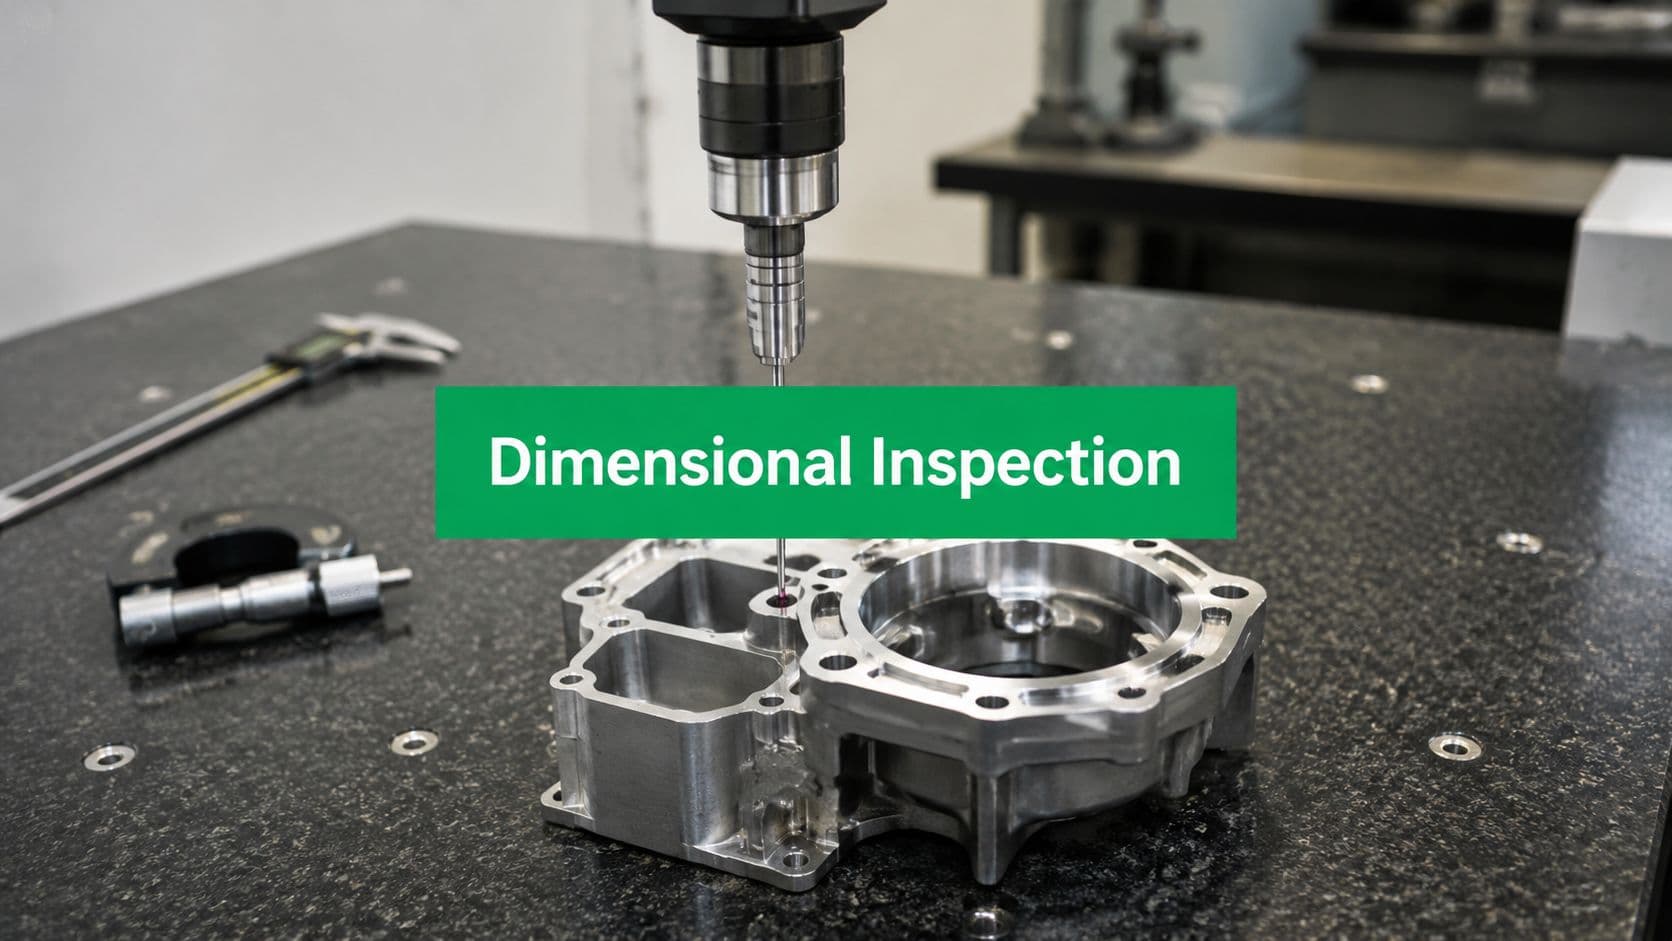
7. Metrology Calibration Standards and Custom Inspection Fixtures
Inspection departments use 3D printing effectively when they stay within the right boundary. Custom holding fixtures, part nests, checking aids, and operator-specific supports are strong candidates. Primary calibration artifacts and tight-reference standards require much more caution.
That distinction matters. A printed fixture can improve repeatability in a CMM routine or bench inspection workflow. It doesn't automatically qualify as a long-term dimensional truth source.
Strong use case, with limits
For irregular parts, especially molded or lightweight components, printed fixtures can hold the work consistently and reduce operator variation. They also help quality teams build inspection support hardware without waiting on the machine shop for every new product launch.
The finish and support strategy matter more here than many teams expect. Prusa notes that surfaces above supports don't have the same finish as side walls and recommends splitting parts when finish matters, which is directly relevant to fixture design because contact surfaces and locating faces can degrade if they're placed carelessly in the build, as explained in Prusa's design-for-printing guidance on supports and surface quality.
If a fixture touches the part on a support-scarred face, you've built variation into the inspection process before measurement even starts.
Best workflow
Print fixture bodies when the benefit is geometry speed and ergonomic handling. Machine or rework the key locating interfaces if the inspection routine depends on them. For many shops, that combination is enough to speed up launch while preserving trust in the measurement system.
A reliable workflow usually includes:
- Orientation planning: Protect locating faces from support damage and uneven surface texture.
- Verification against master references: Check printed fixtures against known-good standards before release to operators.
- Lifecycle management: Retire or re-verify fixtures when wear, heat, solvents, or repeated use starts changing contact geometry.
Done well, printed inspection tooling is practical and fast. Done casually, it hides measurement error inside the fixture itself.
8. Custom Surgical and Orthopedic Instruments
Custom surgical instruments sit in the overlap between anatomy-driven design and low-volume manufacturing. That's exactly where 3D printing performs well. A surgeon may need a guide, handle, or access tool shaped around a specific procedure, and the quantity may be too low to justify conventional tooling.
This category is close to medical prototypes, but the design priorities are different. Here the discussion shifts from anatomical fit alone to grip comfort, line-of-sight, surgical workflow, sterilization, and confidence in the hand.
Why surgeons value these tools
Printed instruments and guides can be designed around patient anatomy or around the surgeon's preferred approach. Orthopedic cutting guides, spinal procedure aids, and trial instruments all benefit because geometry matters more than broad production scale.
The practical gain is usually reduction of uncertainty. The team can physically validate reach, grip angle, indexing features, and contact with anatomy before committing to the final production route.
The manufacturing handoff
Not every custom surgical tool should remain fully printed. A guide may stay additive if the material and validation route support it. A reusable instrument with high mechanical stress, repeated sterilization cycles, or metal contact points may need machined components, metal inserts, or a complete transition to CNC production.
That's where experienced manufacturing planning matters:
- Lock down the anatomy-facing geometry first: Printing is often the fastest route to fit confidence.
- Review reusable surfaces critically: Grips, hinges, wear points, and fastener interfaces may need a different process.
- Plan post-processing early: Smoothing, cleaning, marking, and packaging all affect readiness for actual clinical use.
In orthopedic and reconstructive work, the best result is often a hybrid solution, not a purely printed one.
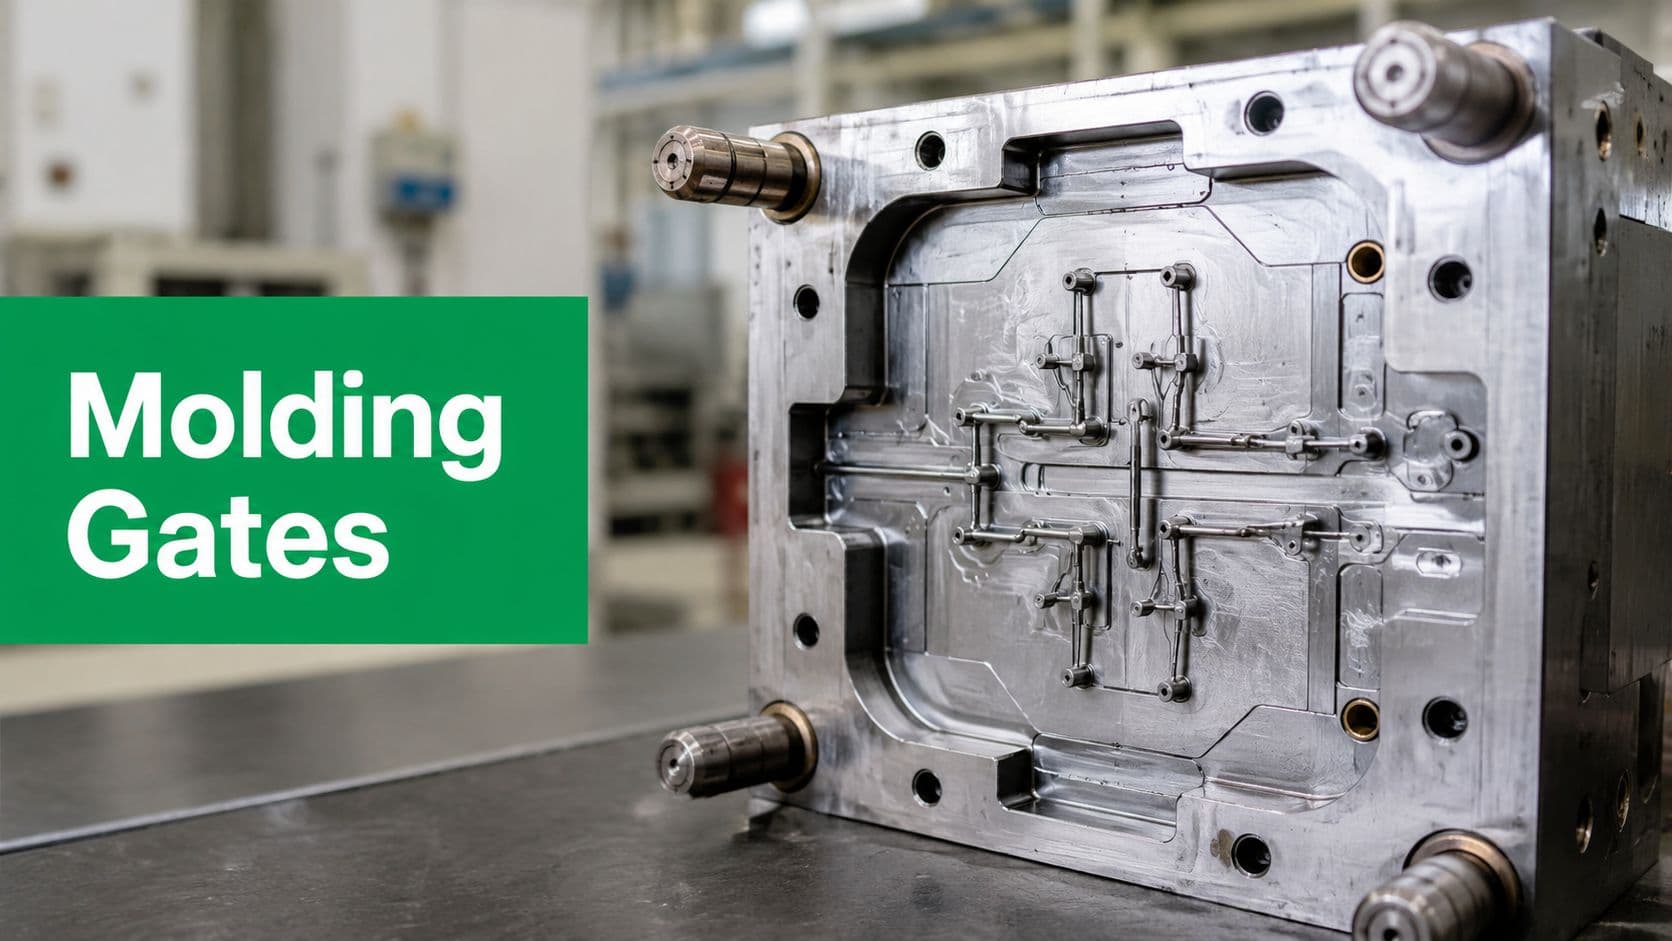
9. Rapid Tooling and Injection Mold Inserts
This is one of the most commercially useful 3D printer applications because it connects prototype thinking to actual part production. Instead of printing the final plastic part forever, teams print tooling elements or inserts to make molded parts faster during bridge production, pilot runs, and design freeze transitions.
That approach works well when the part design is mostly stable but demand hasn't yet justified full hardened production tooling. It also helps when a startup or OEM needs real molded parts for validation, customer sampling, or early market release.
Where rapid tooling earns its keep
Printed inserts can make sense for low-volume molded parts, geometry validation in a molding workflow, and transitional programs where steel tooling would be too slow or too expensive too early. In these cases, additive supports the broader manufacturing path instead of competing with it.
For buyers comparing process routes, the useful question usually isn't “printing or molding?” It's “where does each process belong in the timeline?” That's the practical difference behind how injection molding and 3D printing fit different production stages.
Design around the insert, not just the part
Rapid tooling only works when the mold insert is treated as a constrained manufacturing component, not just as a negative version of the final part. Draft, venting, gate behavior, cooling, ejection, and local stress all matter. Teams that ignore those details usually blame the process when the issue is really poor tool design.
Good practice includes:
- Keep detail realistic: Very sharp, delicate cavity features are more likely to suffer during early runs.
- Plan support and finishing carefully: Printed tool surfaces often need secondary work to become molding-ready.
- Coordinate with the molder: The insert, press setup, and production expectations have to be aligned before the first shot.
The smartest use of rapid tooling is as a bridge. It keeps a program moving while CNC machining, mold refinement, and scaled production catch up.
10. Custom Dental Prosthetics, Aligners, and Surgical Models
Dental labs were early adopters of additive because the production model already fit the process. Nearly every case is patient-specific, turnaround is short, and batch size is often one. That makes 3D printing a production tool, not just a prototyping option.
The strongest dental workflows use printing where geometry changes every case and setup time needs to stay low. Typical applications include study models, thermoforming models for aligners, implant guides, denture try-ins, and selected provisional parts. In each case, the value comes from converting scan data into a physical part quickly, with minimal tooling and very little material waste.
Here's a look at the broader dental workflow in action:
Why additive works so well in dental production
Dental labs already operate inside a digital chain. Intraoral scans, model scans, CAD design, nesting, printing, curing, and inspection all connect cleanly. That reduces handoff delays and makes it practical to produce many different geometries in the same shift.
SLA and DLP remain the standard for most dental applications because they can hold fine anatomy, margin definition, and guide features better than many general-purpose printing processes. In practice, labs often work in the low tenths of a millimeter for printed models and guides, then apply tighter inspection standards to seating surfaces, sleeve locations, and other contact features. The trade-off is familiar to any production engineer. Nominal printer resolution is only part of the result. Resin condition, orientation, support strategy, wash cycle, and cure settings all change the fit.
That is why dental printing rewards disciplined process control more than printer shopping.
Where 3D printing stops and CNC machining starts
A useful dental workflow separates geometry-driven work from material-driven work. Printing is usually the better choice for patient-specific forms that need speed. CNC machining is usually the better choice for final restorations and components where surface finish, wear resistance, and long-term dimensional stability matter more than geometric freedom.
A practical split often looks like this:
- 3D printing: diagnostic models, aligner models, surgical guides, denture try-ins, and some denture base workflows
- CNC machining: zirconia crowns and bridges, titanium bases, metal interfaces, and restorations that require stronger long-term material performance
- Hybrid path: print the model or surgical guide first, confirm fit and treatment plan, then machine the final restoration or interface-critical component
This is the part buyers often miss. Additive does not replace the mill in a dental lab. It removes delay upstream and gives the machining step cleaner, case-specific input.
What shops need to control
Dental failures are usually small but expensive. A guide may seat with slight rock. An aligner model may shrink enough to affect tray pressure. A provisional may fit the prep but miss contacts. None of those problems are cosmetic. They create remake cost, chairside delay, and clinician frustration.
Good labs control the full workflow, not only the printer:
- Track resin handling: lot history, storage conditions, mixing practice, and expiration windows affect repeatability
- Validate orientation by part type: the fastest orientation is not always the one that holds margins or guide surfaces best
- Inspect functional geometry first: seating, contacts, sleeve position, and occlusion matter more than visual surface quality
- Use the right material for the job: model resins, guide resins, try-in materials, and long-term intraoral materials have different limits
- Check the downstream requirement: if the printed part will drive thermoforming, casting, or CNC finishing, inspect the dimensions that matter to that next step
Dental manufacturing shows 3D printing at its most practical. It shortens lead time on patient-specific work, handles one-off geometry efficiently, and fits cleanly into a production path that still depends on CNC machining for many final parts.
10 3D Printer Applications Comparison
The table is useful as a first filter, but real selection work starts after it. A printed part can shorten design cycles, reduce fixture cost, or get a patient-specific geometry into testing fast. It can also create avoidable rework if the process is chosen without regard to tolerance stack-up, surface finish, heat, wear, sterilization, or the machining steps that follow.
Across these ten applications, the practical question is consistent. Use 3D printing where geometry changes often, part count is low, internal features are hard to machine, or speed matters more than perfect finish. Use CNC machining where the job depends on tighter tolerances, stable sealing faces, bearing fits, thread quality, wear resistance, or predictable long-run repeatability. Many of the best workflows use both. Print early to prove form and function, then machine the surfaces and production features that carry the final requirement.
A simple rule helps. If the part's value comes from shape complexity, additive usually deserves a close look. If its value comes from material behavior, surface integrity, and tight dimensional control over time, machining usually takes the lead.
| Application | Implementation complexity 🔄 | Resource requirements ⚡ | Expected outcomes 📊 | Ideal use cases 💡 | Key advantages ⭐ |
|---|---|---|---|---|---|
| --- | ---: | --- | --- | --- | --- |
| Medical Device Prototyping and Custom Implants | High, regulatory validation, extensive post‑processing | Biocompatible SLA/SLS materials, ISO 13485 partners, CMM & sterilization workflows | Patient‑specific implants/guides; fine detail; clinical validation 📊 | Custom implants, surgical guides, pre‑op models | Rapid time‑to‑clinic; complex geometries; full traceability ⭐ |
| Automotive Functional Prototypes and Assembly Fixtures | Medium, part segmentation, thermal/structural validation | SLS nylon, SLA resins, thermal & NVH testing, CNC finishing | Functional fit and thermal testing; faster design iterations 📊 | Under‑hood parts, fixtures, air ducts, jigs | Cuts iteration time; cost‑effective fixtures; one‑piece assemblies ⭐ |
| Custom Electronics Enclosures and Connectors | Low–Medium, thermal/EMI design considerations | Conductive resins, carbon‑filled nylon, multi‑material printing | Functional enclosures with fit and thermal validation; typical prototype tolerances around ±0.3 mm 📊 | IoT housings, connector prototypes, PCB fixtures | Eliminates mold costs; rapid market testing; integrated features ⭐ |
| Robotics Brackets, Gears and Assemblies | Medium, kinematic validation & wear testing | SLS/SLA materials, motor/drive testing, iterative assembly trials | Working kinematic prototypes; weight‑optimized components 📊 | Motor mounts, gears, brackets, joint prototypes | Fast mechanism iteration; weight savings; custom gearing ⭐ |
| Aerospace Component Brackets, Ducts, Interiors | High, strict certification & material constraints | Aviation‑compliant materials (UL94), traceability, FEA & testing | Lightweight, monolithic prototypes; reduced part count for interiors 📊 | Cabin fixtures, ducts, non‑structural fittings | Lower assembly count; complex internal geometries; mass reduction potential ⭐ |
| Fiber Optic & Photonics Alignment Fixtures | High, fine tolerances and thermal control | High‑precision SLA, CMM inspection, temperature‑controlled environment | Optical alignment repeatability; precise datums 📊 | Fiber alignment, optical benches, test rigs | Fast iteration before precision-machined final tooling ⭐ |
| Metrology Calibration Standards & Inspection Fixtures | Medium, traceability and environmental control | Metrology‑grade SLA resins, CMM calibration, climate‑controlled storage | Custom calibration blocks and fixtures with documented repeatability 📊 | CMM fixtures, go/no‑go gauges, inspection tooling | Lower cost than steel; rapid custom fixture production ⭐ |
| Custom Surgical & Orthopedic Instruments | High, sterilization validation and regulatory pathway | Sterilizable biocompatible materials, ISO 13485 manufacturers, post‑processing | Patient‑matched instruments; reduced OR time; ergonomic fit 📊 | Patient‑specific cutting guides, bespoke surgical tools | Improves procedural accuracy; on‑demand production; surgeon‑tailored designs ⭐ |
| Rapid Tooling & Injection Mold Inserts | Medium, plating, mold integration & limited lifespan | SLS/SLA cores, electroplating, injection molding partner | Fast mold turnaround; low‑volume production support 📊 | Low‑volume runs, market tests, limited editions | Shorter lead times; economical low‑volume tooling ⭐ |
| Custom Dental Prosthetics, Aligners & Surgical Models | Medium, ultra‑precision and biocompatibility | Ultra‑precision SLA, dental‑grade resins, strict QC & post‑processing | High‑accuracy crowns and aligner models; fast turnaround 📊 | Crowns, aligners, surgical guides, dental models | Personalized fit; reduced chair time; proven commercial scale ⭐ |
The strongest programs treat this chart as a routing tool inside a broader manufacturing plan. Parts start in additive to answer design questions quickly, then shift to CNC machining, molding, or validated production methods once tolerances, material properties, and unit economics become harder requirements. That is the practical value of 3D printing in production. It gives teams a faster path to the right manufacturing process, not a reason to avoid it.
From Prototype to Production Integrating 3D Printing Strategically
The biggest mistake I see with 3D printing is treating it like a standalone answer. It isn't. It's one process inside a larger manufacturing system. Used well, it shortens learning cycles, removes tooling delays, supports custom and low-volume work, and keeps projects moving when conventional supply chains slow down. Used poorly, it creates parts that look impressive in a meeting and fail in service, inspection, or production.
That distinction matters because the technology has clearly moved beyond its early identity. Autodesk notes that prototype development was the first and largest application, but one of the biggest growth areas is now replacement parts because they can be printed on demand without warehousing and recreated when they're no longer manufactured, according to Autodesk's overview of real-world 3D printing applications. That shift tells you how mature the market has become. Companies aren't only printing to learn. They're printing to operate.
Still, not every printable part should be printed. That's the decision discipline buyers and engineers need. If a part carries significant load, needs stable long-term tolerances, relies on smooth sealing surfaces, or must survive wear at contact points, CNC machining often becomes the better answer. If the geometry is complex, the quantity is low, the design is still moving, or the part benefits from customization and on-demand availability, additive usually deserves serious consideration.
The most effective programs don't choose between 3D printing and CNC machining as if one has to win. They stage them. Print the first geometry-rich versions. Test fit, routing, access, ergonomics, and assembly sequence. Then machine the features that control performance, or migrate the final design into CNC, molding, or another process when the business case is clear.
That's why a combined manufacturing partner matters. When one supplier can review a design, recommend whether it belongs in SLA, SLS, CNC milling, turning, or molding, and then inspect the result with the right metrology tools, the project moves faster with less guesswork. You don't waste time rebuilding the quoting package every time the process changes. You also avoid a common failure point, which is a printed prototype that can't transition cleanly into production because nobody planned the handoff.
For engineering teams, the strategic view is simple. Use 3D printing where speed, geometry freedom, and customization offer the greatest advantage. Use CNC machining where precision, durability, and repeatability decide success. The strongest manufacturing workflow combines both from the start instead of discovering that need after the prototype phase is over.