Master brush finishing aluminum. Explore tooling, grit, anodizing, & QC for perfect CNC part finishes.
You're probably looking at a render, a machined prototype, or a production drawing that says “brushed aluminum,” and the note feels deceptively simple. It isn't. In a CNC shop, that finish callout can decide whether a part looks premium or amateur, whether adjacent panels match, and whether a tight-tolerance feature still fits after cosmetic work.
Designers often treat brushing as a last cosmetic pass. On the shop floor, that's where trouble starts. Brush finishing aluminum is abrasive material removal, which means it affects grain direction, edge condition, surface texture, and sometimes dimensions that were already hard won in machining. It also has a direct impact on what happens next if the part will be anodized or clear coated.
If you want brushed aluminum parts that look deliberate and inspect cleanly under bright light, you have to treat brushing like a controlled manufacturing step. That means choosing the alloy carefully, preparing the surface before the first pass, controlling abrasive wear, and checking more than appearance at the end.
Table of Contents
- The drawing note is never enough
- Surface appearance and dimensional control are tied together
- Start with a surface worth finishing
- Fixturing decides repeatability
- Material choice changes the outcome
- Coated abrasives versus non-woven media
- Use the abrasive to match the part
- Tool body and machine format matter too
- Manual brushing versus machine brushing
- Angle, pacing, and abrasive condition
- When clear coats make more sense
- Visual inspection is necessary, but it isn't sufficient
- Measure what the drawing actually depends on
- Common defects and the likely fix
- Final checks before the part leaves finishing
Why Brush Finishing Is a Precision Machining Step
A product designer signs off a clean brushed face on the render. The shop then has to turn that into a repeatable process on a real aluminum part with datums, corner breaks, tool marks, and an anodize step waiting downstream. That is why I treat brushing as a manufacturing operation, not a cosmetic afterthought.
On aluminum, brushing cuts and smears the surface in one controlled direction to create a uniform grain. It is commonly specified on alloys such as 3003 and 5052 for covers, panels, and housings, and those alloy selections are consistent with common aluminum sheet guidance from The Aluminum Association alloy and application reference. For low-volume CNC parts, the same principle applies to plate and billet components. The finish is significant because it changes both appearance and function, including how the part hides handling marks and how well it accepts later protective treatment.
The tolerance impact gets ignored too often. Every brushing pass removes a small amount of material from exposed high points, softens edge definition, and can change the break on chamfers and outside corners. On a loose cosmetic cover, that may be acceptable. On a part with sealing lands, press features, or flush visual alignment to adjacent components, it has to be planned like any other stock-removal step.
The drawing note is never enough
A callout that says only "brushed aluminum" leaves the operator to decide process details that should have been defined in design or process planning. In practice, those missing details are what separate a premium finish from a part that looks inconsistent under assembly lighting.
The drawing should answer a few specific questions:
- Which faces are cosmetic and require uninterrupted grain
- Which grain direction is acceptable in the assembled product
- How much edge softening is allowed on visible and functional features
- Whether anodizing, clear coat, or another coating follows the brushing step
- Which dimensions and datum features must be protected from finish-related stock loss
If those points are not called out, variation shows up quickly, especially on small-batch CNC work where operators may need custom workholding, masking, or process-specific handling. Good fixturing is part of that control. Shops that invest in enhancing manufacturing quality with tooling usually get more consistent grain direction and fewer handling defects because the part is supported the same way every cycle.
Surface appearance and dimensional control are tied together
Brushing can blend shallow machining marks. It will not fix chatter, clamp bruising, or a face that came off the mill with heavy tool lines. I have seen teams try to save a weak surfacing operation with aggressive brushing, and the result is predictable. The grain looks uneven, the edges wash out, and the part still reads as damaged under direct light.
Material choice also affects how forgiving the process is. Softer alloys tend to smear more easily and show contamination faster, while harder tempers can hold a cleaner directional scratch if the abrasive is chosen correctly. If the design is still flexible, it helps to review the alloy against the intended finish early, especially when selecting from CNC machining aluminum material options.
The other overlooked point is coating compatibility. A brushed face that looks acceptable before anodize can turn blotchy after anodize if the grain depth is inconsistent or if local heat and pressure changed the surface unevenly. Brushing sets the topography that anodize will highlight, not hide.
My rule on the shop floor is simple. If the finish is visible, measurable, or followed by anodizing, brushing goes into the process plan with its own acceptance criteria, fixturing method, and inspection check. That is how you get a satin grain that looks intentional and still respects the part geometry.
Preparation, Fixturing, and Material Choice
The best brushed finish starts before the abrasive touches the part. Most shop-floor problems come from dirty surfaces, unstable fixturing, or unrealistic expectations about what brushing can hide.
A practical workflow for brush finishing aluminum is to pre-clean the substrate, remove prior defects with a 120–180 grit belt, refine the surface with an 80–120 grit belt, brush in one controlled direction, and then rinse away fine aluminum particles. One industry guide reports this sequence can produce roughly 0.5–1.5 μm Ra for a satin cosmetic finish, according to this brushing workflow reference.
Start with a surface worth finishing
If coolant residue, marker ink, adhesive, or oily fingerprints stay on the part, they show up as streaks or drag contamination into the abrasive. Degreasing isn't housekeeping. It's part of finish control.
Use a pre-flight checklist before brushing:
- Clean first: Remove coolant, oil, dust, and tape residue from every cosmetic face.
- Knock down defects early: Deep scratches and clamp marks need to be addressed before the final brushing pass.
- Separate cosmetic and non-cosmetic areas: Mask or protect faces that must retain a machined texture or tight edge definition.
- Rinse after brushing: Fine aluminum particles left on the surface can scratch the part during handling.
Fixturing decides repeatability
Loose hand pressure can work on one prototype. It doesn't hold up when you need matching parts. If the part shifts, tilts, or vibrates, the grain won't stay straight and scratch depth won't stay even.
On low-volume CNC jobs, simple dedicated fixtures usually beat improvised handwork. A stable backer, positive location, and support under thin walls make a big difference. If you're thinking about process repeatability at the fixture level, this overview of enhancing manufacturing quality with tooling is a useful companion to finishing work.
For designers, this also affects part architecture. Broad open faces brush well. Narrow ribs, interrupted islands, and deep pockets don't. If the finish matters, it helps to review material and geometry options early through a practical CNC materials guide such as this aluminum and machining materials reference.
Material choice changes the outcome
Not every aluminum part brushes the same way, even when the operator does everything right. Alloy and form matter. The most familiar brushed appearance usually comes from sheet or plate alloys that accept a uniform linear grain cleanly. In production guidance, 3003 and 5052 show up often because they are common candidates for this type of finish.
What doesn't work well is expecting a highly interrupted machined surface to look like a clean consumer-electronics panel. The more geometry breaks the stroke, the harder it is to keep the texture visually continuous. On functional CNC parts, good preparation often means deciding where brushing belongs and where another finish is more honest.
Clean metal, rigid support, and a realistic cosmetic target solve more brushing problems than any last-minute change in abrasive brand.
Abrasive and Tooling Selection for Aluminum
A brushed finish is set by the abrasive long before anyone argues about sheen. On aluminum, the wrong media changes scratch shape, heat input, edge break, and how much stock comes off the face. If that face later gets anodized, those differences become easier to see, not harder to hide.
For low-volume CNC parts, I choose tooling based on three questions. How much cutter pattern needs to come out. How much dimensional change the part can tolerate. Whether the finish is the final surface or a base for anodizing or clear coat. Those trade-offs matter more than brand labels.
Alloy and product form still influence the result. As noted earlier, 3003 and 5052 are common choices for brushed cosmetic work because they tend to take a clean linear grain more predictably than many highly machined billet parts. For general material context on common aluminum sheet alloys and tempers, The Aluminum Association alloy and temper designations reference is a better technical starting point than a style gallery.
Coated abrasives versus non-woven media
I separate brush-finishing tools into two functional groups.
Coated abrasive belts, sheets, and discs do the cutting work. They remove end mill witness lines, previous sanding scratches, light clamp marks, and small surface waviness. If the part still shows machining pattern under direct light, coated abrasive is usually the first useful step.
Non-woven wheels and pads refine the surface after that cut. They blend peaks in the scratch pattern, reduce the harshness of the line, and leave a more forgiving satin appearance. They are useful for cosmetic tuning, but they are slow at removing real machining marks.
That distinction matters for tolerance control. A coated belt on a hard platen can move dimensions enough to affect a slip fit or flatten a designed edge radius. A non-woven wheel usually removes less material, but it can roll edges faster than people expect because the contact is compliant.
Use the abrasive to match the part
The tool should match the geometry, the cosmetic target, and the amount of stock you can afford to lose.
| Abrasive Type | Typical Use | Common Format | Resulting Finish | Best For |
|---|---|---|---|---|
| Coated abrasive, coarse to medium | Stock removal and grain establishment | Belt | Strong, defined linear grain | Removing visible machining marks on broad flat faces |
| Coated abrasive, medium to fine | Controlled directional finishing on smaller areas | Disc or flap wheel | Directional grain with some blending | Exterior faces, short runs, localized prep |
| Non-woven abrasive, fine | Scratch refinement | Wheel | Softer satin texture | Final cosmetic tuning before coating |
| Non-woven abrasive, fine | Manual blend work | Hand pad | Gentle blending with light cut | Prototype touch-up, edge blending, small-area correction |
Fresh media cuts cooler and more predictably. Worn media skates, loads up with aluminum, and forces the operator to add pressure. That is when grain lines wander and local low spots show up.
Tool body and machine format matter too
Grit number alone does not control the finish. Contact mechanics do.
A wide belt over a stable platen gives the best shot at a straight, even grain on covers, bezels, and large exterior walls. A contact wheel follows shorter features better, but it also prints pressure variation into the surface. Hand pads are useful for small corrections, yet they are poor choices for setting the primary grain on a premium face because hand pressure is hard to repeat over the full length.
Handheld power tools need even more caution. A linear sander can produce acceptable prototype finishes on simple geometry if the part is fixtured well and the stroke direction is controlled. An angle grinder removes material fast, but on aluminum it can load, chatter, and cut troughs if the operator lingers. For teams comparing handheld setups before writing a shop method, this guide to compare metal work angle grinders is useful background on tool behavior.
Supplier process discipline matters too. Some shops treat brushing as bench work done at the end. Others control media type, replacement interval, contact surface, and direction as part of the routed process. For custom parts, LC Proto is one example of a supplier that offers surface finishing within CNC production, which matters when a brushed cosmetic face has to coexist with machined datums, edge requirements, and later anodizing.
The abrasive sets more than texture. It affects stock removal, edge condition, and how the part will read after coating under direct light.
Mastering Techniques for a Consistent Grain
A brushed face usually fails at the last 5 percent. The part is machined correctly, the alloy is right, the abrasive choice is close enough, and then one uneven pass leaves a dark lane that shows from across the room after anodize.
That is why I treat brushing as a controlled stock-removal step, not bench cleanup. On low-volume CNC parts, the goal is not just an attractive grain. The goal is a grain that stays straight across the whole cosmetic face without rounding edges, washing out break lines, or shifting a visible datum enough to create fit issues later. If you need a broader view of where this process sits among other metal surface finishing methods for machined parts, that context helps when you write the finish spec.
A practical starting point is a staged grit progression such as 120 → 240 → 400. Guidance collected in this brushing process reference also notes that tight control of grain direction is what separates a premium cosmetic result from a face that looks patchy under angled light.
Here's the process in visual form.

Keep the stroke honest
The cleanest grain comes from repeatable mechanics. Every pass needs the same entry, the same contact, and the same exit. If one pass starts on the part and the next starts off the edge, the difference usually prints into the surface.
On flat aluminum faces, these controls matter most:
- Declare one grain direction early: Set it from the product's final viewing direction, not from what is easiest to hold at the bench.
- Run past the part edges when possible: Starting or stopping on the face often leaves a heavier scratch band.
- Hold overlap constant: Uneven overlap creates visible lanes, especially after clear or dyed anodizing.
- Keep pressure low and repeatable: Extra force removes material faster, but it also increases scratch depth and makes tolerance drift harder to predict.
This is the trade-off designers rarely see on the drawing. The more aggressive the brushing step, the harder it is to preserve edge definition and cosmetic flatness at the same time.
Manual brushing versus machine brushing
Manual brushing still has a place. I use it for prototypes, local blend work, and parts that changed after machining and do not justify dedicated tooling. It is flexible, but it is also highly dependent on the operator. Two technicians can use the same pad and produce surfaces that look different under the same inspection light.
Machine-assisted brushing reduces that variation because motion and pressure stay more stable. Process guidance in this brushed metal finishing guide recommends keeping the same orientation on every pass, refining with progressively finer abrasives, and avoiding mid-process direction changes that create visible nonuniformity. The same guide also warns that excessive wheel speed can overheat the surface or deform brush filaments, which is a real problem on aluminum because loaded media starts smearing instead of cutting.
A short process video helps make those motion details clearer in practice.
Angle, pacing, and abrasive condition
Contact geometry matters more than many shop travelers admit. On long rectangular faces, a shallow, consistent presentation usually gives a more uniform scratch than a steep, digging contact. Abrasive suppliers also note that belt condition changes finish quality long before a worn belt looks obviously spent. The practical lesson is simple. Once the media starts loading with aluminum or cutting inconsistently, replace it before you chase defects that are really coming from the belt. For background on belt finishing practice and abrasive behavior, 3M's metalworking belt sanding guidance is a better reference than generic aesthetic finish articles.
One more point matters if the part is headed for a harsh service environment. A brushed texture can hold contamination more easily than a smoother machined face, so if the component will later be sealed for marine or wet-duty use, the finishing team should align the grain quality with the coating plan and sealing method, including options used in aluminium boat sealant technology.
If a brushed face looks patchy, check pass direction, overlap, pressure, and abrasive loading before blaming the alloy.
For low-volume CNC parts, I will usually give up a little throughput to keep the grain straight and the stock removal controlled. Rework on a cosmetic face costs more than the extra minutes saved by rushing the first pass.
Integrating Brush Finishes with Anodizing and Coatings
A brushed surface often isn't the final finish. It's the substrate that the final finish sits on. That distinction matters because anodizing, clear coats, and other sealers don't hide a weak brushing job. They preserve it, and in many cases they make the grain easier to see.

One commonly overlooked trade-off is durability. A source focused on brushed metal notes that brushing can make aluminum more prone to dirt and oxidation, and recommends clear coat or anodizing afterward to seal the surface, as described in this overview of brushed metal durability and protection.
Brushing before anodizing
If the part will be anodized, the brushing step needs to be cleaner and more consistent than many designers expect. Uneven grain, random hand blending, or embedded residue can carry through the anodized appearance. You don't get a reset once the chemistry starts.
For specification work, these points matter most:
- Brush first, protect second: The directional texture should be complete before anodizing or clear coat.
- Clean aggressively after brushing: Residual particles and shop contamination can compromise appearance.
- Define cosmetic faces clearly: Not every surface needs brushing, and selective finishing is often smarter.
- Match the finish to the use environment: Handled products need sealing more than display-only parts.
If you're reviewing finishing options at the supplier level, a broader surface finishing reference for machined parts can help frame when brushed-plus-anodized makes sense versus other textures.
When clear coats make more sense
There are cases where you want to preserve the metallic look of raw brushed aluminum without shifting too far toward a different visual effect. That's where clear coats or specialty sealers enter the conversation. The right choice depends on exposure, cleaning requirements, and whether the part lives indoors, outdoors, or in a handled humid environment. For teams comparing protective strategies in harsher aluminum service conditions, this discussion of aluminium boat sealant technology is a useful example of how sealing becomes a performance decision, not just a cosmetic one.
The practical takeaway is simple. Brushing alone can look excellent on day one. If the part will be handled, wiped, exposed to humidity, or expected to stay visually stable over time, unsealed brushing is usually the risky choice.
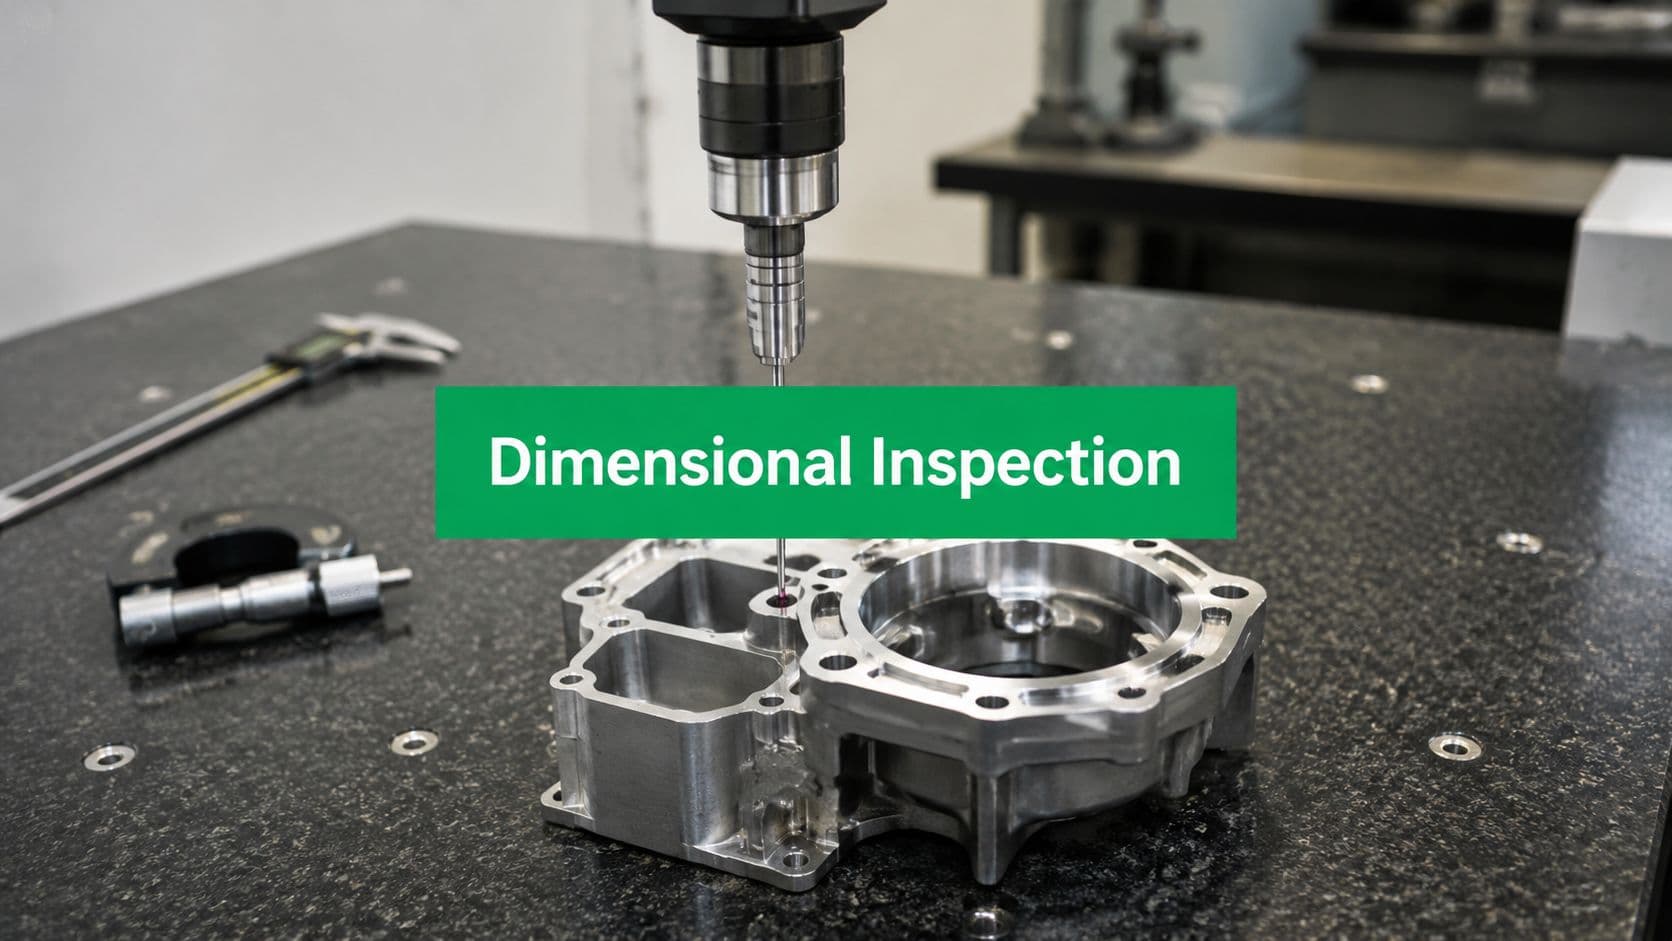
Inspection, QC, and Managing Dimensional Impact
Most brushed parts pass through inspection with a quick visual check under shop lights. That's not enough when the finish is part of the product spec. A brushed face can look acceptable at first glance and still fail in assembly because the grain wanders, the edge breaks too much, or a functional surface loses stock.

An independent machining note makes the critical point directly: brushing aluminum is abrasive removal and can alter part tolerances. That warning is especially important on functional parts where even a few microns can matter, as discussed in this machining note on finishing aluminum and tolerance effects.
Visual inspection is necessary, but it isn't sufficient
A brushed cosmetic surface should still get a disciplined visual review. That means controlled lighting, a defined viewing angle, and comparison across matched parts if the product uses multiple visible components.
A solid visual QC check includes:
- Grain direction: The texture should follow the specified orientation across the entire cosmetic face.
- Uniformity: No cloudy zones, cross-scratches, lane marks, or abrupt changes in scratch depth.
- Edge condition: Corners and chamfers should reflect the intended break, not accidental over-rounding.
- Feature transitions: Holes, pockets, and bosses shouldn't show a disrupted or random grain unless the drawing allows it.
Measure what the drawing actually depends on
If the finish matters to fit or function, measure more than thickness after the fact. Plan for brushing when you set up the machining strategy. That's especially true on parts with mating surfaces, press features, or visible stack-ups.
On critical jobs, inspection usually needs three layers:
| Check Type | What to Verify | Why It Matters |
|---|---|---|
| Visual cosmetic review | Grain direction and consistency | Customer sees this first |
| Surface texture review | Satin target and finish repeatability | Keeps appearance consistent across parts |
| Dimensional verification | Critical features before and after finishing | Prevents fit and assembly issues |
A profilometer is useful when the finish needs a measurable surface target rather than “looks good.” Earlier in the process discussion, the practical benchmark of 0.5–1.5 μm Ra was identified for satin cosmetic brushing on aluminum, which gives engineers a more useful reference than a purely visual note.
Leave room for the finish
A key DFM conversation is about allowance. If a face will be brushed, don't machine it to a zero-margin final condition and hope the finish operator can somehow avoid changing it. Brushing can remove material, soften edges, and change how sharp transitions feel and measure.
The cleanest brushed parts come from drawings that separate cosmetic intent from functional risk.
Tolerance communication matters. If a face is both cosmetic and dimensionally critical, say so. If certain features must be masked or excluded from brushing, say that too. For teams working through those trade-offs, a detailed guide to CNC machining tolerances helps frame what should stay tight, what can float, and what needs explicit finish allowance.
Troubleshooting Common Defects and Final Checks
Most brush-finish failures are easy to diagnose once you stop treating them like random cosmetic problems. The defect usually points straight back to one of four causes: poor prep, bad direction control, worn media, or too much heat.

Common defects and the likely fix
- Uneven or cloudy grain
Usually comes from inconsistent pressure, uneven overlap, or contamination left on the surface. Clean the part again, use fresh media, and re-run the face with steadier contact.
- Deep scratches that don't match the grain
Usually come from embedded debris, a damaged belt, or skipping prep. Go back to the earlier abrasive stage and remove the defect fully before refining.
- Visible start and stop marks
These show up when the tool dwells on the part edge. Enter and exit off the workpiece whenever the setup allows.
- Cross-hatching or mixed grain
This comes from changing direction during passes or reorienting the part inconsistently. Refixturing and a single declared grain direction are the fix.
- Burned or smeared appearance
That points to excessive speed, too much pressure, or loaded abrasive. Reduce aggression and replace worn media.
Final checks before the part leaves finishing
A good final review is short, but it isn't casual.
- Check the part under directional light: Random scratches show up fast when light hits along the grain.
- Compare paired components together: A single part may look fine until it sits next to its mate.
- Verify protected features stayed protected: Threads, bores, datum faces, and sealing lands should be untouched if the process required masking.
- Confirm the next operation is compatible: If the part will be anodized or coated, it has to be clean enough for that process.
A brushed finish should look repeatable, not artistic. If the result depends on who touched the part that day, the process still isn't under control.
The best brushed aluminum parts come from the same mindset that produces good machined parts. Clear intent, controlled execution, and inspection that matches the risk.