SLA 3D Printing Cost: A Practical Pricing Guide
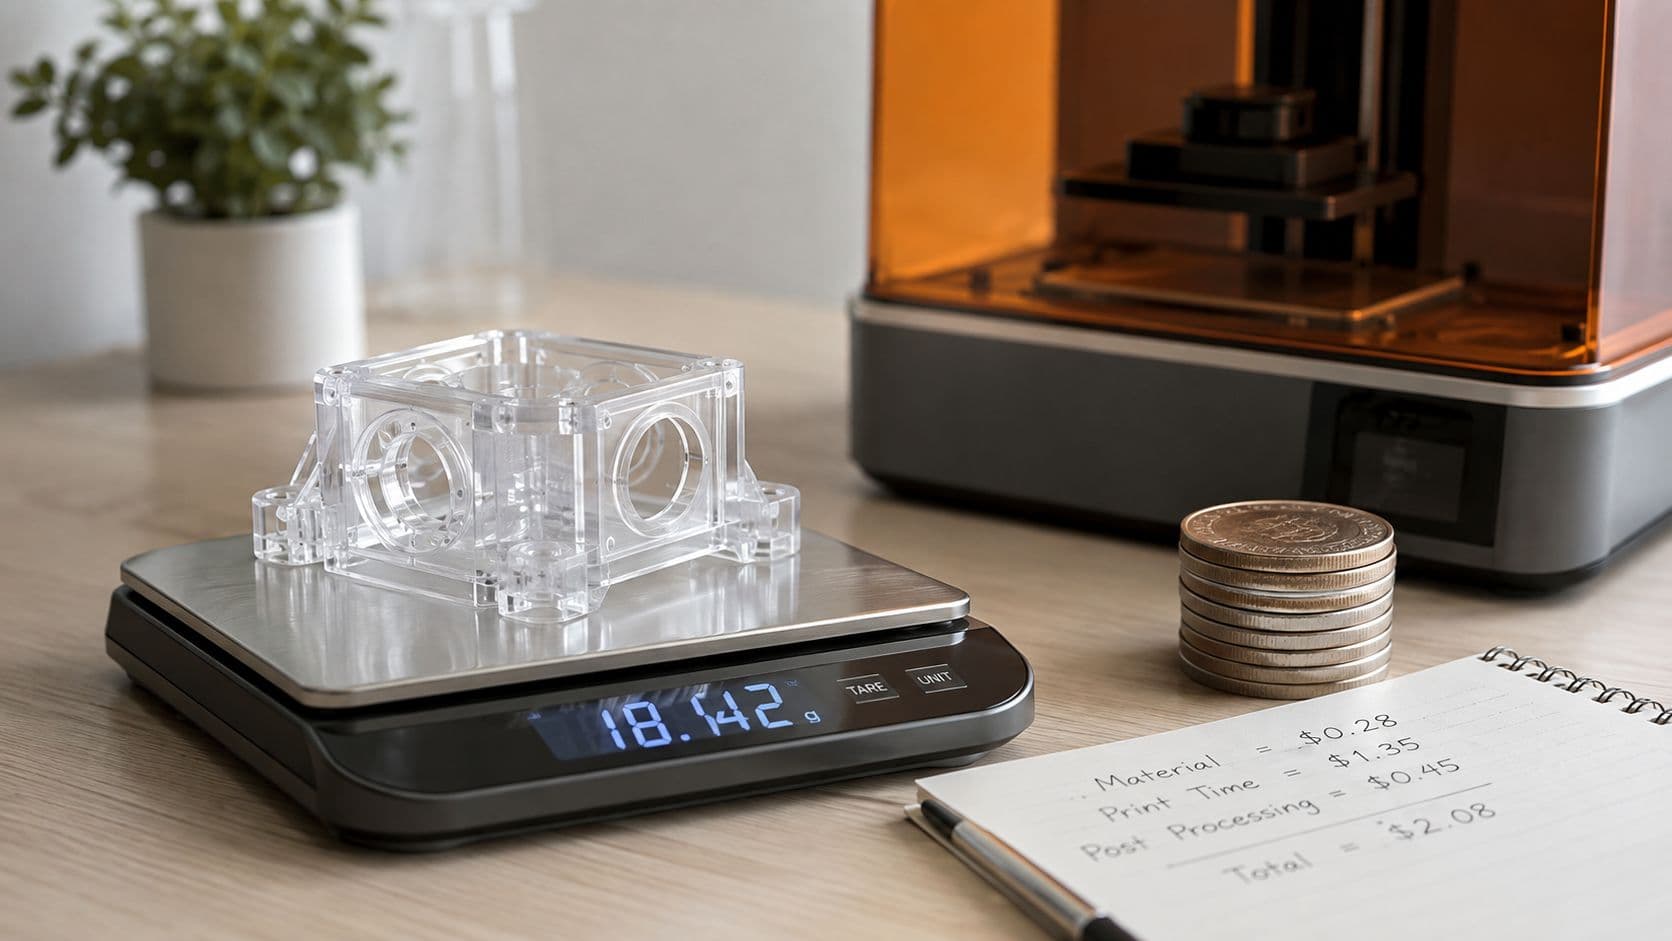
A typical small SLA prototype runs $20 to $100 per part, and specialty resin plus finishing can push the same geometry past $200. That's why SLA 3D printing cost is a finished-part question, not a resin-per-liter question.
A mechanical designer who thinks they got a $42 quote and then sees a $118 invoice learns the hard lesson fast, supports, post-curing, labor, and one bad build can matter more than the resin bottle. The market numbers back up the same reality, industrial SLA printers can run from USD 5,000 to USD 250,000, while engineering-grade resin sits around USD 100 to USD 400 per liter in one industry report, and the global SLA technology market is projected at USD 2.91 billion in 2025 and USD 21.98 billion by 2035 (market report).
Table of Contents
- What a Finished SLA Part Really Costs
- How SLA Printing Actually Builds a Part
Why machine time matters
The Six Cost Drivers Behind Every SLA Quote- What moves the invoice
Real Per-Part Estimates by Size and Geometry- Small, medium, and large behave differently
How to Calculate SLA Cost Step by Step- A workable quote formula
SLA vs SLS vs FDM vs CNC for Low Volumes- Where each process wins
Design Moves That Lower SLA Cost Fast- The cuts that actually matter
Procurement Tips, Lead Times, and Common Questions
What a Finished SLA Part Really Costs
A buyer once asked for a quote on a handful of clear resin enclosures. The shop answered with $42 per part, then the invoice landed at $118 after supports, post-curing, inspection, and a batch failure ate the margin. That is SLA 3D printing cost in practice. The quote is only the starting point.
For small SLA prototypes, $20 to $100 per part is a practical benchmark, and the same geometry climbs higher when the resin gets specialized or the cosmetic standard gets tighter. I have seen the same enclosure jump again when a buyer asks for tighter tolerances, clearer surfaces, or hand-finishing that hides layer lines. The print itself is one line item. Labor, time, and scrap do the rest.

Practical rule: if a supplier quotes only resin, you are not looking at a finished-part price, you are looking at a material estimate.
SLA economics improve when a shop fills the build platform, because machine depreciation, labor, and post-processing get spread across more parts. Resin still stays a meaningful variable input, and the market keeps that pressure visible as utilization rises (market and utilization context). A bureau quote and a desktop printer estimate can look similar on paper while being built on totally different assumptions about time, yield, and cleanup.
Compare finished-part pricing, not resin pricing. Machine time, resin grade, labor, support waste, post-processing, and failures decide the actual number. Miss any one of those and the quote will be wrong.
How SLA Printing Actually Builds a Part
SLA starts with a vat of liquid photopolymer resin. A UV laser, or in some systems a projector or masked light engine, cures the resin one thin layer at a time until the part grows out of the tank. Think of a flashlight tracing the outline of a 3D object on a thin film of honey, then freezing that shape before the platform lifts and the next layer forms.
The build platform is what holds the part in place while each layer cures. Support structures anchor overhangs and delicate features to the plate, because resin parts can't just hang in midair and hope for the best. Once the exposure is done, the part lifts, the next layer floods in, and the cycle repeats until the geometry is complete.
Why machine time matters
That layer-by-layer cycle is why machine time drives quotes so hard. Longer parts, taller builds, and finer layer settings keep the printer occupied longer, which pushes the job cost up even before anyone washes or cures the part. A printer that sits busy on one complex build can't earn from other work, and the shop has to recover that lost capacity in the price.
There are two common architectures. Top-down laser SLA scans the resin surface with a laser, while bottom-up systems such as MSLA or DLP expose layers from below the vat. In practice, the shop cares less about the label and more about throughput, surface finish, and how many parts fit on the plate without forcing extra supports or rework.
A taller part isn't just more resin. It's more exposure time, more peel motion, and more chance that the quote gets padded for risk.
That's the part buyers should focus on. Geometry, layer height, and platform loading determine how long the machine is occupied, and that occupancy is one of the biggest levers in any SLA quote. When people ask why two “similar” parts price differently, the answer is usually in the slicer, not the resin catalog.
The Six Cost Drivers Behind Every SLA Quote
The cheapest way to misunderstand SLA 3D printing cost is to focus on resin price alone. Real quotes break the job into six line items, and capacity comes first. Independent manufacturing guidance places SLA equipment at roughly $5,000 to $100,000, material at $100 to $200 per kg, labor at $20 to $40 per hour for setup and cleaning, and a representative low-volume job at $20 to $50 per part for a 0.1 kg batch-50 part case (manufacturing cost guidance).
What moves the invoice
- Machine time. This is the biggest lever on most quotes. The printer, build platform, and queue time all have to be paid for.
- Resin. Standard material is usually not the problem. Specialty grades are. Engineering, dental, medical, flexible, and high-temperature resins can run roughly 3 to 5 times standard material cost, with standard resin around $30 to $60 per liter and specialty resin around $100 to $300+ per liter (resin pricing guide).
- Labor. File prep, support generation, cleaning, curing, and inspection all take time. A part that looks simple on screen can still be expensive at the bench.
- Post-processing. Sanding, clear coat, painting, and surface refinement add real work. A clean matte prototype costs less than a showroom-clear enclosure.
- Support waste. Resin under supports never becomes part of the finished geometry, so the job consumes more material than the STL shows.
- Failures. Reprints and misbuilds are the hidden tax. Every shop prices for them.
| SLA Cost Drivers and Typical Ranges | Typical Range per Part | Share of Quote |
|---|---|---|
| Machine time | Varies by build and platform loading | Often the largest share |
| Resin | Standard to specialty grades | Material share grows with resin class |
| Labor | Setup, cleaning, inspection | Materially important on small batches |
| Post-processing | Wash, cure, sanding, coating | High on cosmetic parts |
| Support waste | A portion of cured resin becomes scrap | Moderate, geometry-dependent |
| Failed prints | Reprint overhead and lost time | Smaller on stable builds, painful on risky ones |
Service pricing examples show the spread clearly. One published analysis places entry-level SLA machines around USD 3,500 and industrial systems above USD 250,000, with typical parts around USD 20 to USD 100 depending on resin and finishing (service pricing examples). Another public pricing sheet lists SLA resin at USD 0.39 to USD 0.50 per mL, which reflects a lab pricing model rather than a hobby calculator.
The point is simple. A real quote stacks these drivers together, and the shop that explains them clearly is usually the one worth buying from.
Real Per-Part Estimates by Size and Geometry
Part size matters. Geometry matters more. Two parts with the same bounding box can sit in different price bands if one has deep cavities, thin walls, or fragile overhangs that force support redesign and extra cleanup. That is why a serious estimate for SLA 3D printing cost starts with the part profile, not the resin gram.
Small, medium, and large behave differently
A 25 x 25 x 50 mm dental-style housing in standard gray resin, batched 20-up on a Form 3-class machine, usually lands around $18 to $35 per part when support cleanup and a basic IPA wash are included. A 100 x 100 x 80 mm consumer enclosure in tough resin with sandblasting and clearcoat tends to sit in the $90 to $160 range because finish work, not print time, eats the margin. A 150 x 150 x 200 mm jigs-and-fixtures block in castable or high-temp resin can push $220 to $400 per part once post-curing and tapped inserts are part of the job.
| SLA Per-Part Cost by Part Size and Quantity | Batch Qty | Resin + Supports | Machine Time | Post-Processing | Finishing Class | Unit Cost Range (USD) |
|---|---|---|---|---|---|---|
| 25 x 25 x 50 mm housing | 1 | Low | Low | Basic | Standard | 25 to 45 |
| 25 x 25 x 50 mm housing | 5 | Low | Spread across batch | Basic | Standard | 20 to 40 |
| 25 x 25 x 50 mm housing | 20 | Lower per part | Efficient loading | Basic | Standard | 18 to 35 |
| 100 x 100 x 80 mm enclosure | 1 | Moderate | Moderate | Heavy | Premium | 120 to 160 |
| 100 x 100 x 80 mm enclosure | 10 | Moderate | Spread across batch | Heavy | Premium | 90 to 150 |
| 100 x 100 x 80 mm enclosure | 50 | Better utilization | Better utilization | Heavy | Premium | 90 to 140 |
| 150 x 150 x 200 mm fixture block | 1 | High | High | Extensive | Matte or Premium | 250 to 400 |
| 150 x 150 x 200 mm fixture block | 5 | High | Spread across batch | Extensive | Matte or Premium | 220 to 360 |
| 150 x 150 x 200 mm fixture block | 20 | High | Better utilization | Extensive | Matte or Premium | 220 to 320 |
Batch size helps because the printer, wash station, and technician are already tied up. The fixed labor gets spread over more parts, so the unit price drops even when the resin itself does not change much.
For buyers who want a broader cost framework across rapid prototyping methods, this rapid prototyping cost guide is a useful cross-check.
Where finish class changes the game
Surface finish class can add a flat premium of roughly $10 to $40 per part when a buyer asks for premium cosmetic output instead of a simple functional surface. Standard is for fit checks. Premium is for customer-facing parts. Matte is for parts that need to look clean without the extra polishing cycle.
Geometry can outrun finish class, though. A small part with fine detail is usually a good SLA candidate. A large cosmetic part that needs hand-finishing gets expensive fast, and buyers should question whether resin is really the right process if the surface spec is driving the quote.
How to Calculate SLA Cost Step by Step
A finished SLA quote has at least five cost layers. Resin is only one of them. Start with the slicer, because part volume, support volume, build time, and finishing requirements determine whether a resin-per-liter comparison means anything.

A workable quote formula
- Extract part volume. Read the solid model volume from the slicer, then include support material and any raft. For many jobs, support waste is around 15 to 25 percent of model volume.
- Price the resin. Multiply total resin mass by the selected resin rate. Standard, tough, clear, and engineering grades do not carry the same material cost. Standard resin commonly falls around $30 to $60 per liter, while specialty grades can cost far more.
- Price machine time. Use the slicer's print-time estimate and apply the shop's hourly machine rate. Include setup and loading time when the supplier bills them separately.
- Add post-processing. Washing, UV curing, support removal, and basic cleanup are production work. Put them in the quote instead of treating them as absorbed margin.
- Layer overhead and risk. Inspection, packaging, consumables, equipment ownership, and failed-print exposure belong in the finished-part price.
For a 60 x 40 x 20 mm enclosure in tough clear resin, ordered as a batch of 10, the workflow is direct. Take the slicer's base resin mass, add support waste, multiply by the resin rate, then add machine time, finishing, inspection, packaging, and overhead. The geometry changes the result, but the calculation stays the same.
The buyer should request these line items separately. A supplier quoting only resin may appear cheaper while leaving out labor, failed builds, or finishing.
Quote the build, not the bottle. A calculation that ignores cleaning and failure risk is not procurement-ready.
Labor often controls the result on small batches. Setup, cleaning, support removal, and inspection can consume meaningful shop time before delivery, so the finished-part total can exceed raw resin cost by a wide margin when the geometry is difficult or the finish specification is demanding. Use the supplier's actual labor rate and recorded job time rather than accepting a material-only estimate.
SLA vs SLS vs FDM vs CNC for Low Volumes
SLA is not the cheapest process. It's the process you pick when detail, finish, and repeatability matter more than the lowest possible ticket. For the same 80 x 50 x 30 mm functional prototype, the cost picture changes with quantity and process choice.
Where each process wins
| Low-Volume Cost Comparison: SLA vs SLS vs FDM vs CNC | Material | Surface Finish | Tolerance | Qty 1 Unit Cost | Qty 10 Unit Cost | Qty 50 Unit Cost | Best Fit |
|---|---|---|---|---|---|---|---|
| SLA | Resin | Superior cosmetic finish | Tight | 20 to 60 | 20 to 60 | 20 to 60 | Detail-critical cosmetic parts |
| SLS | Nylon powder | Rougher surface | Good | 40 to 120 | 40 to 120 | 40 to 120 | Functional assemblies needing toughness |
| FDM | PLA or ABS | Visible layer lines | Looser | 5 to 25 | 5 to 25 | 5 to 25 | Budget jigs and visual prototypes |
| CNC | Machined ABS or 6061 aluminum | Dependent on finishing | Strong | 80 to 300 | Drops with setup spread | Drops sharply above 25 | Tight tolerances, certification, or volume |
SLA wins when the buyer cares about cosmetic quality, transparency, or fine detail under low volume. SLS is the better call for functional assemblies because it brings support-free builds and tougher part behavior, even if the surface is rougher. FDM wins when the part is a visual mockup or a cheap fixture and nobody is paying for cosmetic perfection.
CNC is where procurement should get serious. It costs more at low volume because programming and setup are real work, but it starts making sense when tolerances, material certification, or quantity change the math. If you need the cleanest surface and the part count stays low, SLA is often the right middle ground. If strength and finish both matter, compare SLA to SLS before you sign off.
For a broader process comparison, this SLA vs SLS guide is a useful reference point. The decision rule is blunt, choose SLA for detail-first parts, SLS for functional durability, FDM for cheap prototypes, and CNC when the job needs metal, traceability, or tighter production control.
Design Moves That Lower SLA Cost Fast
The fastest cost cuts happen before the printer starts. Orientation is the biggest lever, because a tall thin part printed upright can chew through time and supports, while the same part rotated flat may print faster and cleaner. If I only get two design changes before quoting, orientation and support reduction are usually the ones I ask for.

The cuts that actually matter
- Optimize part orientation. Rotating a tall feature flat can cut build time by 30 to 50 percent and reduce support material significantly.
- Hollow solid parts. Drainage holes save resin and cut weight, which matters on larger enclosures and display parts.
- Combine models. Filling one build plate with multiple parts spreads setup and machine time across more units.
- Simplify details. Tiny features, undercuts, and decorative ribs often cost more than they're worth in support and failure risk.
Wall thickness matters too. Parts below 1.0 mm force slower curing and more supports, while moving walls to 1.2 to 1.5 mm often recovers machine time and reduces hassle. That change doesn't just save material, it lowers the odds that the operator has to babysit the build.
Batching is where procurement people leave money on the table. A platform loaded to 70%+ utilization is a very different quote from one part per plate, because the fixed work gets spread around. If the geometry permits it, nesting multiple parts together is one of the cleanest ways to lower the effective per-unit cost.
If you're sending geometry to a supplier, this file-type guidance is a useful reminder to keep the model clean before you ask for numbers. My rule is simple, fix the easy design issues first, then ask for a quote. Don't pay a premium for geometry that could have been oriented better in five minutes.
Procurement Tips, Lead Times, and Common Questions
Treat one part as a valid order, but don't expect one-part pricing to be pretty. Per-unit cost drops as you move to 5, 10, and 25 pieces, because setup and handling get spread out. Standard SLA lead times usually run 5 to 8 business days, and expedited 2 to 3 day service often adds 30 to 60 percent to the price.
Ask for a quote that separates machine time, resin, post-processing, and finishing. If the supplier won't itemize, you can't compare bids. Also ask whether the resin has the certifications your application needs, such as ISO 10993 or UL 94 V-0, and confirm whether washing and UV post-cure are included.
If a supplier won't tell you what's included, assume the missing steps will show up on the invoice later.
A few questions come up repeatedly. Resin waste is usually treated as part of the build overhead, and many quotes don't call it out separately. Minimum order spend often appears as a setup fee rather than a part charge. Failed prints are sometimes billed, sometimes absorbed, but you should ask before you send the first file.
Use this checklist before you place an order:
- What's included in the part price? Ask about supports, wash, cure, and inspection.
- What resin are you quoting? Standard, tough, clear, dental, or high-temp changes the economics.
- What is the lead time? Standard and expedited service should be separated clearly.
- What happens if the print fails? Clarify who carries the risk.
- Can you itemize by batch size? You want a quote that shows where the breakpoints are.
If you want a supplier that can price SLA alongside CNC, sheet metal, molding, and finishing in one workflow, FIRMFG provides SLA 3D printing quotes from uploaded CAD files and can return a free quote within 24 hours. For teams trying to compare prototype options without guessing at hidden cost, that kind of cross-process quoting saves time and makes the decision cleaner. Visit FIRMFG and send the part file with your finish, quantity, and lead-time target so you can get a real number instead of a resin-only estimate.