Urethane Casting Services: A Practical Guide for Engineers
You've got a CAD model that's close, the team wants something people can hold by next week, and procurement is asking whether you really need steel tooling yet. That's the exact moment urethane casting services earn their keep. They're not a shortcut to mass production, they're the practical bridge when you need production-like parts without committing to hard tooling too early.
Table of Contents
How the Vacuum Casting Process Works- From master pattern to mold cavity
Material Selection and Mechanical Properties- Match the resin to the validation question
Urethane Casting vs Injection Molding and 3D Printing- Process Selection Matrix
Realistic Lead Times and Production Economics- Throughput is the real bottleneck
Design for Manufacturability Guidelines- Build the geometry for release
Selecting a Manufacturing Partner and Quality Control- What to ask before you send the RFQ
The Strategic Role of Urethane Casting in Product Development
A typical program hits this process when the design is still moving but the physical part has to stop being hypothetical. You may need 50 or 60 high-fidelity housings, a handful of cosmetic samples, or enough parts to run fit checks, user reviews, and limited functional testing. In that bracket, urethane casting often becomes the default because it gives you real parts without the economics and schedule burden of a steel mold.
Why engineers keep coming back to it
The process is also known as vacuum casting or polyurethane casting, and its modern roots are usually traced to silicone-mold plastic vacuum casting work in the 1960s, then vacuum-casting machines appearing in Japan in the 1970s, with broader maturation in the 1980s as thermoset resins improved source timeline. That history matters because it explains why the process settled into a dependable role for rapid prototype replication in automotive R&D and later broader engineering use.
Practical rule: if your question is “Can we validate form, fit, finish, and early function before committing to expensive tooling?”, urethane casting is usually the right conversation.
The process sits between 3D printing and injection molding in a very specific way. It's more faithful to a production-looking part than most printed surfaces, but it doesn't pretend to be a high-volume method. The short mold life is part of the design, not a flaw, because it keeps upfront tooling cost low and makes the method useful for bridge programs, pilot builds, and appearance parts service overview.
That's why product teams use it to answer questions that don't need permanent tooling yet. Will the enclosure close cleanly? Does the snap fit survive repeated assembly? Does the surface still look right after paint or tint? Those are the kinds of questions that become expensive if you ask them after hard tooling is already cut.
How the Vacuum Casting Process Works
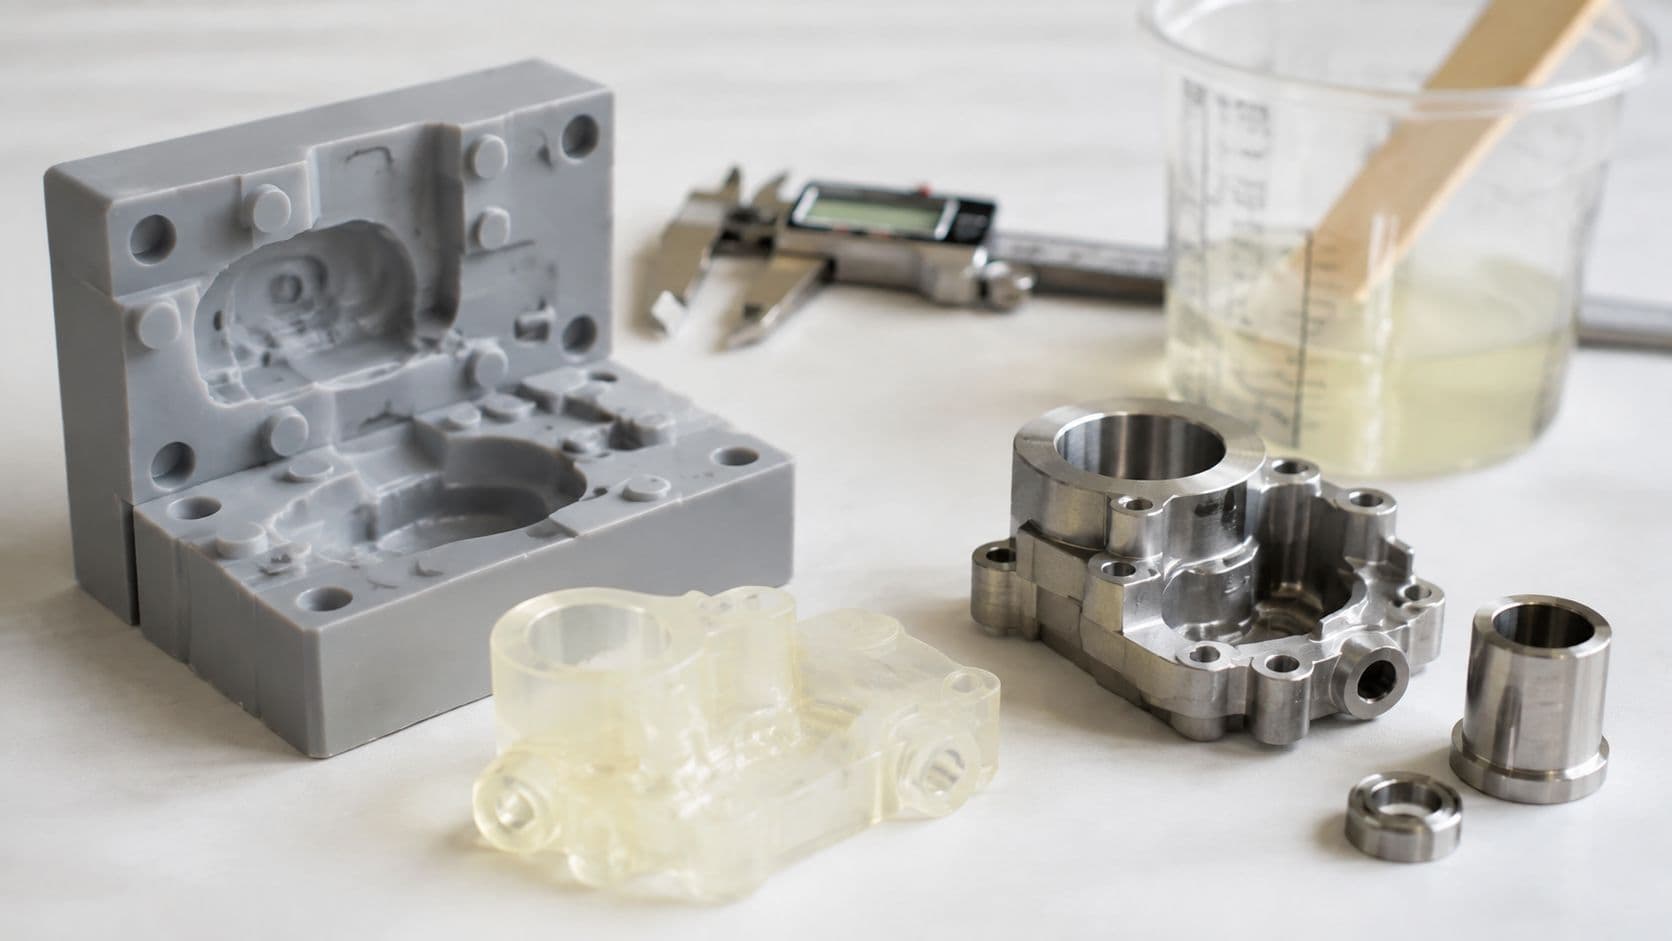
The workflow starts before any silicone is poured. A master pattern is made first, usually by SLA 3D printing or CNC machining, because the mold can only reproduce what the master already gets right. If the master carries layer lines, draft mistakes, or a bad surface texture, the cast parts will faithfully copy those problems.
From master pattern to mold cavity
The master is fixed inside a mold box, then liquid silicone is poured around it and cured. After the silicone sets, the mold is split, the master is removed, and the cavity is ready for resin. That is the physical core of the process, and it explains why good urethane parts are still a hand-built result rather than an automated commodity.
The vacuum step is what makes the parts more reliable than a casual pour. Resin is mixed, degassed, and pulled into the mold under vacuum so air bubbles don't get trapped in thin features or cosmetic faces. If the part has fine ribs, pocketed geometry, or visible outer surfaces, that degassing step is a big part of why the result looks intentional instead of hobby-grade.

Open-face versus closed-mold choices
An open-face mold is simpler and works well for parts with one dominant cosmetic side or geometry that releases cleanly. A closed-mold approach supports more complex shapes and better feature definition on both sides, but it takes more care in parting lines, alignment, and venting. The more geometry you ask the mold to capture, the more manual setup you're asking the shop to manage.
Good cast parts are rarely “just poured.” They're assembled from pattern quality, mold design, degassing discipline, and release strategy.
That's also why the work is usually quoted as a service rather than a simple material purchase. There's pattern prep, mold making, resin handling, cure control, trimming, and often a finishing pass. If you want to see how a production-oriented shop organizes that workflow, the process map at FIRMFG's vacuum casting page is a useful reference point.
Material Selection and Mechanical Properties
The word “urethane” hides a lot of real material variety. A rigid cast polyurethane can be selected to feel closer to an ABS-like housing, while other formulations can behave more like polycarbonate-like, nylon-like, or flexible elastomer parts depending on the resin system. That flexibility is a strength, but it also means the material choice has to be tied to the test you're running, not just the CAD file.
Match the resin to the validation question
If the team is checking snap fit retention, a hard resin may be more useful than a soft one. If the part is a gasket, boot, grip, or seal, a flexible formulation matters more than cosmetic hardness. For appearance models, clear or tinted resins can help, but the finish still depends heavily on the master and the mold surface.
The harder mistake is assuming the cast resin is a direct stand-in for an injection-molded engineering thermoplastic. It can mimic the look, and sometimes enough of the handling feel to support a prototype review, but the mechanical behavior is still governed by a different chemistry. That distinction matters most in assemblies that will see load, temperature cycling, or repeated fastening.
Shrinkage is the hidden precision risk
Shrinkage is where many schedules get surprised. One technical bulletin reports linear shrinkage as low as 0.0002 in/in for some castable urethanes, while other polyurethane systems can reach about 0.0173 in/in; service guidance often uses a typical process allowance of roughly +0.15% and still recommends checking the exact resin datasheet shrinkage guidance. That spread is why a generic “urethane casting” spec isn't enough for precision work.
Thermal expansion during cure can shift dimensions in the mold, so the effect shows up first in snap fits, thin walls, sealing landings, and precision interfaces. Loose-fit prototypes are forgiving. Cosmetic housings and mating parts aren't.
Design insight: the tighter the interface, the more the resin datasheet and mold compensation strategy matter. If the interface is cosmetic only, the risk is lower. If it mates to another part, it isn't.
For a process overview and material families commonly used in vacuum casting, FIRMFG's polyurethane casting page is a practical reference, especially if you're comparing rigid, flexible, and clear resin options for short-run builds.
Urethane Casting vs Injection Molding and 3D Printing
The wrong comparison is usually made on price alone. The right comparison starts with what you're trying to learn from the part. If you need a physical object quickly and the design may still change, urethane casting is a strong fit. If you need final production material behavior or large quantities, injection molding starts to win. If you need geometry fast and surface quality is secondary, additive methods can make more sense.
Process Selection Matrix
| Feature | Urethane Casting | Rapid Injection Molding | SLA/SLS 3D Printing |
|---|---|---|---|
| Best use | Bridge parts, appearance models, low-volume validation | Higher-volume pre-production and repeatable output | Fast geometry checks and complex internal shapes |
| Tooling burden | Silicone mold, low upfront tooling | Rigid tool, higher tooling burden | No traditional tooling |
| Surface quality | Strong cosmetic finish potential | Strong and repeatable | Depends on process, often more visible layer or powder texture |
| Material behavior | Polyurethane systems that approximate some production plastics | Production thermoplastics | Photopolymer or powder-based behavior, process-dependent |
| Volume fit | Low-volume and bridge runs | Larger repeat runs | One-offs through short batches |
| Source for process planning | Vacuum casting process reference | Low-volume injection molding overview | Process-specific printer or service guidance |
The table above is the decision map. A cast urethane part is usually better when the team cares about appearance, moderate functional testing, and schedule control without hard tooling. Injection molding becomes the better long-term answer when volume rises and the part has to live in its final production material.
3D printing sits in a different lane. It's valuable for geometry, iteration, and some functional testing, but if the team needs a finished-looking enclosure or a material feel that resembles a molded part, printed prototypes can fall short. That's especially true when buyers, clinicians, or customers are evaluating the part by hand.
The crossover point isn't a single universal number because geometry, finish requirements, and resin choice all shift the economics. The useful question is simpler, do you need the fastest good part, or do you need the first version of the final process? Urethane casting usually answers the first one better.
Realistic Lead Times and Production Economics
“Rapid” is a fair label for the first sample, but it gets abused when teams start talking about a batch of parts. A silicone mold typically produces only about 10 to 25 parts before replacement, though some sources report up to 50 parts depending on geometry, mold material, and process conditions service overview. That short tool life is the center of the economics, because every new mold adds labor, setup, and schedule risk.
Throughput is the real bottleneck
Production guidance also notes that standard RTV silicone molds often land around 25 to 50 parts per mold, while higher-temperature silicone systems can extend life to roughly 300 to 500 parts under favorable conditions mold life guidance. That sounds like a wide range, and it is. In practice, the resin, wall thickness, undercuts, and cure profile decide whether a mold is merely short-lived or fragile.
A separate service note says production-level urethane casting commonly takes about 3 weeks, and that a single silicone mold often yields only 1 to 10 parts per day depending on resin and geometry, because cure time itself can't be meaningfully shortened throughput guidance. That's the piece many buyers miss. The first part can arrive quickly, but the batch doesn't scale like an automated line.
What this means for planning
A small run can still be economical because tooling cost stays low, often in the $200 to $1,000 range with per-part pricing commonly around $10 to $100 service overview. But once quantities rise beyond a few dozen parts, replacement molds start driving cost, schedule slip, and part-to-part consistency issues. The work stops being about a single mold and becomes about managing mold turnover.
Procurement teams should treat urethane casting as a batch process with a maintenance cycle, not a one-time tool build.
That mindset helps when NPI dates are tight. If you need a small bridge run, the economics are sensible. If you need long, uninterrupted output, the process starts to work against you.
Design for Manufacturability Guidelines
Good cast parts are designed to release cleanly, not forced out by operator patience. Wall geometry, draft, and undercut strategy all matter because silicone is forgiving in some ways and unforgiving in others. The part may not need steel-tool draft rules, but it still needs release logic.

Build the geometry for release
Keep wall thickness controlled, and avoid sudden transitions that trap resin or create sink-like visual distortion. Design draft into vertical surfaces so the mold opens without tearing the part or damaging a delicate edge. If you're working on snap fits or cosmetic housings, remember that the material choice and shrinkage allowance matter as much as the sketch line.
Undercuts are where the cost starts climbing. Some can be handled with multi-part silicone molds or soluble features, but every added complication increases hand labor and risk. If the feature can be simplified without hurting function, simplify it before you ask the shop to engineer around it.
- Wall Thickness: Keep thickness consistent enough for predictable fill and cure behavior.
- Draft Angles: Add release-friendly draft on vertical faces so the part doesn't fight the mold.
- Undercuts: Use them sparingly, because they can require extra mold complexity and more manual work.
Surface texture also transfers from the master pattern, which is useful when the master is deliberate and painful when it isn't. Gate placement matters for the same reason. If the witness mark lands on a hidden face, it's a small issue. If it lands on a branded front bezel, it becomes a design problem.
Selecting a Manufacturing Partner and Quality Control
A good partner does more than pour resin. They catch bad geometry before the mold is made. That matters because the cost in urethane casting often shows up in rework, not in the pour itself, especially when the first sample exposes a missed tolerance, a difficult release feature, or a shrinkage assumption that was too optimistic. A solid supplier should give early DFM feedback and point out what will be expensive to mold, paint, or inspect.
What to ask before you send the RFQ
Look for traceable quality systems, especially ISO 9001 and ISO 13485 if the parts touch medical or regulated workflows. Ask whether the shop has in-house metrology such as CMM inspection, because that is where dimensional claims become evidence instead of reassurance. If the part needs a branded finish, ask about tinting, painting, polishing, and whether the process can support the appearance you need.
If a supplier can't explain how they control shrinkage, inspect features, and handle cosmetic finish, they're not really quoting the job. They're guessing at it.
Ask how they handle post-processing too. Cast parts often need trimming, paint, inserts, or other finishing steps, and those steps can change the schedule as much as the mold itself. A partner that can coordinate the full path from mold to finished part reduces handoff errors and keeps the prototype loop tighter.
If your project needs casting alongside machining, additive work, or later low-volume production, FIRMFG is one option to evaluate because it combines CNC, printing, molding, and casting under one roof with ISO 9001 and ISO 13485 quality systems. That kind of mixed-process support helps when the first cast part is only one step in a broader NPI plan.
If you're deciding whether a urethane cast part belongs in your next build, send your CAD, target volume, and key interfaces through the contact or quote page and ask for DFM feedback before you commit to tooling. A short review can save you from a mold that releases poorly, a tolerance stack that drifts, or a schedule that slips because daily throughput was never realistic in the first place.