Type 2 vs Type 3 Anodizing: Which Coating to Specify
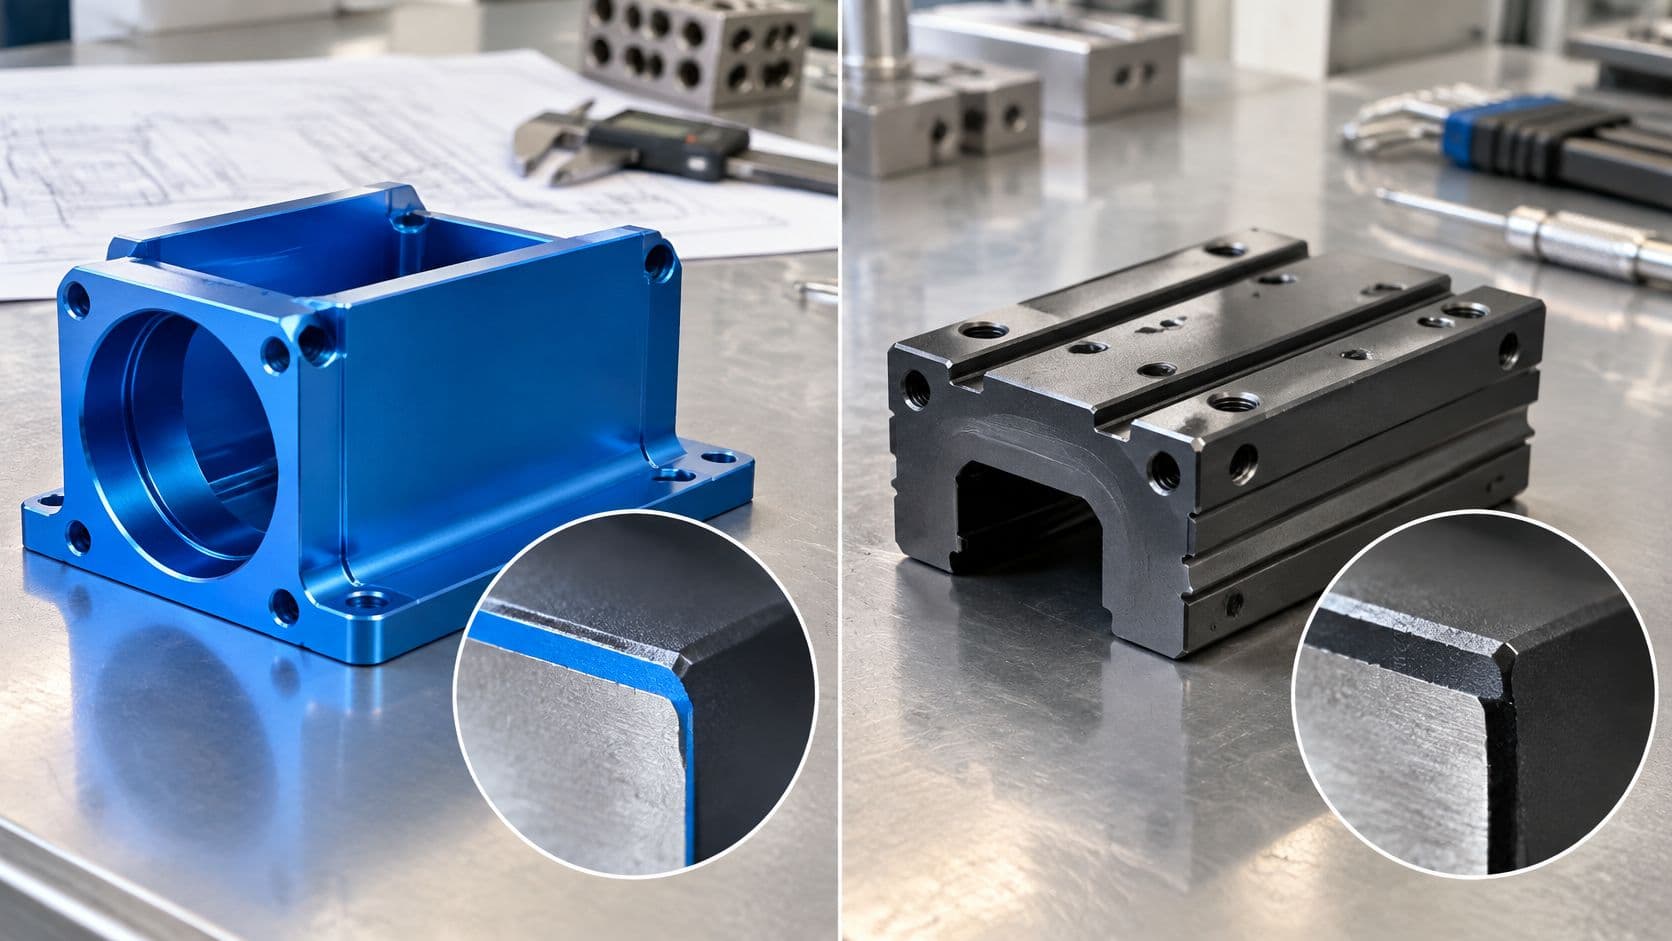
The most repeated piece of advice about anodizing is also the laziest. If the part matters, call out Type 3 hard coat and move on, because hardness reads as quality on a drawing and the price difference per square foot looks small next to the cost of a rejected lot. Then the parts come back with bores that no longer accept a bearing, threads that no longer take a nut, and a housing that doesn't match the one beside it.
Type 3 buys wear resistance. It does not automatically buy corrosion resistance, and it charges for its thickness in dimensional change, masking work, limited color and slower processing. Choosing between type 2 vs type 3 anodizing is a drawing-level decision about how far the coating moves each surface, what that surface rubs against, and which test proves the finish worked.
Table of Contents
- Type 2 and Type 3 Anodizing Side by Side
- How Coating Thickness Changes Your Part Dimensions
Work one bore through the numbers
Wear and Hardness Compared Across Both Finishes- Hardness is not the same as wear life
Corrosion Resistance and Why Sealing Decides It- What sealing actually changes
Cost, Color and Appearance Trade-Offs- What drives the price
Choosing Type 2 or Type 3 for Each Application- Three parts, three answers
Confirm the Coating Type on Your Drawing
Type 2 and Type 3 Anodizing Side by Side
The one-sentence answer: Type 2 is conventional sulfuric-acid anodizing, chosen for appearance, color and moderate corrosion protection. Type 3 is hard anodizing, chosen when the surface has to survive sliding contact, abrasion and repeated handling. Type 2 and Type II name the same finish, and Type 3 and Type III do too.
Neither is a coating laid on top of the metal. Both convert the aluminum surface itself into aluminum oxide, so the layer is part of the part and cannot peel the way paint can. That single fact explains why anodizing moves dimensions instead of adding a film with a clean edge, and why the thickness range is the number that matters most on the print.
The MIL-PRF-8625 coating ranges published by Anoplex set each type by thickness: Type II from 0.00007 to 0.0010 inch (about 1.8 to 25.4 micrometers) and Type III from 0.0005 to 0.0045 inch (about 12.7 to 114.3 micrometers). Both categories sit inside that U.S. military specification, which evolved from MIL-A-8625, and the same reference notes that Type III gives improved corrosion protection over a conventional anodic coating because its greater thickness and coating weight build a more substantial oxide layer.
The table below is the reference the rest of this article explains.
Type 2 vs Type 3 anodizing at a glance
| Criteria | Type 2 (Type II) | Type 3 (Type III) |
|---|---|---|
| Standard basis | Conventional sulfuric-acid anodizing under MIL-PRF-8625 | Hard anodizing under MIL-PRF-8625 |
| Coating thickness | 1.8–25.4 µm (0.00007–0.0010 in) | 12.7–114.3 µm (0.0005–0.0045 in) |
| Default thickness if unspecified | No default in the cited data, so name the thickness yourself (10–20 µm suits most decorative work) | 50.8 µm ± 10.2 µm (0.002 in ± 0.0004 in) |
| Surface hardness | About 200–300 HV | About 400–500 HV |
| Wear resistance | Adequate for general handling | High, for sliding contact and abrasion |
| Color options | Wide range of dyed colors | Limited, darker and less color-consistent |
| Corrosion protection | Good for general and moderate exposure | Improved over Type 2 when sealed; test when sealing is specified |
| Typical use | Housings, covers, brackets and visible parts | Guides, actuators, fixtures and contact surfaces |
Read it as a starting point, not a purchase order. Pick Type 2 when appearance, color range and general corrosion protection lead. Pick Type 3 when abrasion leads. Then finish the specification, because "anodized" on its own is not a specification: type, class, target thickness, sealing, color and dimensional allowance all have to be on the drawing before the parts reach the tank.
How Coating Thickness Changes Your Part Dimensions
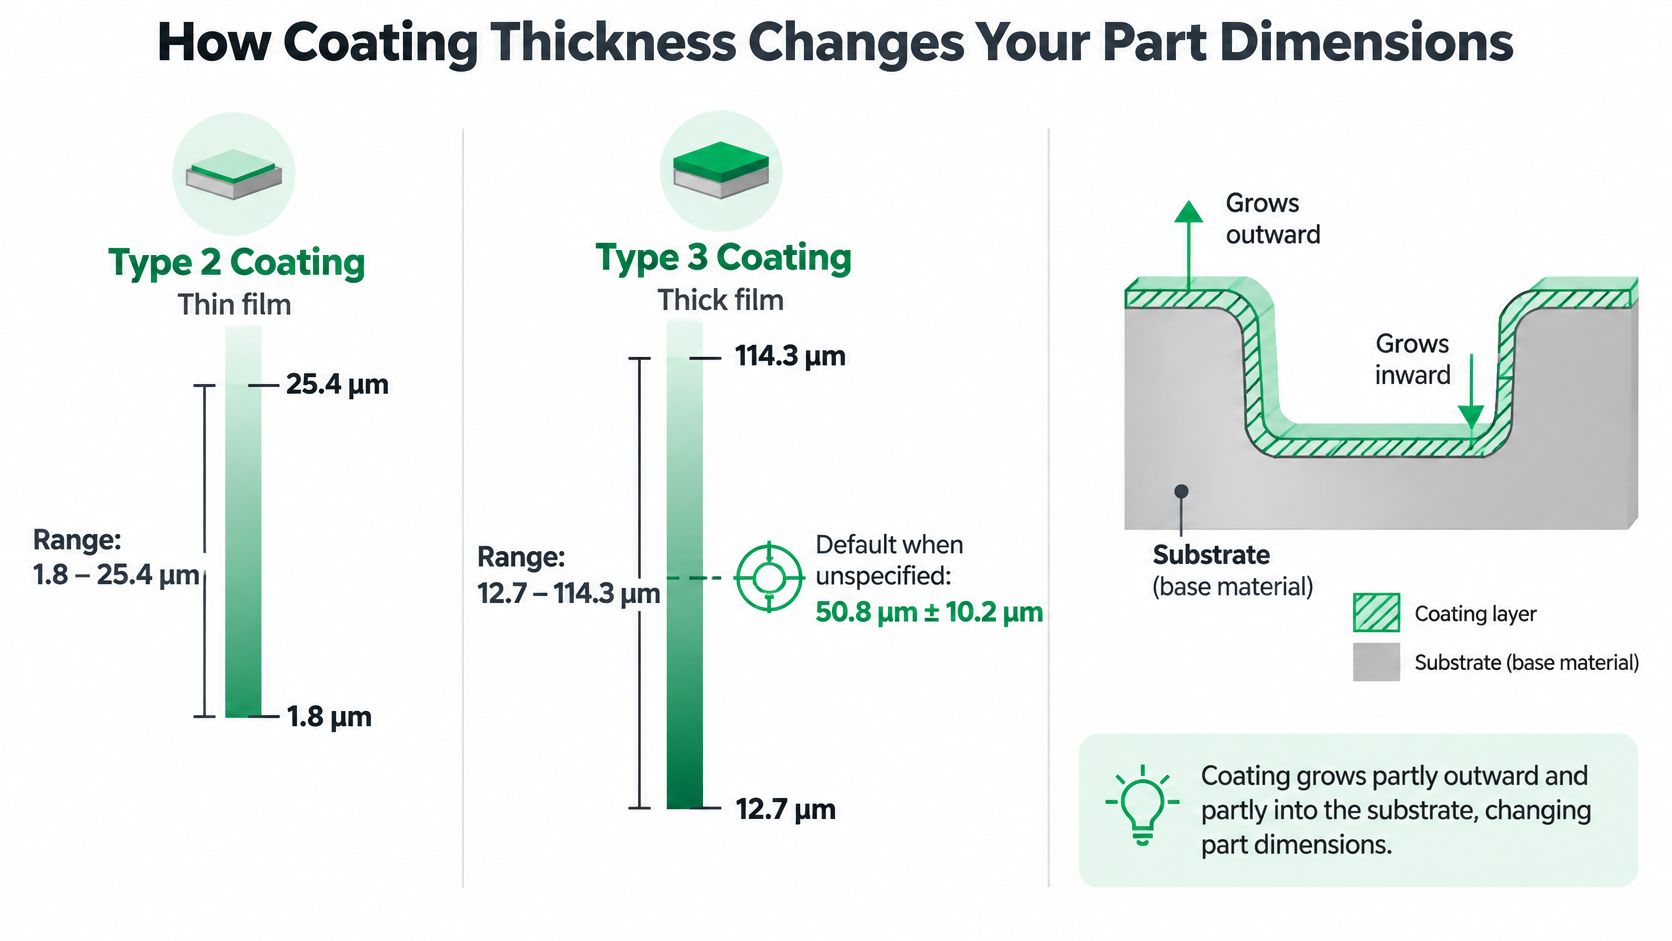
Anodizing moves every coated surface. The oxide grows partly outward from the original surface and partly into it, so each surface shifts by roughly half the total coating thickness. Outside diameters grow, bores shrink, and threads tighten on both flanks.
Type 2 runs from 1.8 to 25.4 micrometers and Type 3 from 12.7 to 114.3 micrometers, so the question is not whether the part moves but by how much. When nobody writes a thickness on the drawing, the default answers for you. NASA's aluminum anodizing process specification, which requires compliance with MIL-A-8625, states that if no thickness is specified, Type III defaults to 0.002 in ± 0.0004 in, roughly 50.8 µm ± 10.2 µm, and it prohibits room-temperature Type III processing.
Halve the total and you get the per-side number that goes into your tolerance stack.
Approximate dimensional build-up per side
| Coating case | Total coating | Approx. growth per side | Fit check |
|---|---|---|---|
| Type 2 (Type II), low end | 1.8 µm | About 0.9 µm | Usually negligible on loose fits |
| Type 2 (Type II), high end | 25.4 µm | About 12.7 µm | Check bores and threads |
| Type 3 (Type III), low end | 12.7 µm | About 6.4 µm | Check press fits |
| Type 3 (Type III), default | 50.8 µm ± 10.2 µm | About 25.4 µm | Allow for bore and thread sizing |
| Type 3 (Type III), high end | 114.3 µm | About 57.2 µm | Confirm sizing before ordering |
Work one bore through the numbers
Take a bore drawn at 10.00 mm and sent out for 50 µm of Type 3. Each side takes 25 µm, so the diameter loses about 0.05 mm and lands near 9.95 mm. A bore that was meant to slide now needs a press, and a press fit that was meant to hold may not start at all. Run the same bore through Type 2 at the top of its range and the diameter loses about 25 µm, roughly half the change, which normally stays inside a general tolerance.
Practical rule: whatever total thickness you call out, halve it and give that number to every mating feature on the part.
The band around the nominal matters too. The Aluminum Anodizers Council reference guide notes that MIL-PRF-8625 generally limits coatings up to 0.002 inch to ±20% variation unless otherwise specified, with a stated ±0.0004 inch limit for thicker coatings. At 50 µm nominal, that band is 10 µm of total coating the anodizer can legitimately deliver, and your allowance has to absorb it.
On tight interfaces the offset has to be cut into the part before anodizing, which is a CAM decision as much as a drawing decision; how machining tolerances stack with coating growth covers the stack-up side of it. FIRMFG offers aluminum CNC machining, so a pre-anodize size can be programmed straight from the final coated dimension on the print.
Thickness, tolerance and allowance decisions belong on the drawing, and first-article inspection is what confirms them.
Wear and Hardness Compared Across Both Finishes
Hardness is where the two finishes separate on paper. A 2026 technical guide from EPOC CRAFTER reports Type II surface hardness of about 200 to 300 HV and Type III hard-anodized hardness of about 400 to 500 HV on CNC aluminum parts. That's roughly double, and it's the number most comparisons stop at.
Hardness is not the same as wear life
Doubling the hardness reading doesn't double service life. Abrasion resistance depends on the alloy and on how much coating sits over the substrate. A thicker Type 3 layer gives the surface more oxide to wear through before the base metal is exposed, which explains its longer life on sliding contact.
Hard coat still fails where a thin coat fails. Scratches cut through. Sharp edges and tight internal corners are where the oxide cracks first, so a burr left on an edge becomes a crack start in service. Pits and open pores give moisture a path in. Edge quality from machining matters as much as the type on the print.
Two parts that sort themselves
A clamp slide riding a steel rail under load is a Type 3 part. The rail is harder than any anodized layer, the load is constant, and the surface has to keep its geometry after thousands of cycles. Type 2 in that wear track would polish through and expose aluminum that then galls and picks up.
A lid opened twice a week is a Type 2 part. The contact is light, the cosmetic face carries the finish the customer sees, and a 50 µm hard coat would close a hinge bore for a duty cycle that never needed it.
Before choosing, answer three questions:
- What does the surface rub against? A harder counterface under load pushes you to Type 3, while occasional glove or packaging contact does not.
- How often does it make contact? Continuous cycling and twice-a-week handling are different engineering problems.
- Under what load? Light pressure wears a coating by polishing; high pressure with grit in the joint cuts it.
Treat a claim like "10 times more wear resistant" as marketing until the test conditions are stated: test load, counterface material, lubricant, alloy, sealing state and the failure criterion. Ask for those parameters in the supplier's inspection report and reject a certificate that quotes a multiplier with nothing behind it.
Corrosion Resistance and Why Sealing Decides It
Type 3 is not automatically the better corrosion finish. A thicker oxide can improve wear performance, but corrosion acceptance depends on alloy, sealing, exposure and the test required by the drawing.
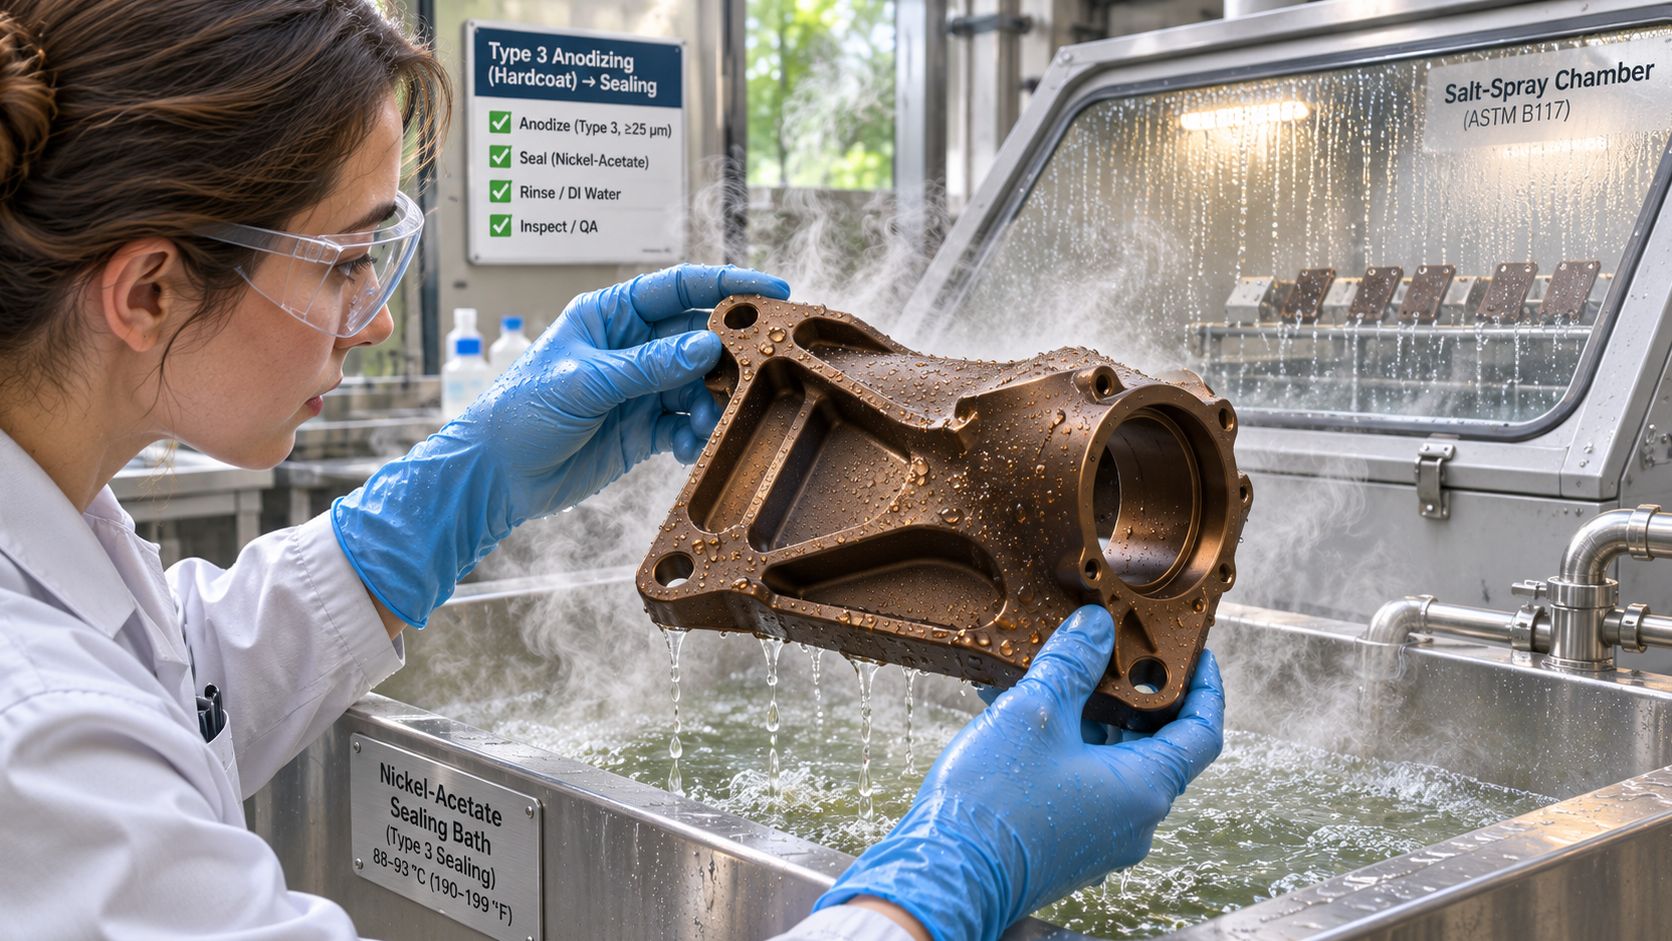
The Aluminum Anodizers Council guidance on specifying anodized finishes identifies 336-hour ASTM B117 salt-spray performance in its specification data for Type II and sealed Type III. It also makes clear that Type III corrosion testing is conditional on sealing. A Type III callout that omits the sealing requirement leaves the corrosion acceptance criteria ambiguous.
What sealing actually changes
Anodizing creates a porous oxide layer. Dye can enter those pores, but open pores can also retain moisture, salt and process residue against the metal. Sealing closes the pores and changes how the coating performs in corrosive exposure. The comparison should therefore specify whether each finish is sealed, rather than treating Type 2 and Type 3 as fixed corrosion-performance categories.
A hard coating can still fail locally. Scratches, edges, pits and unsealed areas may become points of attack, so a thickness callout alone does not establish corrosion performance.
The finish type identifies the process. Sealing, alloy and a named test define the corrosion requirement.
Alloy changes the answer
Alloy affects the oxide that forms and the resulting finish. FIRMFG machines aluminum alloys 6061, 7075 and 2024. These alloys do not anodize identically: 6061 generally produces a more uniform oxide, while the copper content in 7075 and 2024 can make coating formation and appearance less predictable.
Service conditions matter too. Contact with stainless steel or other metals can concentrate corrosion at a joint. Chemicals may attack a seal even when a part passes a salt-spray test, and outdoor or marine exposure brings wetting and chloride conditions that a coating-thickness value cannot describe. In some environments, paint or a conversion coating may suit the requirement better than either anodized finish.
Put the acceptance criteria on the drawing:
- Environment: State whether exposure is indoor, outdoor, marine, chemical or body contact.
- Sealing: Specify whether the coating must be sealed.
- Validation: Name the test, duration and pass criterion. “Corrosion resistant” alone is not an acceptance standard.
Cost, Color and Appearance Trade-Offs
Hardcoat costs more per square foot, and the gap is wide enough to change a sourcing decision on its own. A 2026 pricing comparison published by Baetro CNC Services lists Type II clear anodizing at about $0.90 to $1.80 per ft² in the United States against $2.50 to $4.80 per ft² for Type III hardcoat.
Anodizing price per square foot, US, 2026
| Finish | Price per ft² (US, 2026) |
|---|---|
| Type 2 clear anodizing | $0.90–$1.80 |
| Type 3 hardcoat | $2.50–$4.80 |
| Dyed Type 2 finish | Clear rate plus a dye charge, quoted per batch |
| Sealed Type 3 finish | Hardcoat rate with the seal included in the same tank cycle |
What drives the price
The premium reflects process time and control, not raw material. A hardcoat bath runs colder and builds a far thicker layer, so a load occupies the line longer. Then the dimensional work starts before the tank: bores cut oversize, threads masked or allowance-cut, contact faces protected, and first parts measured after coating to prove the allowance was right.
Color limits come with the harder coating
Type 2 takes dye well and covers a wide palette: clear, black, red, blue, gold, green and bronze are all routine. Type 3 runs darker and less consistent across batches, and the dense oxide absorbs dye unevenly. Matching a brand color across a multi-part assembly in hard coat is a fight worth avoiding.
Say a 200-part housing order goes out for Type 2 clear. The finishing cost sits at the bottom of the range in the table, the dye step is optional, and the dimensional allowance is small enough that most features need no change. On a sliding part that wears out in service, the Type 3 premium is smaller than the cost of a rebuild, and that is the only comparison that matters.
The costs that never appear on the price sheet are masking for zoned finishes, extra machining for the allowance, and re-inspection after coating. Where the surface is a painted panel rather than a functional one, anodizing and powder coating solve different problems and the cost comparison changes completely.
Pay the Type 3 premium where wear is the failure mode. Specify Type 2 wherever appearance is the requirement.
Choosing Type 2 or Type 3 for Each Application
Start with the environment the part will live in and the surface it will rub against. The type follows from those two answers. Working from the type name first is how a cosmetic housing ends up with a hard coat that won't match its neighbor, or a slide ends up polished through in a season.
The checklist below is the order I would run for any part, cosmetic or functional.
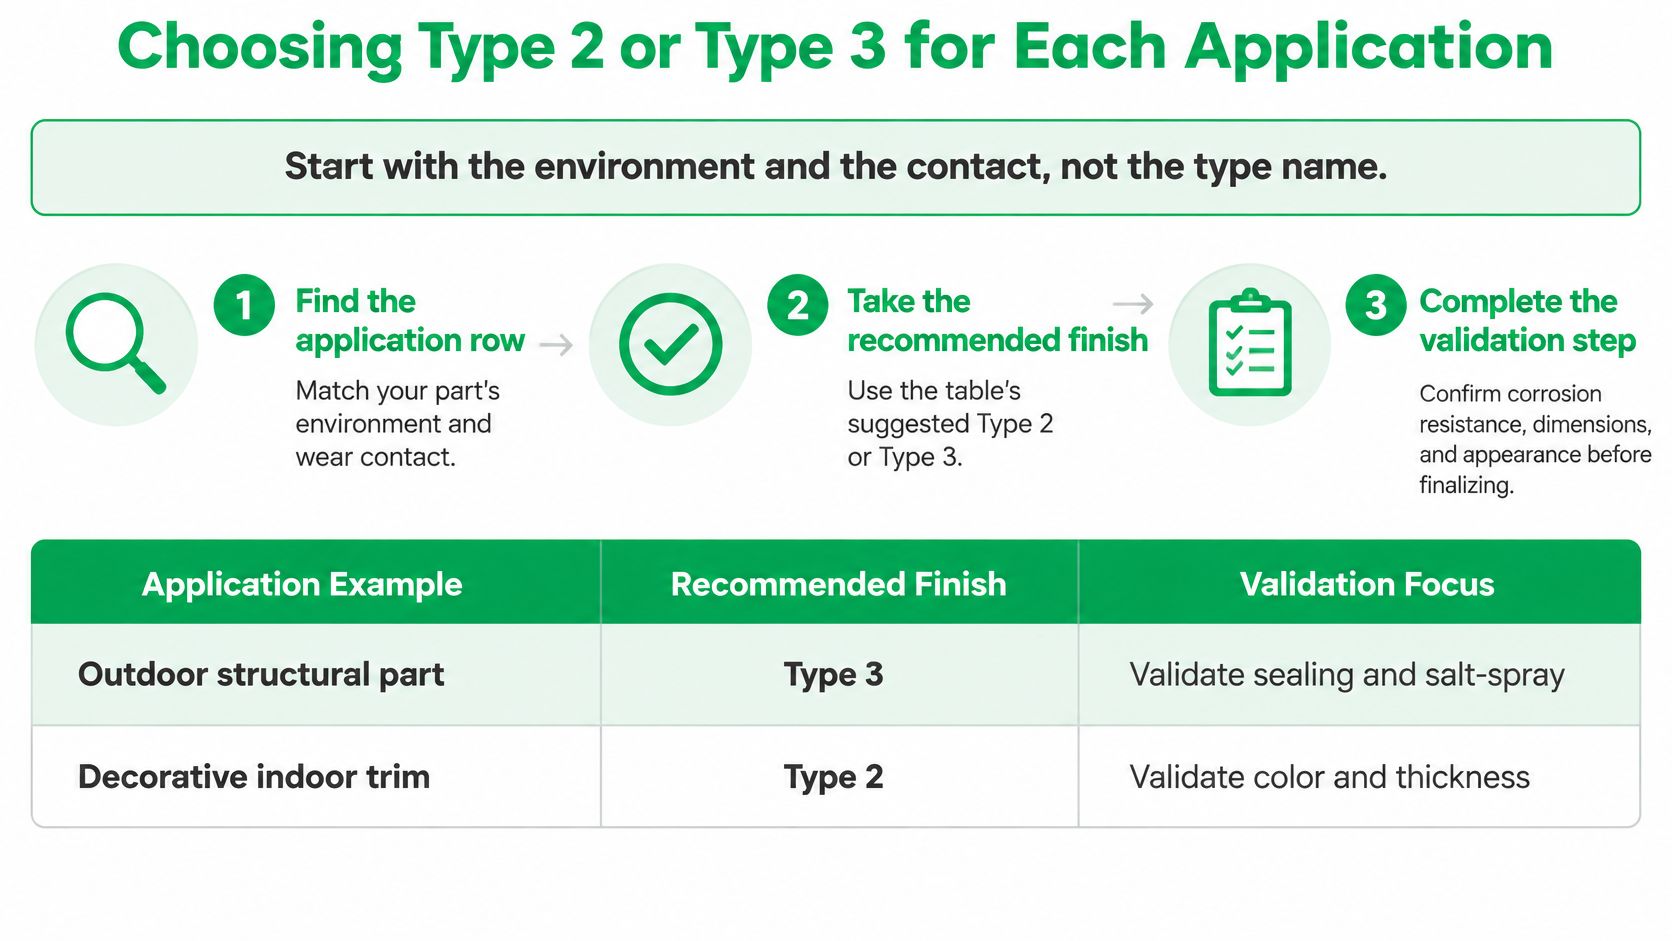
Sort the part with the table, which pairs each common application with a finish and the check that goes with it.
Choosing the finish by application
| Application | Recommended finish | Why | Validate with |
|---|---|---|---|
| Cosmetic housings and covers | Type 2 | Broad color range and tight dimensions | Color match and coating-thickness check |
| Sliding guides and actuator bodies | Sealed Type 3 | Abrasion from repeated contact | Hardness and wear test under real load |
| Bores, bearing seats and threaded holes | Type 2, or Type 3 with allowance | Coating grows into and out of the part | First-article dimensional inspection |
| Outdoor or marine parts | Sealed Type 3 or Type 2, per specification | Salt exposure depends on sealing and alloy | ASTM B117 salt-spray test when sealing is specified |
| Fixtures and tooling contact faces | Type 3 | Repeated handling and wear | Wear check on the fixture in use |
| Chemically exposed or medical parts | Neither, by default | Needs a surface system review beyond the two types | Specification review with the supplier |
Three parts, three answers
A control housing with a brand color and a visible face is a Type 2 part. Color range is the requirement, dimensional room is small, and nothing on the housing slides. Validation is a color match against the approved sample plus a thickness check on the first article.
A linear slide on an actuator body is a sealed Type 3 part. The surface carries load against a harder counterface and the wear track has to hold its geometry. Validation is a wear test under the specified load with the specified counterface, plus hardness and thickness readings from the same lot as the production run.
A threaded adaptor screwing into a steel fitting is usually Type 2, because the thread is the feature and the coating is there to protect the body. If thread wear justifies Type 3, the thread gets either a masking callout or an allowance, and a first-article check confirms the coated thread still gauges.
Mixed parts and zoned finishes
A fixture can carry Type 3 on its contact faces and Type 2 on its visible faces. That's a legitimate drawing, but it needs masking instructions, two tank cycles and a plan for the boundary between the two areas. Zoned work also spends longer in process and picks up a second inspection, which is where the cost advantage disappears.
A finish name sorts the part. A validation step releases it.
Outdoor, marine and chemically exposed parts shouldn't default to either type. They need an explicit sealing decision, an alloy review, and a salt-spray or chemical test named on the print. Where a barrier film or a specific color is the main requirement, paint or a conversion coating may be the better system, and both anodic types are second choice.
For prototype and low-volume work, anodizing and hardcoat are usually quoted alongside the machining, so settle the finish before the first cut and the allowance gets cut into the part instead of chased afterward.
Confirm the Coating Type on Your Drawing
A drawing that says “anodize” leaves key decisions open. Before release, specify the coating wherever it affects fit, function, or appearance.
- Name the standard, type, and class. Specify MIL-PRF-8625 and Type II or Type III, plus the class for dyed or natural coating.
- Set coating thickness and tolerance. Use a defined range or value with a tolerance, such as 15 to 20 µm or 50 µm ± 10 µm.
- Identify the alloy. Aluminum alloys such as 6061, 7075, and 2024 can differ in color and corrosion behavior after anodizing.
- Specify the sealing condition. State whether the coating is sealed, since sealing affects corrosion performance.
- Mark masking zones. Identify threads, press-fit bores, bearing seats, grounding pads, and surfaces that must remain bare.
- Define color limits. Name the required color and reference sample, and identify where batch consistency matters.
- Set dimensional allowances. Account for coating growth on affected bores, threads, and bearing seats. Use the specified thickness to set the allowance before machining.
- List inspection requirements. Specify thickness readings, hardness checks where wear matters, first-article dimensions, and any required salt-spray or wear tests.
The drawing should connect the finish to measurable acceptance criteria. For example, a wear surface needs a specified coating and thickness, plus a defined inspection; a tight bore needs a dimensional allowance and a post-finish check.
FIRMFG offers aluminum CNC machining and anodizing among its surface finishing services, so the machining and finishing can be discussed together when you request a quote. Keep the drawing specific about the coating, allowance, and inspection criteria.
Review one active drawing against this list before releasing it for production.