Bead Blasting Aluminum for a Controlled Matte Finish
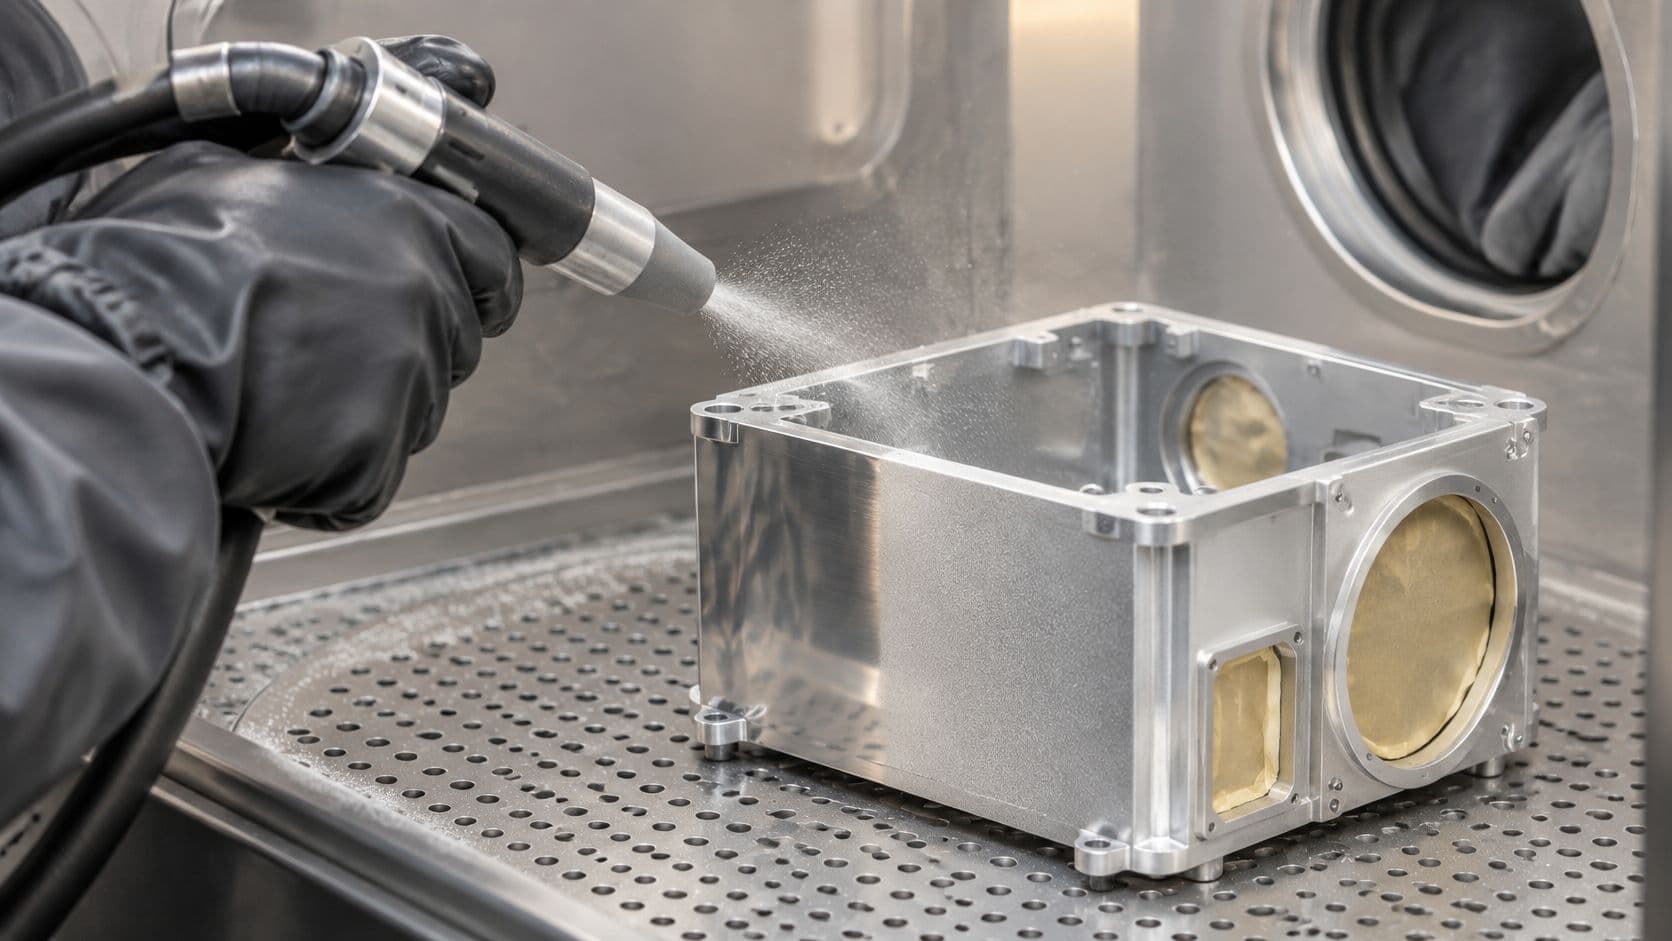
The most popular advice on bead blasting aluminum is also the least useful on a drawing. You'll hear that glass bead doesn't cut, doesn't change dimensions, and leaves a safe matte finish on any part. That's not how a process sheet works. Spherical bead is gentler than angular oxide, but it still removes metal, softens edges, and can embed in soft aluminum if you chase texture with pressure. I would treat the media name as a starting point, not a tolerance guarantee. What protects a fit is a written window for mesh, pressure, stand-off, dwell, masking, and cleaning, proven on a coupon before good hardware goes in the cabinet.
Table of Contents
- Glass Bead Settings and Expected Roughness
Why Pressure Moves Roughness Fast
How to Use the Table on a Real Part
Features That Lose Size or Edge Definition- What to Protect Before Blasting Aluminum
How to Bead Blast a Machined Aluminum Part- The Qualification Sequence
Cloudy Texture, Embedded Bead and Other Failures- Reading the Surface Correctly
Safety for Dust, Noise and Media Handling- Engineering Controls Come First
Cleaning and Proof Before Anodizing or Coating- Checks in Order
In-House or Outsourced Blasting Decision
Glass Bead Settings and Expected Roughness
The media name alone cannot specify a finish. A useful starting point pairs bead size with pressure and stand-off, then sets an Ra target the operator can measure. Keep the intended finish subordinate to the part's most sensitive surface.
| Part intent | Media | Pressure | Stand-off | Typical Ra range |
|---|---|---|---|---|
| Cosmetic enclosure | 120 to 270 mesh glass bead | 40 to 50 psi | 150 to 200 mm | about 0.8 to 1.6 µm |
| General 6061 housing or bracket | 70 to 100 mesh glass bead | 58 to 87 psi (0.4 to 0.6 MPa) | 100 to 200 mm | about 1.8 to 2.2 µm |
| Coating or paint key | 70 to 100 mesh glass bead | up to 50 to 65 psi | 100 to 200 mm | about 1.6 to 2.2 µm |
| Thin wall or precision bracket | fine to medium glass bead | 40 to 50 psi | 200 to 300 mm | keep near or under 2.0 µm |
| Embedment-sensitive surface | fine glass bead | qualify low on a coupon | 250 to 300 mm | measure, don't assume |
The table gives illustrative typical ranges, not guaranteed outcomes. Surface roughness affects appearance, coating adhesion, sealing, friction, and feel. The MicronsHub guide to bead blasting media and surface texture reports that 100-mesh glass beads at 0.4 to 0.6 MPa produce Ra of approximately 1.8 to 2.2 micrometers on 6061-T6 aluminum. It gives a broader glass-bead range of Ra 0.8 to 3.2 micrometers for 70 to 270 mesh, so mesh alone does not define the finish.
Why Pressure Moves Roughness Fast
Higher pressure can change texture quickly. The same guide reports Ra of approximately 2.4 to 2.8 micrometers at 0.8 MPa, about 116 psi. That is substantially above the 0.4 to 0.6 MPa range, and increases the risk of glass particles embedding in relatively soft aluminum. Treat 0.8 MPa as a screening ceiling, not a production setting for making a coarser coating key.
Practical rule: If you need more texture, change bead size first and requalify. Raising pressure on 6061-T6 can create a rougher surface while increasing embedment risk.
How to Use the Table on a Real Part
Hold the gun at 45 to 90 degrees and keep travel speed and overlap consistent. A perpendicular jet at short stand-off concentrates impact. A shallow angle and longer stand-off spread it, which can help on thin walls but may leave machining lines visible on a cosmetic cover.
For a cosmetic enclosure, fine bead at lower pressure can soften light machining lines without frosting the part white. It will not erase a deep step or torn surface from a dull cutter. Blasting evens reflection more readily than geometry, so correct poor machining first.
For a general housing, use the middle row as a qualification starting point. For a coating key, ask the coater for a defined Ra range rather than assuming rougher always bonds better. Excessive embedment can work against the intended interface. The surface roughness chart helps translate an Ra target into a drawing note that a finisher can inspect.
Specify an Ra range or visual limit sample on the drawing, not just “bead blasted.” Measure representative parts with a calibrated profilometer at multiple locations and orientations. Record bead condition, pressure, stand-off, and exposure time so the process can be repeated. A cosmetic cover can accept a wider band than a sealing interface; state which requirement governs.
Features That Lose Size or Edge Definition
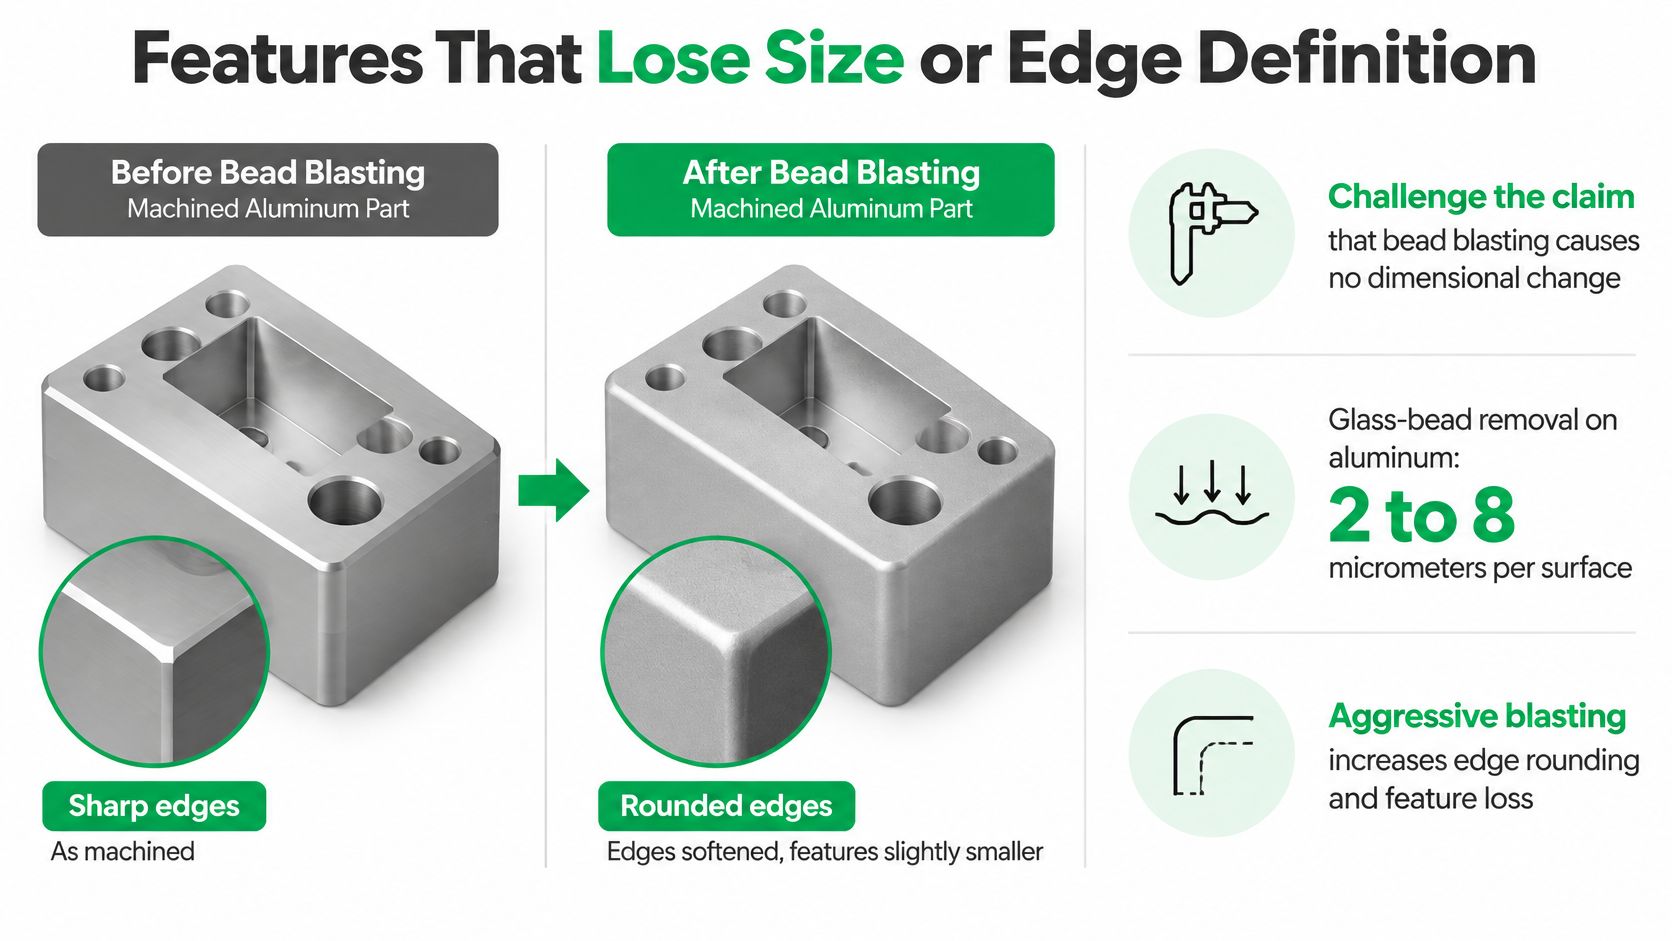
Glass bead is gentler than angular abrasive, but it does not preserve every dimension or edge. The JLC CNC guide to abrasive blasting reports approximately 2 to 8 µm of material removal per surface during aluminum bead blasting. For features held to ±0.025 mm or tighter, the guide recommends CMM checks before and after blasting.
A few micrometers can matter when a feature is blasted from multiple sides or receives extra exposure. A slot, press fit, bearing location, or gasket land may shift even when the finish looks uniform. The drawing should identify which features are masked, measured, and cleaned before anodizing or coating.
What to Protect Before Blasting Aluminum
| Feature | Reported risk | Control |
|---|---|---|
| General exterior surface | About 2 to 8 µm removed per surface with glass bead | Measure a representative feature; account for removal where tolerance is tight |
| Feature at ±0.025 mm or tighter | Small size changes can affect the tolerance | Use pre-blast and post-blast CMM checks |
| Exposed corner or arris | Abrasive blasting can soften edges; aluminum oxide may round corners by roughly 0.1 to 0.3 mm | Mask the edge or specify an edge-radius limit |
| Bore, thread, bearing seat, sealing face | Localized erosion or trapped media can affect function | Plug or mask the feature |
| Thin rib or small hole | Uneven exposure can cause localized material loss | Limit exposure or mask the feature |
Bores and bearing seats need their size and roundness preserved. Plug them with cabinet-suitable caps or plugs, and check that the mask seals at the edge.
Threads can trap bead, while direct blasting can soften thread flanks. Mask external threads and plug internal threads. If fit matters, gauge the threads after cleaning rather than relying on an air blow to clear a blind hole.
Sealing faces and datum pads should be masked or left machined. A softened sealing land can pass visual inspection and still compromise a seal. Define the blast boundary on the drawing or with a fixture.
Stock Allowance and Edge Limits
Allow sacrificial stock only where the design can accommodate it and inspection can confirm the finished dimension. Extra stock on a general exterior may be practical; adding it to a thin rib can alter the feature you need to preserve.
Specify the alloy, media, pressure, stand-off, dwell, pass count, critical dimensions, and edge-radius limit. These controls make exposure repeatable and give inspection clear acceptance criteria. A matte surface can look even while a corner has softened or a locating bore has shifted, so inspect the features that locate, seal, and fasten.
How to Bead Blast a Machined Aluminum Part
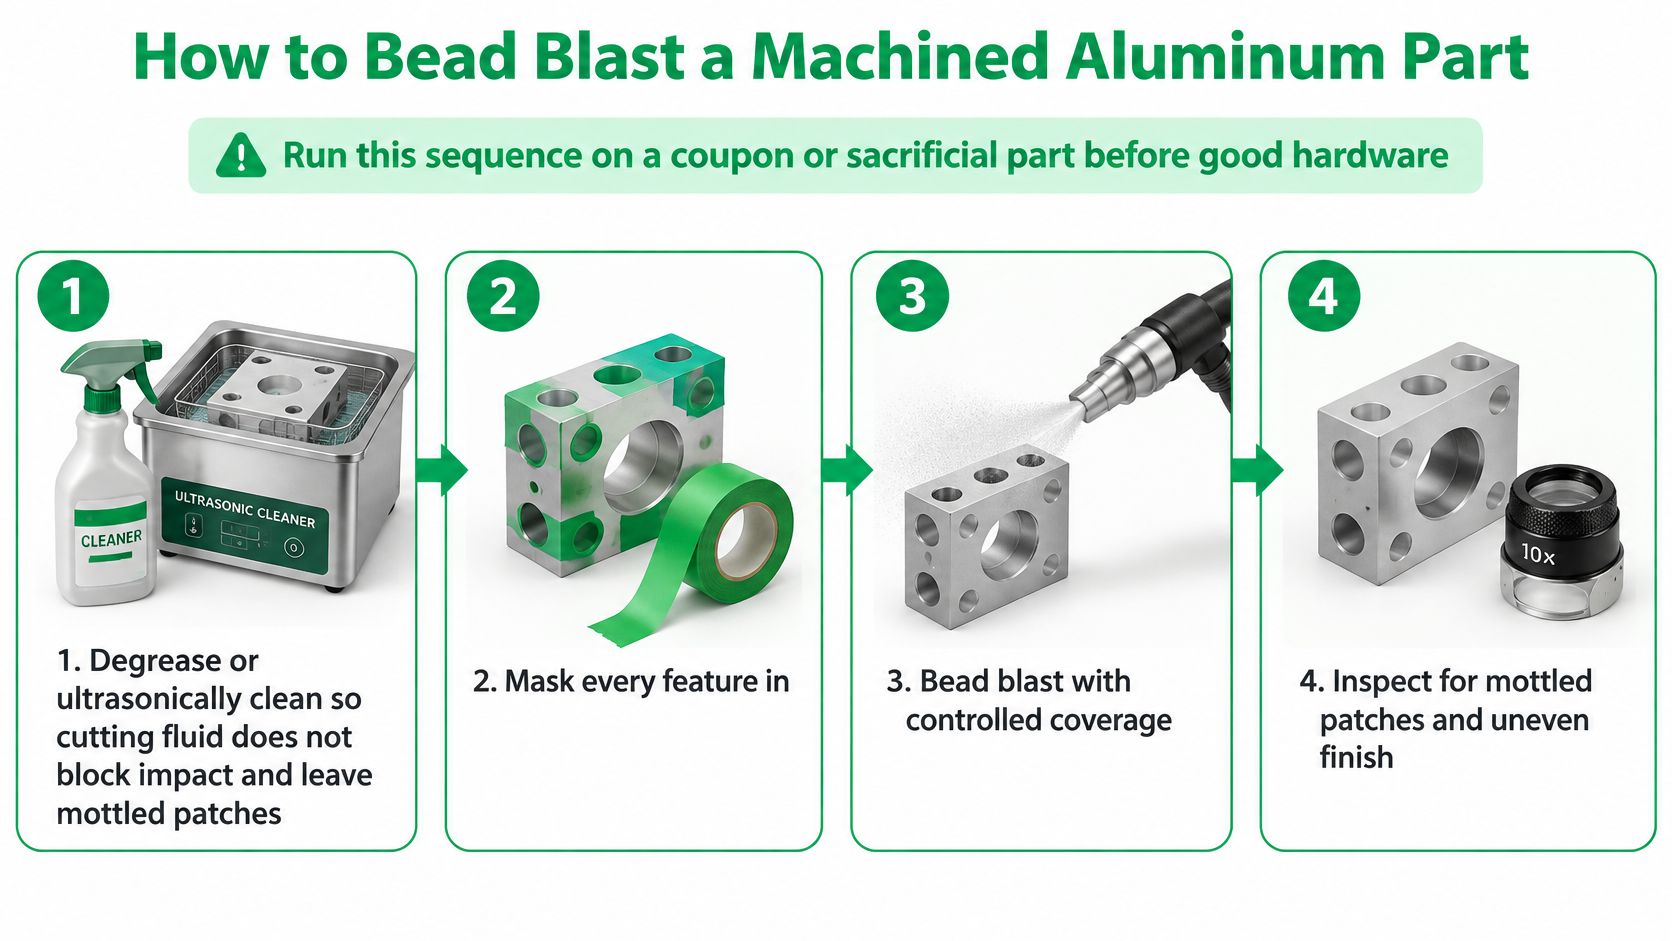
Run this sequence on a coupon or sacrificial part first. The coupon should match the alloy, temper, and prior milling texture as closely as you can manage, because a polished scrap offcut won't predict how a milled housing responds.
The Qualification Sequence
- Degrease or ultrasonically clean first. Cutting fluid and handling oil block bead impact and leave mottled patches that operators then try to fix with extra passes. Clean, dry, and handle with gloves after washing.
- Mask before you load media. Cover precision bores, threads, sealing faces, bearing seats, datum surfaces, and sharp functional edges with plugs, caps, or blast tape. Check mask edges under light, because a lifted tape corner creates a hard witness line.
- Load clean, unmixed glass bead. Use the mesh from your chosen setpoint row and confirm the sieve and reclaim system aren't carrying oxide or steel from a previous job. Mixed media changes the cut and contaminates aluminum.
- Set pressure conservatively. The Rapid Protos glass bead blasting process guide reports 50 to 65 psi is commonly used for general aluminum parts, while 40 to 50 psi is more conservative for thin walls and precision brackets. It also reports typical 6061-T6 roughness near Ra 1.6 to 2.0 µm with medium beads at 50 to 60 psi.
- Fix stand-off and angle. Start at 100 to 200 mm and 45 to 90 degrees for general work. Mark the distance with a fixture stop or a cabinet reference if operators struggle to hold it freehand.
- Sweep with repeatable overlap. Keep the nozzle moving at constant travel speed. Don't dwell on a dark patch, and don't add passes to chase color. Mottling usually points back to cleaning or uneven prior texture, not insufficient blasting.
- Inspect under acceptance lighting. Check texture beside your limit sample, then measure Ra at multiple orientations and locations. A reading taken only along the lay can miss the condition across milled scallops.
- Clean out every passage. Blow off the part, then ultrasonically clean pockets, blind holes, and internal channels so trapped bead doesn't reach assembly, a pump, or a bearing.
Locking the Work Instruction
Once the coupon matches the drawing, record nozzle type, media lot and mesh, pressure, stand-off, angle, travel pattern, and exposure time. Photograph the masking arrangement for complex parts. New operators reproduce photos more reliably than paragraphs.
Those published pressures are benchmarks, not guaranteed results. Roughness shifts with bead size, pressure, stand-off, angle, travel speed, overlap, alloy temper, and the milling texture you started with. A 6061-T6 bracket with fine stepover marks will even out faster than a rough-milled housing wall, even in the same cabinet.
Release production on a measured coupon, not on a visual guess at the first shippable part. If the first article fails Ra or a critical dimension, you still have hardware left to save.
For parts that will be anodized, identify the blast condition on the drawing when it's specified, so the anodizer isn't guessing what texture arrived. That discipline matters most when machining and finishing sit in different shops. If you're still setting machining strategy, our guide to CNC machining aluminum covers how cutter marks and alloy choice set up the surface you'll later ask blasting to hide. Don't ask bead blasting aluminum to compensate for chatter, torn edges, or a step you should have blended at the machine. It will soften the look, but the defect will still read through anodize.
Cloudy Texture, Embedded Bead and Other Failures
A cloudy or over-frosted face is usually an energy problem, not a media problem. Too much pressure, too many passes, or a gun that stopped moving will whiten aluminum and blur edge definition. Drop pressure, pick a finer bead, shorten exposure, and keep the nozzle moving before you blame the bead lot.
| Defect | Likely cause | Change |
|---|---|---|
| Cloudy or over-frosted face | pressure, dwell, or repeat passes | nearer 0.5 MPa, finer bead, constant motion |
| Embedded glass sparkle | high pressure on soft aluminum | avoid about 0.8 MPa, 250 to 300 mm stand-off |
| Rounded edge or lost arris | unmasked corner in the jet | plug or mask, set an edge limit |
| Mottled patches | oil or coolant film | degrease before blasting |
| Scratchy or dirty texture | fractured beads or mixed grit | sieve and keep media lots separate |
| Grit in holes and threads | no blow-off or ultrasonic clean | clean passages before inspection |
Reading the Surface Correctly
Embedded glass often shows as a faint sparkle under raking light. Tilt the part under a single bright source instead of judging it flat under ceiling panels. The JLC CNC guide to bead blasting states that increasing pressure to about 0.8 MPa can raise 6061-T6 roughness to approximately Ra 2.4 to 2.8 µm but increases the risk of glass-particle embedding. It recommends limiting pressure to roughly 0.5 MPa and maintaining 250 to 300 mm stand-off when embedding is a concern.
Treat those values as screening limits, because cabinet design, nozzle wear, and bead condition move the result. A worn nozzle at the same gauge pressure doesn't deliver the same jet as a new one. That's why your work instruction needs the nozzle identified, not just a psi number.
Rounded edges mean the jet hit an unmasked arris. Don't try to polish the radius back to sharp. You can't restore a lost corner by hand without creating a worse local flat. Mask the next part, reduce dwell near edges, and approach corners at a shallower angle if the drawing allows any softening at all.
Mottled color tracks back to oil, coolant, fingerprints, or uneven oxide from handling. Re-clean and blast a fresh coupon. Adding passes over a contaminated patch drives the film into the texture and makes the patch more permanent, not less visible.
Media Condition Is a Process Variable
Worn or fractured beads stop peening and start scratching. Sieve on a schedule, remove fines and broken media, and keep lots for aluminum separate from harder grits. If the texture turns scratchy mid-batch, stop and inspect the media before you adjust pressure to compensate.
After blasting, clear cavities, then inspect under consistent lighting and measure roughness with a defined method. Verify critical dimensions before and after, especially small holes, thin ribs, mating faces, and external arrises. A part can look uniformly matte and still carry embedded media, trapped bead in a blind hole, or a rib that's thinner than the model allows. I would quarantine any batch where media condition changed mid-run until a fresh coupon proves the texture again.
Safety for Dust, Noise and Media Handling
Set up controls before the first part is loaded, not after dust is visible on the cabinet window. Abrasive blasting creates airborne dust and noise, and a tidy cosmetic result doesn't mean exposure is controlled.
Engineering Controls Come First
- Sealed cabinet or enclosure: Check door seals, glove condition, and window integrity before a run. A leaking enclosure defeats every other control and spreads fines across nearby benches.
- Local exhaust and dust collection: Confirm airflow and filter condition on the recovery system. A clogged collector changes visibility in the cabinet, and poor visibility makes operators move the nozzle closer, which changes the finish.
- Media identification: Read the supplier safety data sheet for every new lot and confirm composition before it enters a shared reclaim system. Don't assume a bag labeled as bead contains only what the purchase order intended.
- Noise control: Keep the cabinet closed during blasting and maintain seals and muffling where fitted. If operators raise their voices to talk beside the cabinet, treat that as a prompt to check hearing protection and equipment condition.
Use respiratory protection, eye protection, hearing protection, and gloves where engineering controls don't reduce exposure fully, especially during cabinet cleaning, media changes, and filter service. Those maintenance tasks often expose operators more than normal blasting through intact gloves.
Check you can see: If dust escapes when the door opens, the collector, seals, or shutdown dwell needs attention. Don't solve a visible leak by handing out better masks and continuing production.
Train operators on pressure limits, emergency shutdown, media handling, and waste separation before they run production parts. Keep spent media labeled and separated by type, and dispose of it under your local rules. Mixed waste creates disposal questions and invites someone to pour the wrong media back into a hopper to save time.
Put cabinet seals, filters, gloves, and reclaim screens on a fixed inspection schedule with a named owner. A cabinet that can't hold stand-off, visibility, and media separation is a process risk as well as a safety risk. Operators compensate for poor visibility and weak reclaim with closer distance and longer dwell, and your qualified Ra disappears.
Cleaning and Proof Before Anodizing or Coating
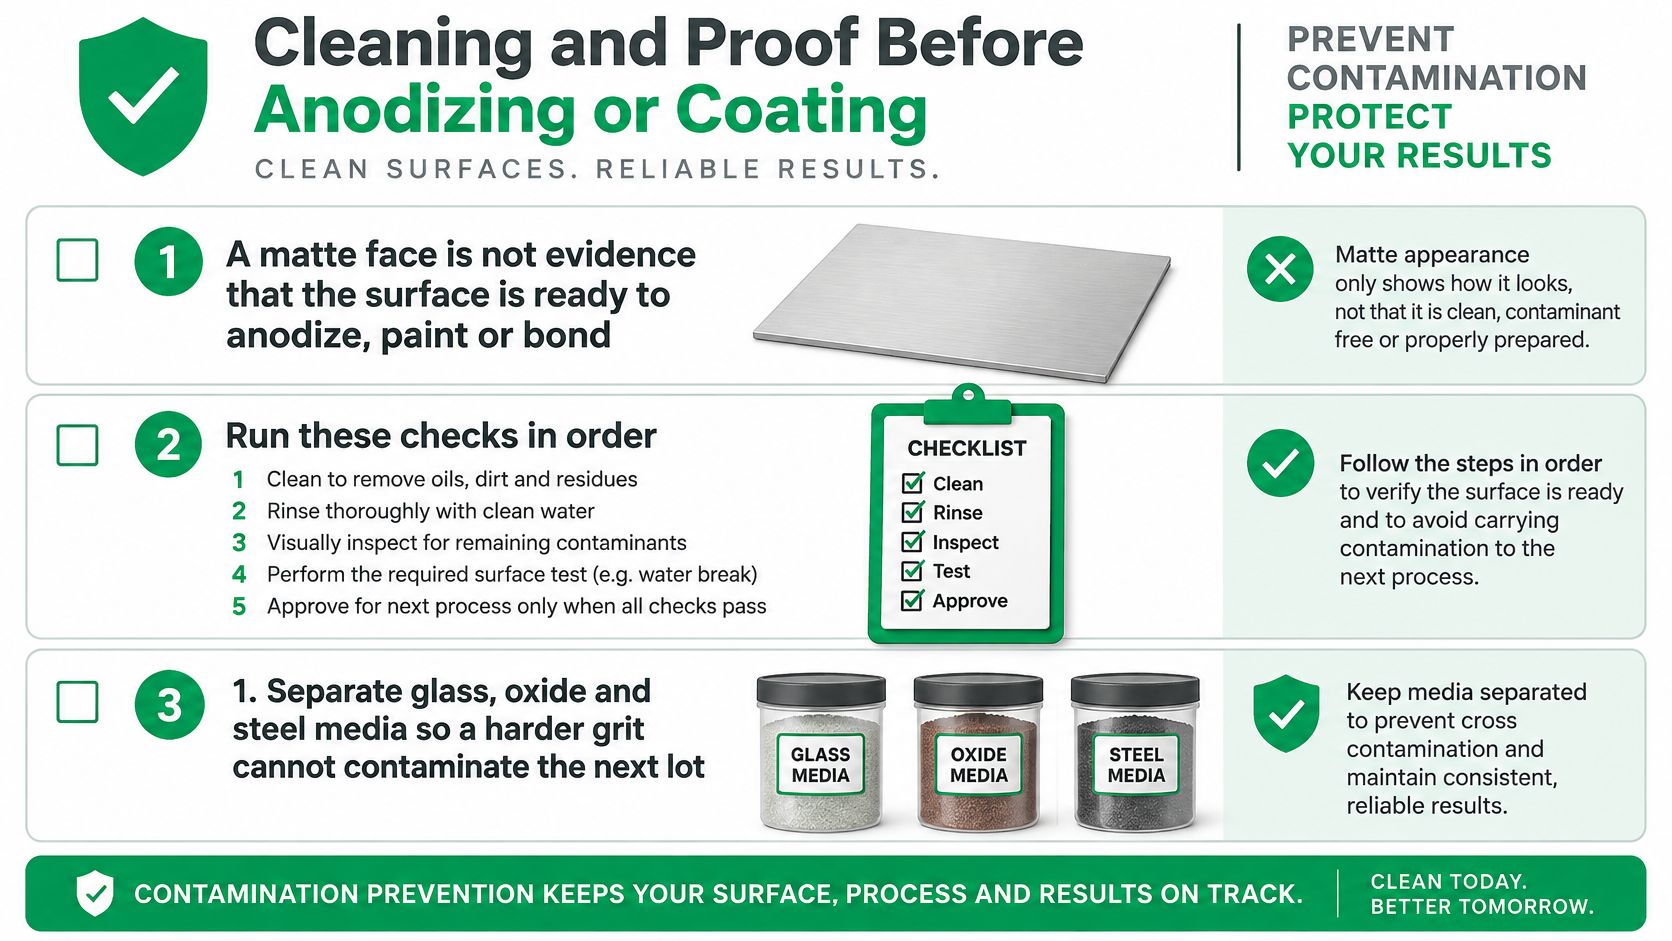
A matte face isn't evidence that aluminum is ready to anodize, paint, powder coat, or bond. Glass bead is softer and more spherical than aluminum oxide, but non-cutting doesn't mean contamination-free. You still have spent bead, aluminum fines, fractured media, and disturbed oxide to remove and prove removed.
Checks in Order
- Separate media by material. Keep glass, oxide, and steel in labeled containers and dedicated reclaim paths where you can. One scoop of angular grit in a glass system can scratch a whole batch of enclosures.
- Clean with a validated, repeatable method. Use blow-off plus ultrasonic cleaning or a documented aqueous wash, then dry fully before packing. Define time, chemistry, and rinse steps in the instruction instead of writing "clean as required."
- Inspect visually and dimensionally. Use the acceptance lighting, check blind features for retained bead, and remeasure critical dimensions on the first article. Cosmetic uniformity alone isn't an acceptance criterion for a functional interface.
- Measure Ra where it matters. Use a calibrated profilometer on the coupon and first article, at more than one location. Record orientation, because a coating supplier will ask how the number was taken when adhesion varies.
- Run finish coupons. Process representative coupons through the same alloy, blast, clean, and finish route, then test adhesion or corrosion performance required by your program. The EpoCrafter guide to bead blasting aluminum media selection reports improved salt-spray performance after controlled blasting followed by Type II anodizing on AlSi10Mg additive parts, while recommending SEM checks for embedded media on critical components.
- Put the blast condition on the drawing. State media, mesh, pressure band, Ra or visual standard, masked features, cleaning method, and the following finish. Your anodizer shouldn't have to infer preparation from appearance.
That evidence pack matters in medical, automotive, aerospace, and electronics programs, where a blister, bond failure, or corrosion spot costs far more than a coupon. Media specifications can define particle properties, but they don't guarantee your recipe prevents embedment on your alloy and geometry.
If you're deciding between finishes after blasting, our comparison of anodizing vs powder coating helps you match the blast texture to the coating system instead of specifying both in isolation. I would not release a bonded or sealed assembly on bead blasting aluminum without a coupon that survived the actual cleaning and finishing route. Appearance is the easiest property to judge and often the least predictive of adhesion.
In-House or Outsourced Blasting Decision
Keep blasting in-house when the part is a cosmetic prototype, tolerances are loose, masked features are simple, and someone on your team can log mesh, pressure, stand-off, and a profilometer reading. A small cabinet you control beats a distant finisher for fast iteration on covers and appearance models, provided you still qualify on a coupon.
Outsource when a sealing face, a feature at ±0.025 mm or tighter, a thin wall, or a specified anodize, powder coat, or plate must match the blast. That's where split responsibility hurts. The machine shop protects a bore, the blaster removes the plug to even the color, and the anodizer receives a part nobody measured between steps.
FIRMFG is a Shenzhen CNC and finishing shop that can plan machining, bead blasting, and anodizing on one routing. We offer aluminum CNC machining for alloys 6061, 7075, and 2024, plus finishing services including anodizing, powder coating, electroplating, bead blasting, passivation, sandblasting, and decorative finishing. One routing doesn't remove the need for proof. It removes handoffs where masking and cleanliness notes disappear.
Whichever route you pick, put alloy, glass bead mesh, pressure band, stand-off, masked features, Ra or visual standard, cleaning method, and following finish on the drawing. Require a first-article coupon with Ra and critical dimensions before and after blasting as the acceptance pack. If a supplier won't record those values, you're buying a look, not a controlled process.
Send us your drawing with the alloy, masked features, Ra target, and following finish called out, and we'll plan machining, bead blasting, and anodizing or coating as one qualified routing instead of three disconnected handoffs. Visit FIRMFG to start the review and get a first-article plan that measures size and roughness before production parts are released.