Mastering Stainless Steel Finish: A 2026 Guide
You can have a stainless part that looks right in the hand and still fails on the shop floor. A startup team learns that fast when a polished housing still shows weld discoloration, picks up fingerprints, or needs a second finishing pass before assembly. In small-batch work, stainless steel finish isn't a cosmetic afterthought, it's a process choice that changes corrosion behavior, cleanability, and how much rework a part needs before it ships.
The material story starts with the first true stainless steel, melted on 13 August 1913 with 0.24% carbon and 12.8% chromium World Stainless. That chromium-rich foundation is still what makes modern finishes possible, whether a surface is brushed, polished, bead-blasted, or electropolished. If you choose the wrong finish early, you don't just change appearance, you change fabrication effort, inspection burden, and the odds of scrapping a prototype that was otherwise dimensionally correct.
Table of Contents
- Introduction to Stainless Steel Finish
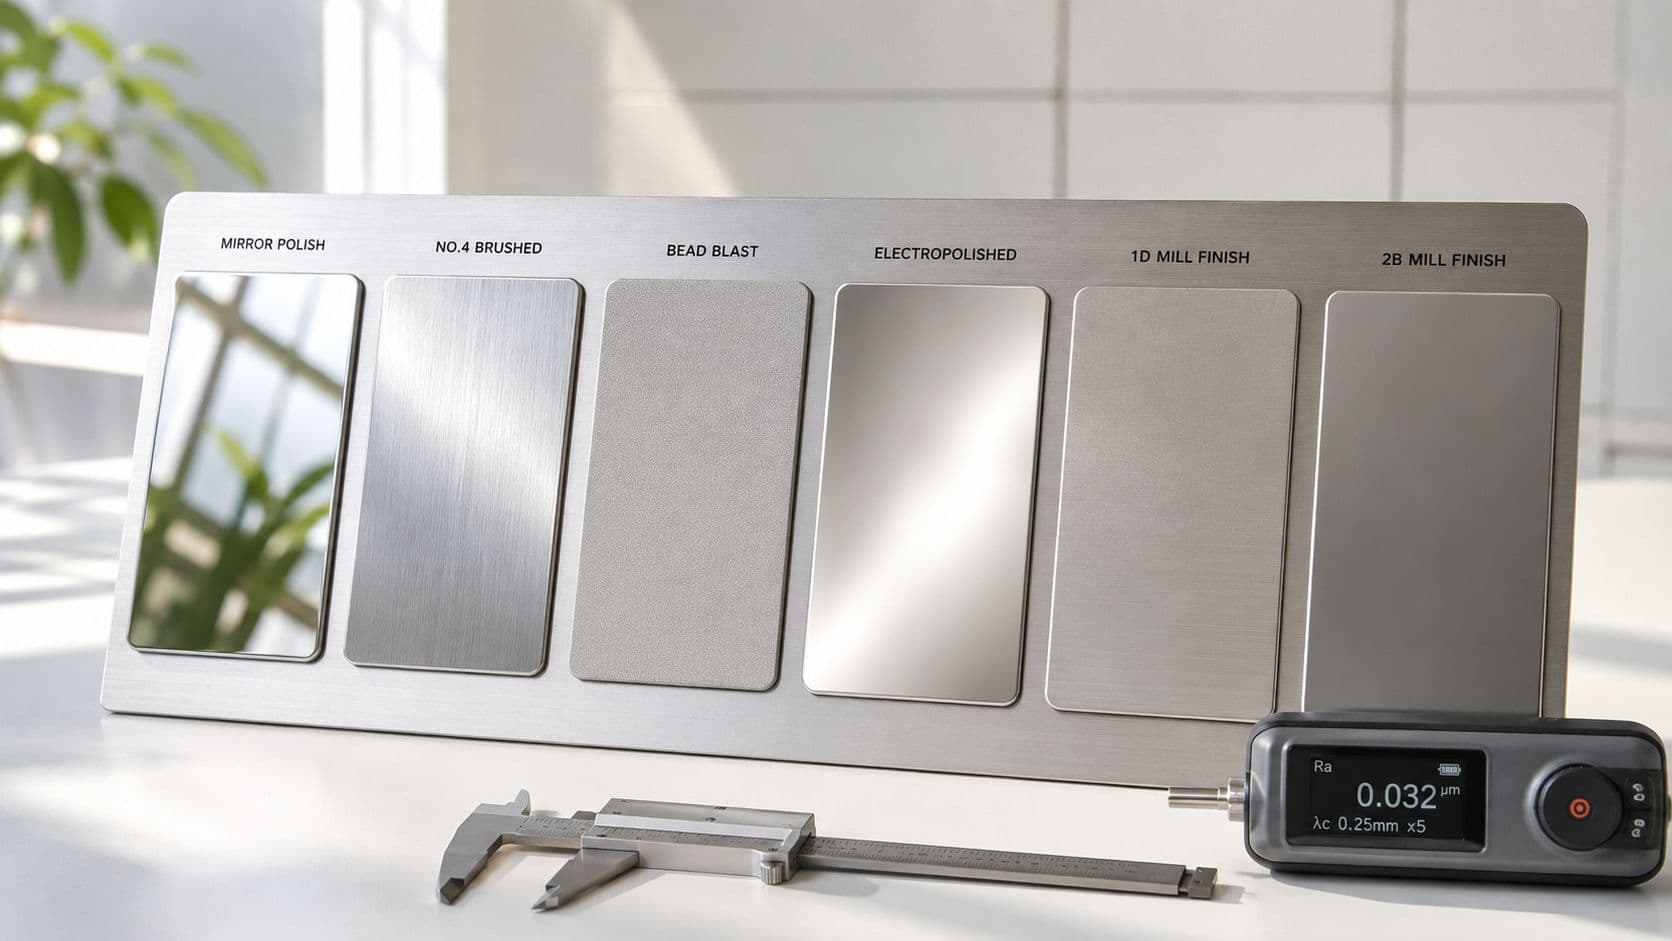
- Understanding Common Stainless Steel Finishes
How to read the table
How Finish Processes Work- Mechanical finishing
Choosing Finishes Based on Application- Corrosion, hygiene, and touch points
Inspection and Quality Checks for Finishes- Visual checks first
How to Specify Stainless Steel Finishes on Drawings- Write the finish like a manufacturing instruction
Introduction to Stainless Steel Finish
A prototype can clear dimensional checks and still fail in the shop if the surface choice forces extra work later. A polished enclosure may look right on the first day, then reveal weld heat tint, handling marks, or cleaning trouble after the first build cycle. That is why finish selection belongs in quoting and drawing review, not as a cleanup step after machining.
A stainless steel finish is the surface condition created by rolling, pickling, abrasive grinding, polishing, blasting, or electropolishing. It changes more than appearance. Finish affects corrosion resistance, cleanability, how visible scratches become, and how much handwork the shop needs after CNC cutting, bending, or welding.
Practical rule: choose the finish that matches the part's real environment, not the one that photographs best.
Surface finish also acts like a control knob for downstream work. A part that leaves the machine closer to its final condition usually needs less deburring, blending, passivation, cleaning, and inspection. That matters in rapid prototyping and short-run production, where every extra finishing pass can slow feedback and add avoidable cost. For a useful way to connect finish choice with roughness targets, see this surface roughness chart for CNC machining.
The historical context helps explain why finish choice matters at all. The first true stainless steel, melted in 1913, showed that enough chromium could create a corrosion-resistant steel instead of a conventional carbon steel. That chromium-rich passive layer is the reason finish options work, and it is also why contamination, finish damage, or poor post-weld cleanup can matter so much in service.
For engineers and designers, the better question is not which finish looks nicest. It is which finish will reduce downstream rework. A surface that starts closer to final condition saves time later, and that savings shows up in the prototype shop as well as in short-run production. When the part must be visible, touched, cleaned, or welded, the finish should be chosen with the full build sequence in mind. When the part will be hidden, structural, or reworked later, a simpler mill condition may be the better starting point.
Understanding Common Stainless Steel Finishes
A stainless finish is easiest to judge by asking two questions, what did the surface look like coming out of the process, and how much follow-up work will it create later? Some finishes come straight from the mill, some are refined with abrasives, and others are improved with chemical or electrochemical steps. For FIRMFG's rapid prototyping and short-run production work, the best choice is usually the one that fits the part's job and keeps rework low before the next operation.
The comparison below gives a practical view of common options. Roughness numbers only make sense when they are tied to the process that produced them, because two surfaces with similar roughness can behave differently in corrosion resistance, cleanability, and repair work.
| Finish Type | Process | Typical Ra Range (µin) | Typical Ra Range (µm) | ASTM or EN Spec |
|---|---|---|---|---|
| 1D | Hot rolled, heat treated, pickled | Not stated in verified data | Not stated in verified data | Standard mill condition |
| 2B | Cold rolled, heat treated, pickled, skin passed | 40 to 15 APA Stainless | Not stated in verified data | Standard mill condition |
| No. 3 | 120-grit abrasive finish, rougher than a typical mill finish APA Stainless | 36 to 58 APA Stainless | Not stated in verified data | Commonly referenced in industry finish systems |
| No. 4 | Directional brushed finish | Not stated in verified data | Not stated in verified data | Commonly referenced in ASTM and EN finish systems |
| 8 / mirror | Highly polished, reflective finish | Not stated in verified data | Not stated in verified data | Commonly referenced in ASTM and EN finish systems |
| Electropolished | Electrochemical smoothing | Not stated in verified data | 0.1 to 3.2 Steel Pro Group | Common in cleanability-focused specs |
For a broader texture-selection reference, this surface roughness chart for CNC machining and finish selection guide helps translate part intent into a measurable target. That is useful when a drawing needs a finish callout the shop can inspect without guessing.
How to read the table
A mill finish like 2B is a practical default when corrosion resistance matters more than a decorative look. The surface is already cleaned up from rolling and pickling, so it often gives engineers a stable starting point with less follow-up work. A No. 3 finish is rougher and visibly directional, which can help when the part needs a controlled texture without moving all the way to a polished appearance.
Designer's shortcut: choose the least aggressive finish that still meets the part's cleaning, appearance, and repair requirements.
The table also shows why electropolishing stands apart. It is not just a smoother finish. It is a separate finishing route that can support cleaner, brighter surfaces and better corrosion performance in sanitary and high-purity settings Steel Pro Group. That matters when surface chemistry is as important as texture.
How Finish Processes Work

A finish process starts long before a part reaches final inspection. In a short-run shop, the choice has to work like a routing decision, because every extra touch can create more handling, more setup time, and more chances to rework the part later. For FIRMFG and similar rapid-prototyping workflows, the best finish is often the one that gives the needed surface condition without forcing a second pass.
The surface can be changed in three basic ways. A process can shape it mechanically, clean it chemically, or refine it electrochemically. Each route leaves a different fingerprint on the metal, and that fingerprint affects how the part looks, how it cleans, and how it behaves after forming, welding, or assembly.
Mechanical finishing
Cold rolling and annealing create the base condition for many mill finishes. In a 1D or 2B path, the sheet is rolled, heat treated, then pickled to remove scale and restore a cleaner surface condition. That sequence is why these finishes are often used as standard starting points when corrosion resistance matters more than appearance APA Stainless.
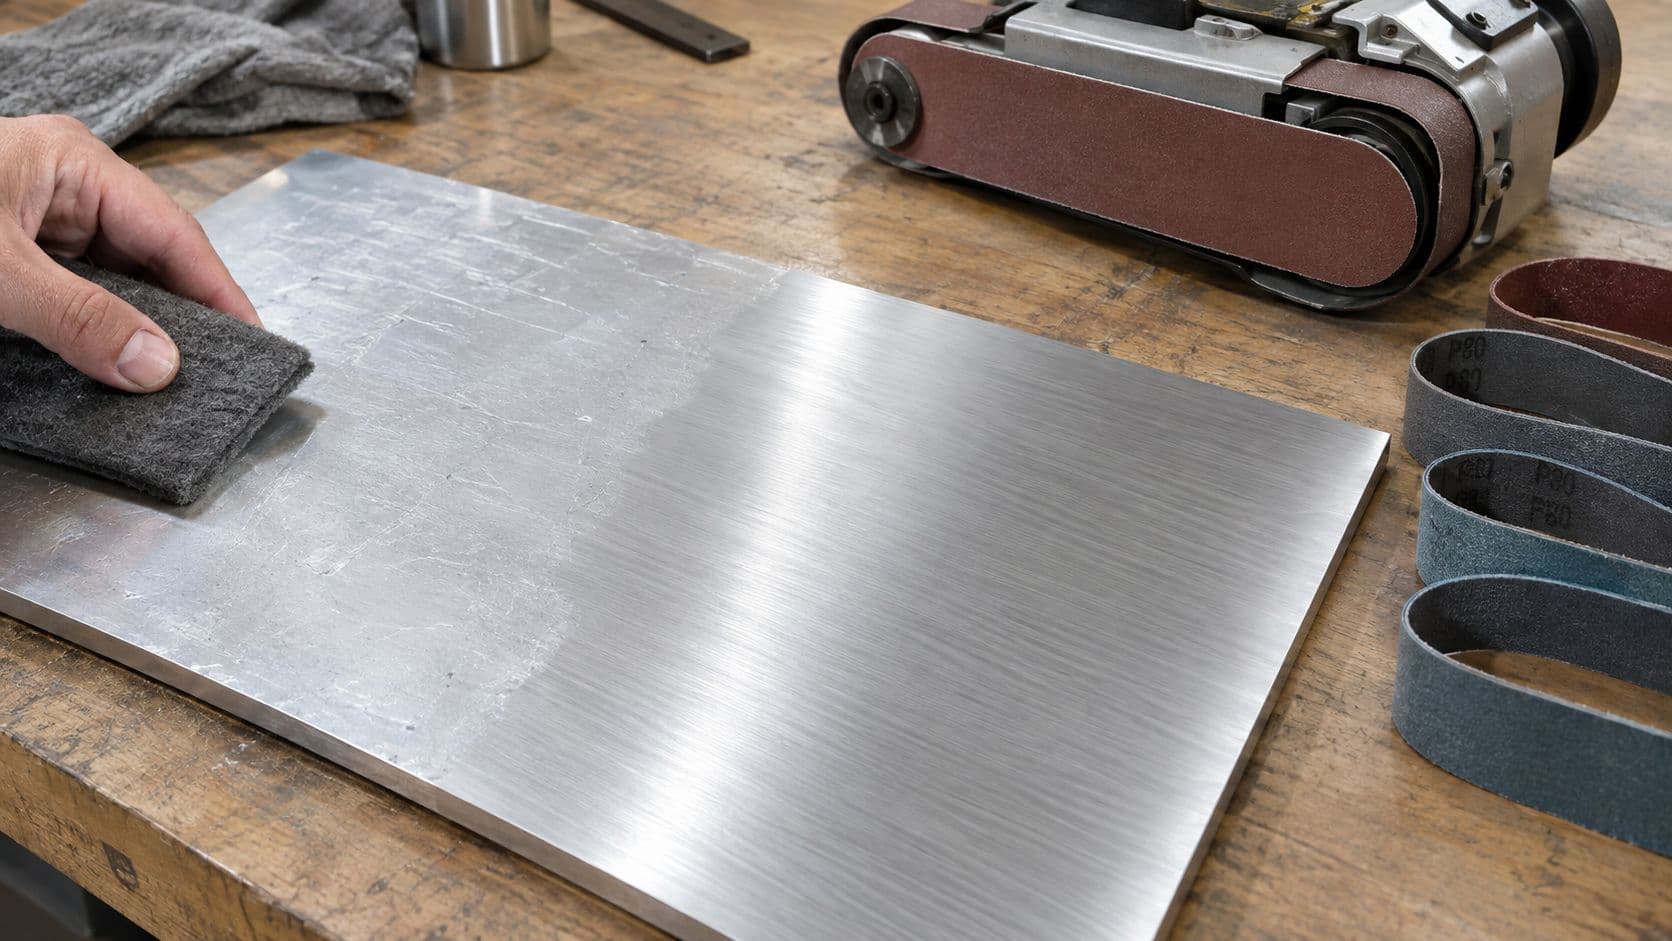
Abrasive belt grinding works differently. The belt acts like a controlled file, moving material in one direction and leaving a visible grain. That is how a brushed surface gets its directional look. For engineers and designers, the practical benefit is repeatability. A shop can match that grain across related parts, and it can often blend repairs without making the surface look inconsistent.
Chemical and electrochemical finishing
Pickling removes scale and impurities left by heat treatment or fabrication. It is a cleanup step, not a cosmetic one. Electropolishing goes further by removing a microscopic surface layer and leaving a smooth, bright, reflective condition with improved cleanliness and corrosion resistance.
That difference matters because electropolishing changes the surface at a finer scale than simple abrasion. Instead of only lowering the high spots, it levels the surface in a way that can help parts perform better in sanitary or cleanroom environments. Published Ra values for stainless steel finishes commonly span 0.1 to 3.2 micrometers, which shows how wide the finishing range can be depending on the target application Steel Pro Group.
For prototype parts, that range is useful because it gives the shop room to match function to finish instead of forcing every part into the same surface treatment. A test bracket, a visible enclosure, and a fluid-contact component do not need the same surface behavior, even if they start from the same alloy.
Why the process matters to the shop
A shop cannot treat every finish like a paint chip on a display board. A brushed panel, a pickled weldment, and an electropolished tube each need a different sequence, different handling, and different inspection points. If the finish route does not fit the fabrication route, the team usually pays for it later in cleanup, masking, or surface repair.
That is the main lesson. Mechanical methods shape appearance, chemical methods strip contamination, and electrochemical methods refine the surface layer itself. Once those functions are separated clearly, finish selection becomes a process decision instead of a guess, which helps reduce downstream rework in rapid prototyping and short-run production.
Choosing Finishes Based on Application
A finish choice starts with how the part will behave after it leaves the shop. Will people handle it often? Will cleaners touch it every shift? Will it sit in humid air, meet process fluids, or need welding after delivery? Those questions matter more than whether the surface looks bright in a photo.
Corrosion, hygiene, and touch points
For corrosive or sanitary environments, smoother surfaces are usually the safer starting point because they clean more easily and leave fewer places for residue to collect. That does not mean every sanitary part needs a mirror finish. It means the finish should help the cleaning method do its job instead of adding friction. Electropolishing is often used for pharmaceutical, food-processing, medical, and cleanroom parts because it supports cleanliness and corrosion resistance.
User-facing parts need a different balance. A visible enclosure, appliance trim, or premium hardware piece may call for a directional brushed look so handling marks are less obvious. A No. 4 brushed finish is directional and relatively easy to match across surfaces, while ultra-smooth 1P to 2P finishes are non-directional and highly reflective Fractory.
Practical rule: if repair blending matters, directional finishes usually give the shop more forgiveness.
Fabrication sequence and rework
Finish choice should also follow the forming and welding plan. For parts that will be welded, bent, or re-cut, the finish should leave enough margin for those steps without forcing extra cleanup. That matters in rapid prototyping, where a design can move from CAD to a welded test build in a short window and there is little time for correction passes.
A brushed surface can hide some handling damage, but it can also expose mismatch if adjoining panels run in different grain directions. A smoother non-directional finish may make visual alignment easier, yet it can demand stricter handling because scratches stand out more clearly. That tradeoff is why finish selection has to follow the assembly order, not just the final presentation.
For a short run, the best finish is often the one that keeps the part moving with the fewest touch operations between machining and shipment. If a surface will be cut again, bent again, welded, or inspected multiple times, choose the finish that leaves room for those steps and reduces the chance of an expensive correction pass. A good example is a part that needs repeat dimensional verification. A CMM inspection service can confirm whether the part still matches the drawing after finishing and secondary work, which helps the team avoid rework caused by late-stage surprises.
Inspection and Quality Checks for Finishes
A finish can look acceptable under warehouse light and still fail once it reaches standardized inspection lighting. Quality control has to separate appearance from measurable texture, because those are related but not the same thing. The supplier, inspector, and designer need the same acceptance criteria before the first part is released, especially when the goal is to avoid rework in rapid prototyping and short-run production.

Visual checks first
Start with lighting, angle, and contamination. Standardized visual inspection catches color variation, heat tint, oil smears, and uneven grain before anyone reaches for a profilometer. That first pass matters because a part can meet roughness targets and still fail appearance or cleanliness expectations.
A useful way to train the eye is to inspect under the same conditions every time. If one inspector views the part at a shallow angle and another checks it head-on, the results will drift even if the surface itself has not changed. Consistency here works like a fixture in machining, it keeps the judgment point fixed.
Measure texture, not just shine
Surface roughness gives the finish objective meaning. In stainless-steel work, the roughness benchmark often sits around Ra, and the choice between a mill surface, a brushed finish, or electropolishing changes what range is acceptable. A profilometer turns that surface feel into a repeatable number, which helps when multiple suppliers or shifts are involved.
Inspection habit: measure the same critical zones the same way every time, or the numbers will not mean much from batch to batch.
The difference between directional and non-directional surfaces matters here too. A No. 4 brushed finish is directional and easier to blend, while 1P to 2P finishes are non-directional and highly reflective. That means the inspection method has to match the finish type, because scratch visibility and repair blending behave very differently across those two families.
For geometry verification after finishing, a CMM inspection service helps separate dimension checks from surface checks. That matters when finish work happens after machining, because a part can still look right while drifting out of tolerance.
Catch contaminants before they spread
Finish problems often start as contamination problems. Oil, grease, discoloration, and embedded debris can change how the part behaves in service, especially after welding or cleaning. A controlled inspection flow should flag those issues before assembly, coating, or passivation.
The best quality systems treat finish as a released characteristic, not a subjective impression. Once the part is measured, photographed, and compared against the callout, the team can decide whether it ships, gets reworked, or gets quarantined. That discipline saves time because it stops surface problems before they become assembly problems.
How to Specify Stainless Steel Finishes on Drawings
The cleanest finish in the world won't help if the drawing leaves the surface open to interpretation. A good callout tells the supplier what finish to make, where to make it, and how to verify it. That's especially important on parts with mixed zones, welded areas, or faces that need different handling after fabrication.
Write the finish like a manufacturing instruction
Start by naming the finish designation clearly. If you want 2B, No. 4, or an electropolished condition, state it directly rather than relying on shorthand that could be interpreted differently across shops. If the finish depends on direction, add the grain orientation so the fabricator doesn't guess.
Then add the roughness requirement where it matters. A finish number alone doesn't always tell the whole story, which is why roughness values help define the expected texture more precisely. If the part has sanitary contact surfaces, user-facing panels, or repair-sensitive zones, give those areas separate notes instead of one broad surface requirement.
Keep the callout aligned with inspection
A finish note should be inspectable without debate. That means the drawing has to connect the finish type to a measurable standard, the measured area, and the acceptance logic. If multiple finishes appear on one part, group them by zone so the inspector doesn't need to interpret the model every time.
Practical rule: if a shop can't inspect the callout in one pass, the callout isn't finished yet.
For a useful reference on how to structure the wording, this surface texture callout guide is a strong companion when you're drafting shop-ready notes. It's especially helpful if your drawings move between prototype and production teams that may not share the same finish vocabulary.
Examples of clear specification habits
A user-facing panel might call for a directional brushed face on the visible side and a simpler mill finish on hidden faces. A weldment might require post-weld cleanup and a specified final finish only on the touched surfaces. A sanitary component may need an electropolished interior with a separate external cosmetic requirement.
The point is to reduce interpretation. Clear finish notes save time because they stop suppliers from over-finishing hidden areas, under-finishing visible ones, or sending back parts that technically passed shape but failed surface intent. In short-run production, that kind of ambiguity is expensive.
Conclusion and Best Practices
A stainless steel finish should be chosen like any other process decision, with the part's next steps in mind. If the part will be welded, bent, cleaned, handled, or inspected often, the surface choice needs to support that sequence instead of creating extra work later. The wrong finish can turn a good prototype into a repeat job, because the part may look acceptable on the bench and still fail once it moves into assembly or test.
The safest habit is straightforward. Match the finish to the environment, specify the roughness and grain direction clearly, and inspect against the same criteria every time. 2B is a strong functional default for many parts that need an even, practical surface. No. 4 fits cases where visible blending matters, and electropolishing belongs where cleanliness and corrosion performance take priority.
For rapid prototyping and short-run production, that choice affects more than appearance. A finish that is easy to inspect and easy to reproduce works like a well-marked tool path, it reduces hesitation at the shop floor and reduces the chance of rework after first article review. Clear finish intent also helps the team decide where a part needs cosmetic care and where a simpler surface is enough.
The deeper lesson is that finish is part of manufacturability. When the drawing is clear and the surface intent is tied to actual use, shops spend less time on correction passes, and engineers get cleaner feedback from the prototype build. That is the fastest route from first article to a part that is ready for real use.
If you are preparing a prototype or short run and want the finish spec handled with the same care as the geometry, send your drawings to FIRMFG. A clear finish callout at the start usually saves a round of rework at the end.